
S15/T15 Sonoma P/U 2WD V6-4.3L VIN X (1998)
Shackle: Service and Repair
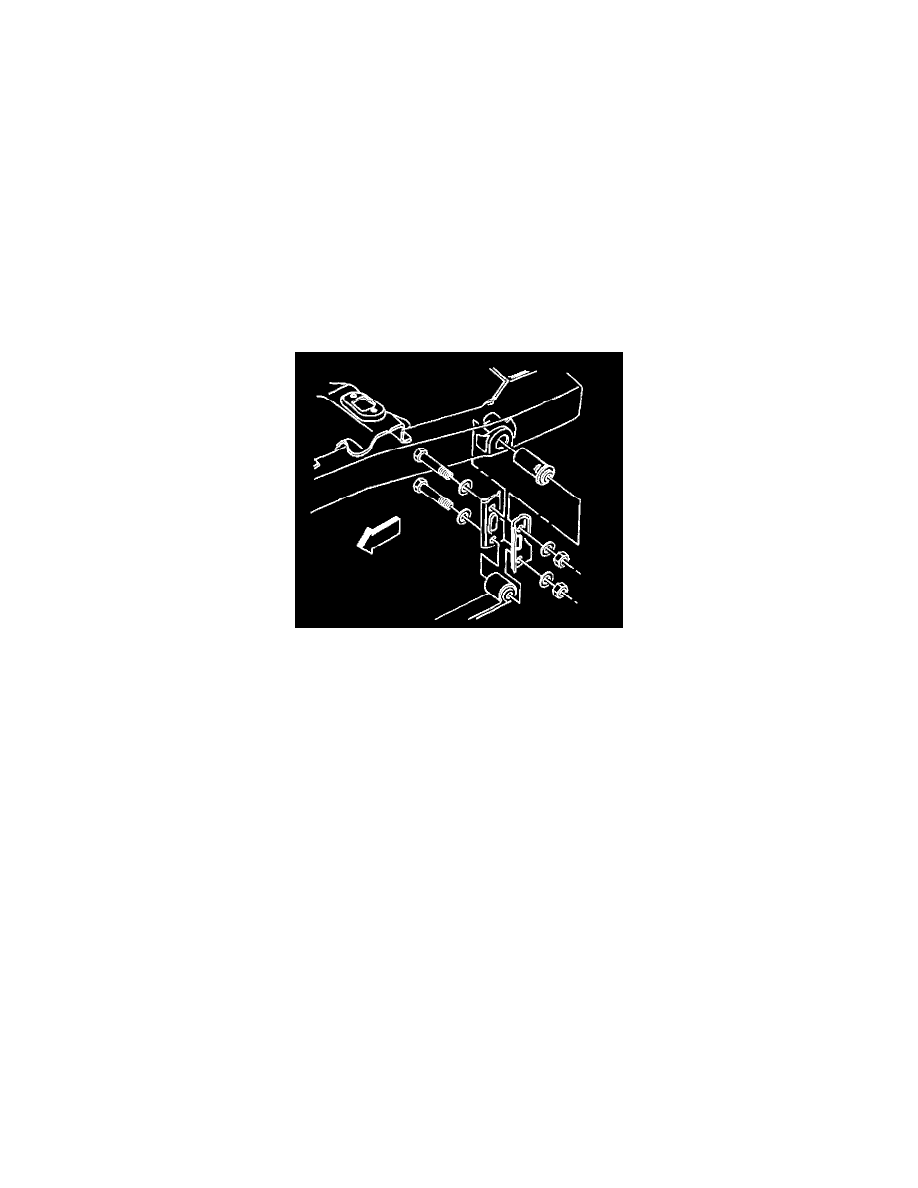
Shackle Bushing Replacement
REMOVAL PROCEDURE
^
Tools Required:
-
J 21474-01 Control Arm Bushing Service Kit
1. Raise the vehicle on a hoist.
2. Support the vehicle with safety stands.
3. Disconnect the battery negative cable.
CAUTION: Before removing or installing any electrical unit or when a tool or equipment could easily come in contact with "live"
exposed electrical terminals, disconnect the negative battery cable to help prevent personal injury and/or damage to the vehicle or
components. Unless instructed otherwise, the ignition switch must be in the "OFF" or "LOCK" position.
Important: Support the rear axle.
4. Remove the fuel tank on pickups and 4 door utility models.
5. Remove the following parts:
^
The upper shackle bolt
^
The nut
^
The flat washers
6. Loosen the lower shackle bolt at the spring. Leave the bolt attached.
7. Lower the axle until there is enough clearance to remove the shackle bushing.
8. Use a blunt punch to straighten out the bushing flange that comes through the inner frame.
Important: Replace both of the shackle bushings while the fuel tank is off the vehicle.
9. Remove the shackle bushing using J 21474-01.
INSTALLATION PROCEDURE
^
Tools Required:
-
J 21474-01 Control Arm Bushing Service Kit