
Safari Van 2WD V6-4.3L VIN X (2003)
mounting studs and/or fasteners are damaged to the extent that the SDM may no longer be properly mounted.
10.1.
Remove the stripped nut and discard the nut.
10.2.
Drill out the weld spots to the weld stud from the floor pan side, then remove and discard the stud.
10.3.
Condition the floor panel attaching surface where the new stud is to be installed.
10.4.
Install new weld stud GM P/N 115115602 and clamp the weld stud.
10.5.
Migweld the stud at the drilled holes form above or below the floor pan, as required.
10.6.
Apply body sealer around any exposed openings.
10.7.
Install a new fastener GM P/N 11515933.
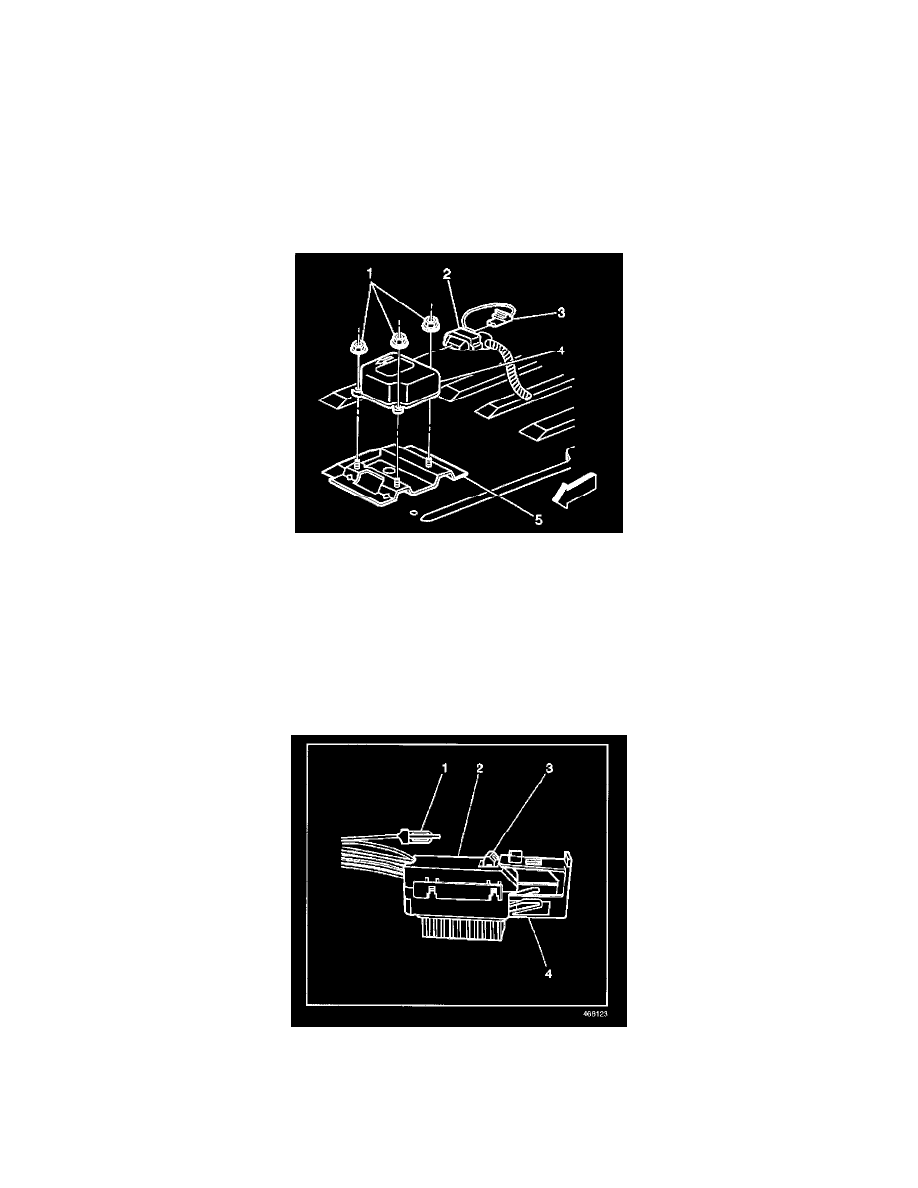
INSTALLATION PROCEDURE
1. Remove any dirt, grease, or other impurities from the mounting surface.
2. Install the SDM (4) horizontally to the vehicle.
3. Point the arrow on the SDM toward the front of the vehicle.
4. Install the SDM mounting fasteners (1).
NOTE: Refer to Fastener Notice in Service Precautions.
Tighten
Tighten fasteners to 12 N.m (106 lb in).
5. Connect the SDM wiring harness connector (2) to the SDM (4).
6. Push down the flex lock button (3) and slide the connector locking cover (4) to the close position.
7. Install the CPA (1) to the sensing and diagnostic module (SDM) wiring harness connector (2).
8. Position the carpet to cover the sensing and diagnostic module (SDM).
9. Install the carpet retaining sill trim molding.
10. Install the driver seat.
11. Enable the SIR system. Refer to SIR Disabling and Enabling Zone 7.