
Safari Van M V6-262 4.3L VIN Z TBI (1990)
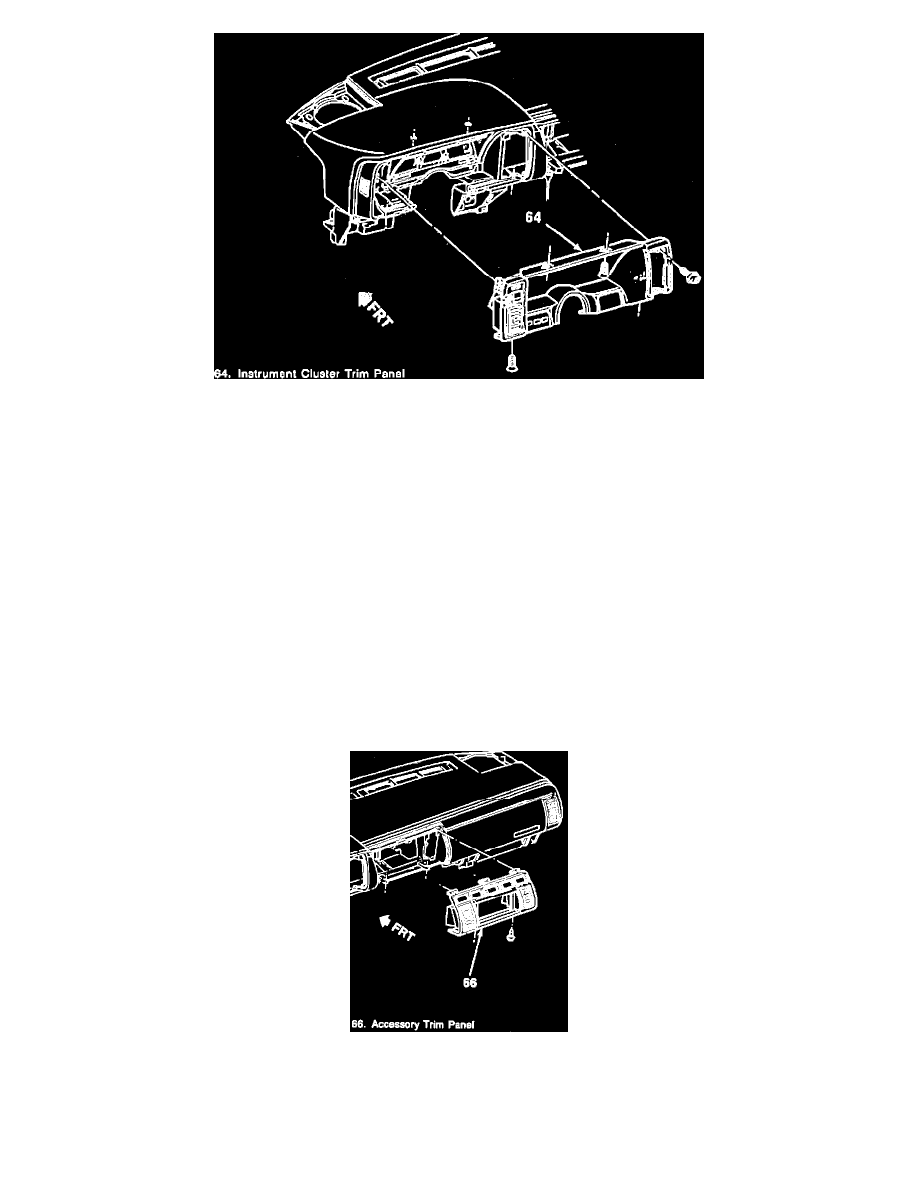
Fig. 3 Instrument Cluster Trim Panel
6.
Remove the bulkhead connector as follows:
a.
From inside vehicle, hold both nuts of bulkhead connector using a suitable wrench.
b.
Have a helper remove the bolts from the connector in the engine compartment.
c.
Push the bulkhead connector through the cowl into cab until no slack is left in engine harness.
7.
Remove steering column filler, Fig. 1.
8.
Remove steering column retaining nuts, then lower steering column.
9.
Disconnect PRNDL clip from steering column.
10.
Disconnect electrical connectors from steering column.
11.
Remove convenience center and bracket retaining screws, then lift convenience center away from pad.
12.
Disconnect parking brake cable from parking brake pedal.
13.
Remove left lower trim pad mounting bolts.
14.
Disconnect instrument panel lower extension, then lower extension from engine cover and disconnect electrical connections, Fig. 2.
15.
Remove instrument cluster trim panel, then disconnect two wiring connectors on back left side, Fig. 3.
16.
Remove screws securing heater-A/C control to instrument cluster housing.
17.
Disconnect vacuum lines, electrical connectors, cable and lamp from heater-A/C control.
18.
Remove alarm and bracket from left side of dash panel.
19.
Remove instrument cluster retaining screws and move cluster forward.
20.
Disconnect speed sensor and speedometer cable from cluster.
Fig. 4 Accessory Trim Panel