
Savana 3/4 Ton Van V6-4.3L VIN X (2003)
Important: The intake manifold may be removed as an assembly. Do not remove the specific intake manifold components unless component
service is required.
Do not allow dirt or debris to enter the fuel system. Ensure that the ends of the fuel system are properly sealed.
Do not disassemble the central sequential fuel injection (SFI) unit, unless service is required
15. Remove the intake manifold assembly.
16. Remove and discard the lower intake manifold gaskets.
17. Clean all sealing surfaces and the intake manifold.
18. If the intake manifold requires replacement refer to Intake Manifold Disassemble.
Installation Procedure
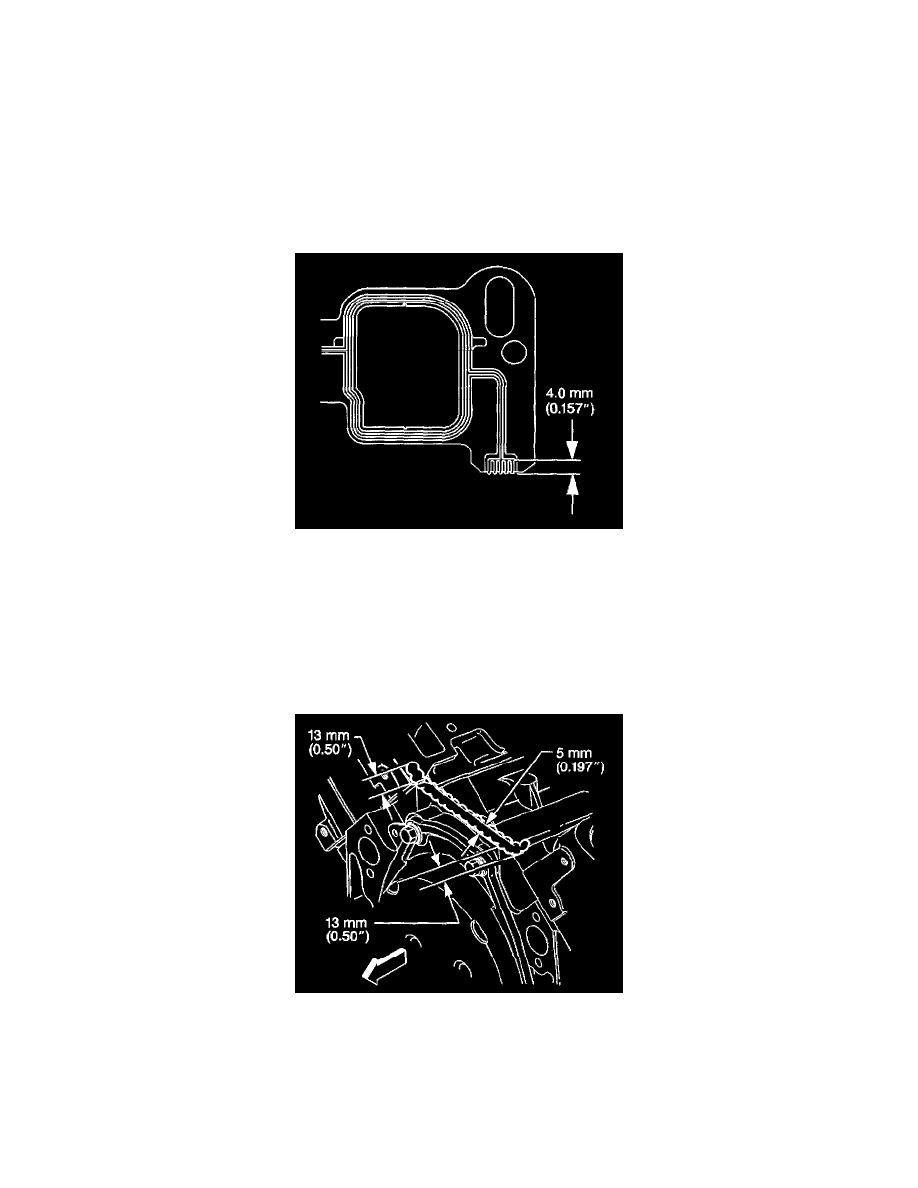
1. Apply a 4.0 mm (0.157 inch) patch of adhesive GM P/N 12346141 (Canadian P/N 10953433) or equivalent to the cylinder head side of the lower
intake manifold gasket at each end.
Important: The lower intake manifold gasket must be installed while the adhesive is still wet to the touch.
2. Install the lower intake manifold gasket onto the cylinder head.
Use the gasket locator pins in order to properly seat the lower intake manifold gasket on the cylinder head.
Important: The lower intake manifold must be installed and the fasteners tightened while the adhesive is still wet to the touch.
3. Apply a 5 mm (0.197 inch) bead of adhesive GM P/N 12346141 (Canadian P/N 10953433) or equivalent to the front top of the engine block.
4. Extend the adhesive bead 13 mm (0.50 inch) onto each lower intake manifold gasket.