
Savana 3/4 Ton Van V8-305 5.0L VIN M SFI (2001)
A/C Coupler O-ring: Service and Repair
O-RING REPLACEMENT
TOOLS REQUIRED
J 39400-A Halogen Leak Detector
REMOVAL PROCEDURE
1. Recover the refrigerant. Refer to Refrigerant Recovery and Recharging.
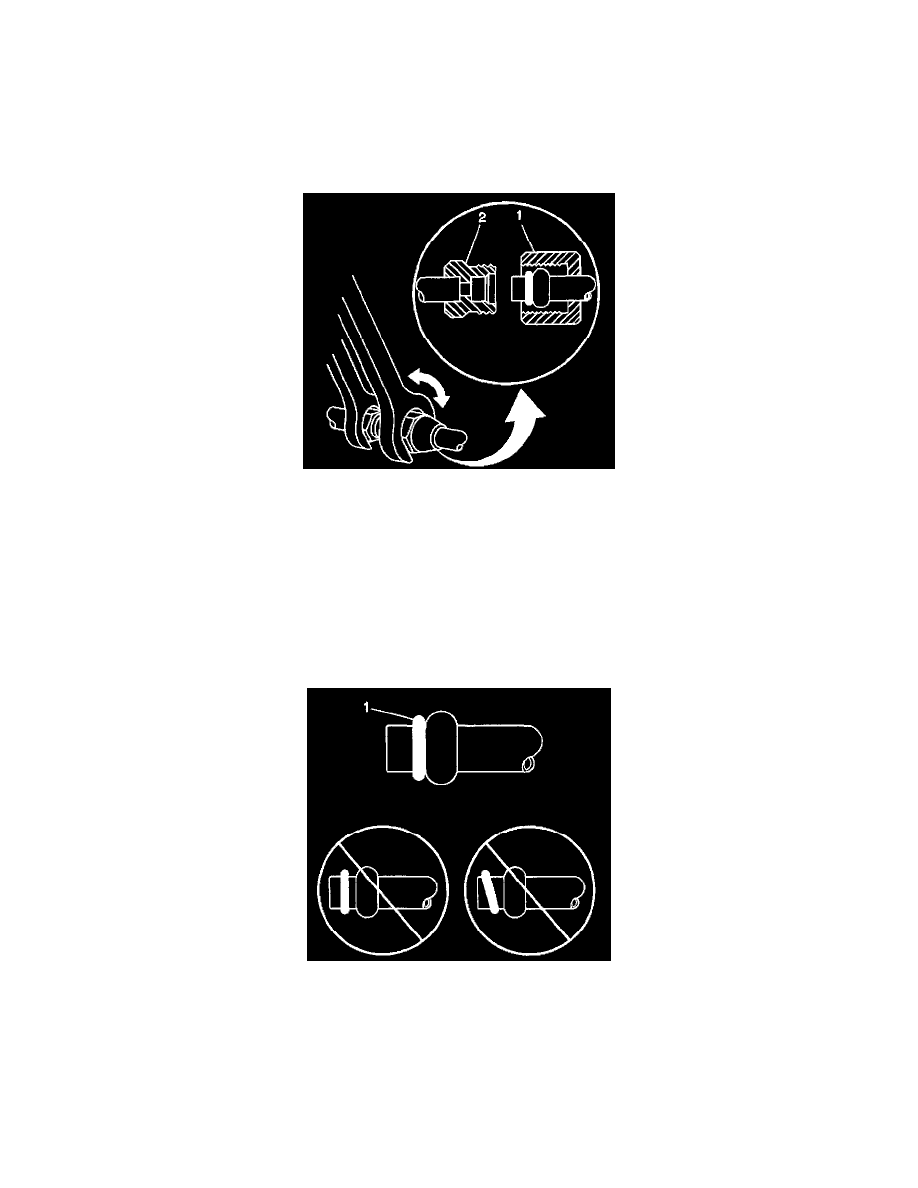
2. For compression-style fittings; use a back-up wrench on the A/C refrigerant component (smaller size) fitting (2), then loosen the A/C refrigerant
hose (larger size) fitting (1).
3. For banjo-style fittings; remove the bolt retaining the A/C refrigerant hose to the A/C refrigerant component.
IMPORTANT: Cap or tape the open A/C refrigerant hose and the A/C refrigerant component immediately.
4. Disconnect the A/C refrigerant hose from the A/C refrigerant component, discard the O-ring seal and cap or tape the A/C refrigerant hose and the
A/C refrigerant component to prevent contamination.
INSTALLATION PROCEDURE
1. Remove the cap or tape from the A/C refrigerant hose and the A/C refrigerant component.
2. Using a lint-free clean, dry cloth, carefully clean the sealing surfaces of the A/C refrigerant hose and the A/C refrigerant component.
3. Lightly coat the new O-ring seal (1) with mineral base 525 viscosity refrigerant oil.
IMPORTANT: DO NOT allow any of the mineral base 525 viscosity refrigerant oil on the new O-ring seal to enter the refrigerant system.
4. For compression-style fittings; carefully slide the new O-ring seal (1) onto the A/C refrigerant hose until seated.