
Savana 3500 V8-4.8L (2009)
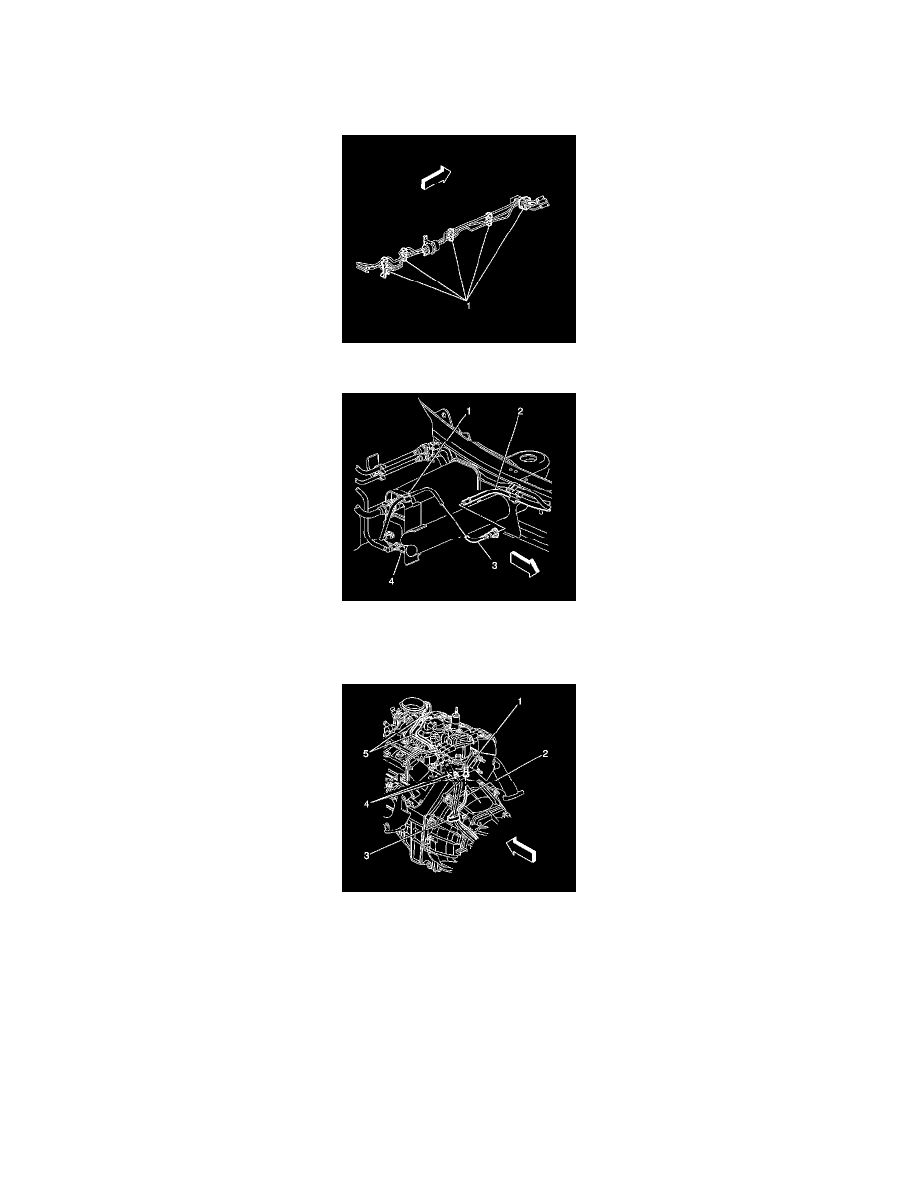
11. Note the position of the EVAP pipe for aid in installation.
12. Remove the EVAP pipe from the retaining clips (1).
13. Remove the EVAP pipe.
Installation Procedure
1. Install the EVAP pipe into the retaining clips (1).
2. Remove the cap from the rear EVAP pipe.
3. Connect the rear EVAP purge pipe (3) to the chassis EVAP purge pipe (2).
4. Install the EVAP pipe into the transfer case bracket clip, AWD drive only.
5. Install the EVAP pipe into the transmission bracket clip.
6. Install the EVAP pipe into the bellhousing stud clip (3).
7. Lower the vehicle.
8. Remove the cap from the engine compartment EVAP pipe.
9. Connect the engine compartment EVAP pipe (1) to the chassis EVAP pipe (2).
10. Install the engine cover. Refer to Engine Cover Replacement (See: Body and Frame/Access Cover/Service and Repair).