Sierra 1500 2WD V8-6.0L (2007)

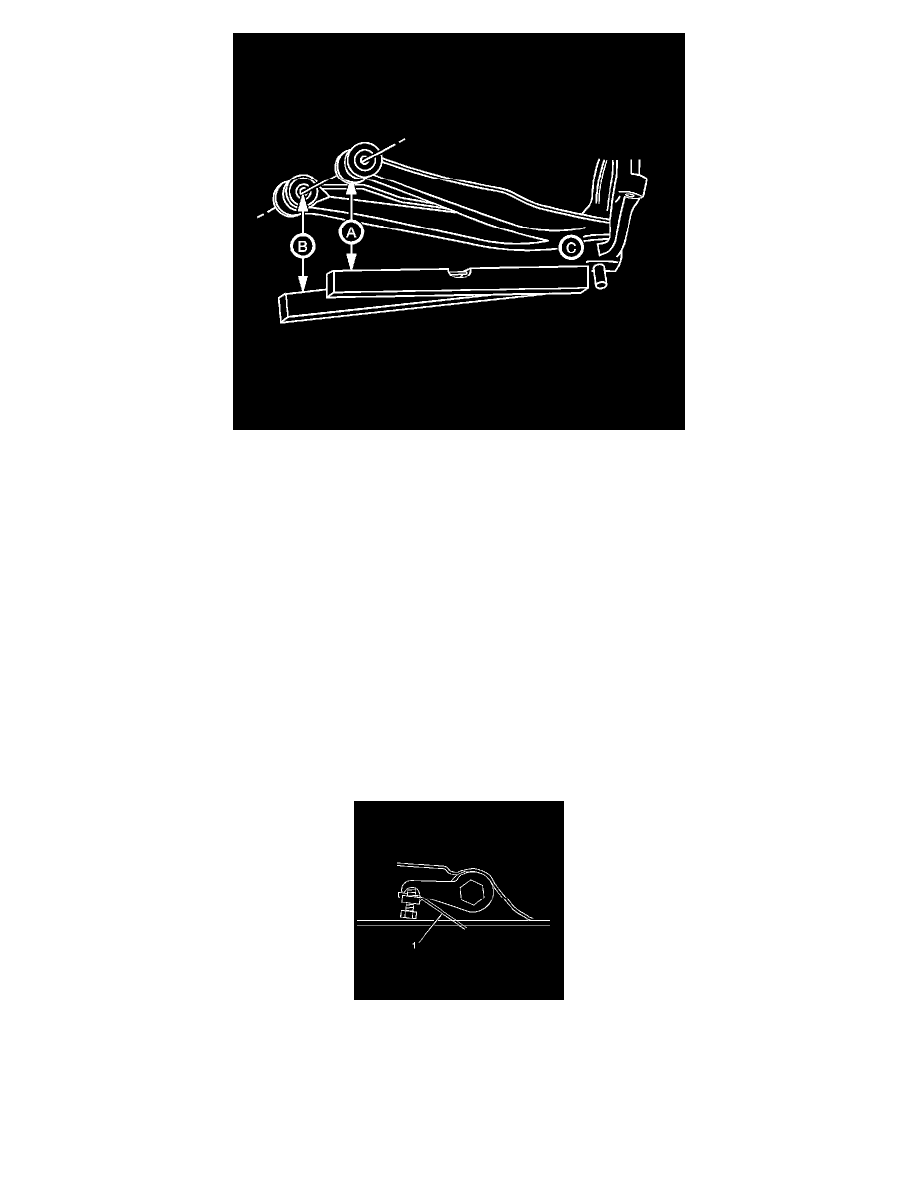
4. Set the top edge of the level on the reference surface of the steering knuckle (C) and extend the level directly under the rear end of the front
attachment bolt of the lower control arm (A).
5. While keeping the level in contact with the knuckle reference surface, adjust the level up/down until the bubble indicates it is horizontally level.
6. Extend a tape measure straight down from the center of the attachment bolt. The point where the tape measure and the level intersect is your first
measurement.
7. Keep the top edge of the level on the reference surface of the steering knuckle (C) and move the level directly under the front end of the rear
attachment bolt of the lower control arm (B).
8. Extend a tape measure straight down from the center of he attachment bolt. The point where the tape measure and the level intersect is your second
measurement.
9. Push the front bumper of the vehicle down about 38 mm (1.5 in)
10. Gently remove your hands and let the vehicle settle.
11. Repeat this operation 2 more times for a total of 3 times.
12. Re-measure the Z height.
13. The true Z height is the average of the measurements taken. Refer to Trim Height Specifications. If any of these measurements are out of
specifications, inspect for the following conditions:
*
Worn or damaged suspension components
*
Collision damage
Z Height Adjustment
1. For vehicles equipped with a torsion bar suspension, turn the bolt (1) that contacts the torsion arm as needed. One revolution of the bolt (1) into
the nut increases the Z height by approximately 6 mm (0.2 in).
2. For vehicles without torsion bars, replace damaged or worn components as necessary.
3. If these measurements are still out of specifications after adjustment or are not equipped with torsion bars, inspect for the following:
*
Sagging front suspension-Refer to Torsion Bar and Support Assembly Replacement (Bushing Style).
*
Collision damage
