
Sierra Classic 1500 2WD V8-5.3L Hybrid (2007)
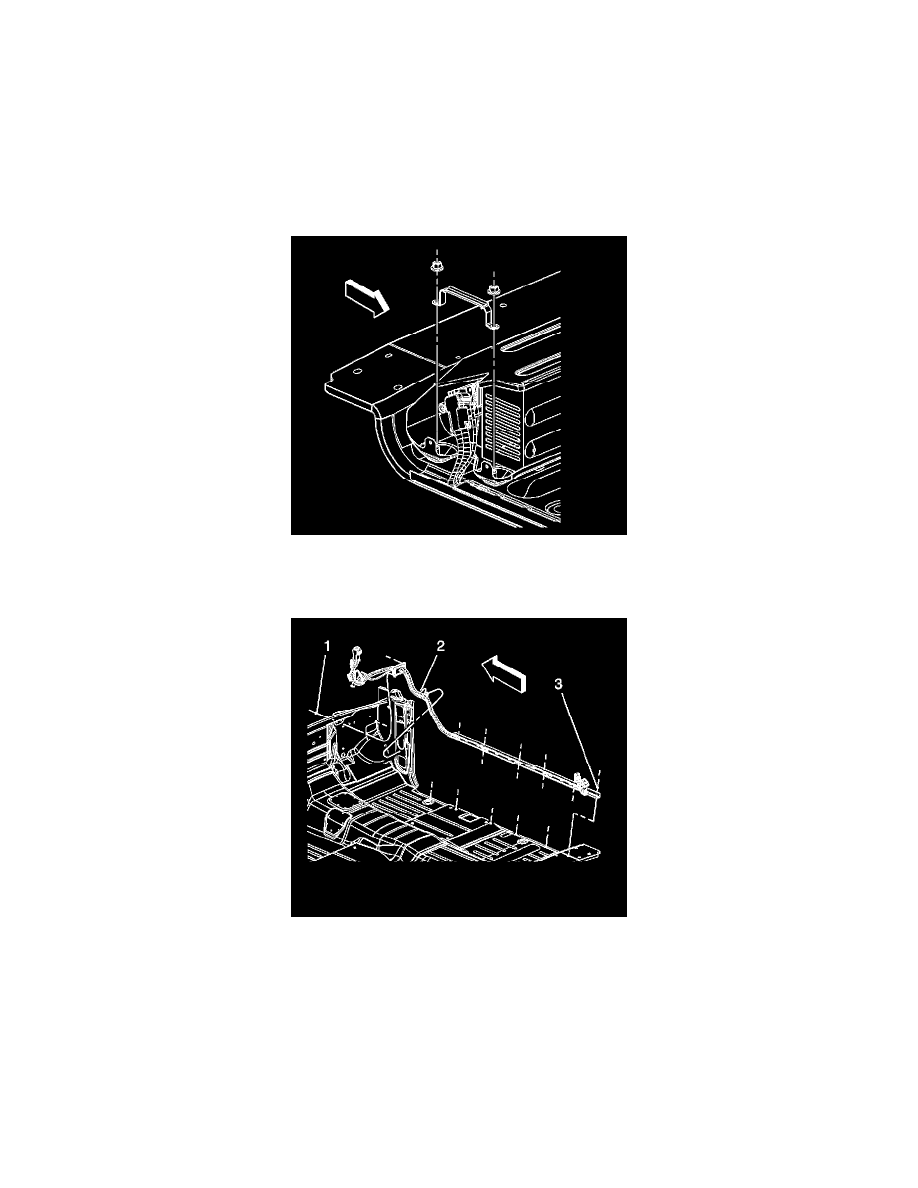
1. Install the 42-volt positive/negative cable.
2. Install the ground straps from the stud (2).
Notice: Refer to Fastener Notice.
3. Install the ground strap nut (1).
Tighten the nut to 10 N.m (89 lb in).
4. Connect the 120-volt AC electrical connector (3).
5. Connect the 42-volt positive/negative cable electrical connector (4).
6. Install the 42-volt positive/negative cable retainer and nuts.
Tighten the nuts to 20 N.m (15 lb ft).
7. Engage the 42-volt positive/negative cable channel to the studs on the floor.
8. Install the 42-volt positive/negative cable channel rear nut (3).
Tighten the nuts to 10 N.m (89 lb in).
9. Position the carpet.
10. Install the door sill plate.
11. Install the 42-volt positive/negative cable clip (2) at the right cowl panel.
12. Push the 42-volt positive/negative cable grommet through the front of dash.
13. Install the hinge pillar trim.
14. Install the 42-volt positive/negative cable grommet nuts (1) to the front of dash.