
Suburban 3/4 Ton 4WD V8-305 5.0L (1986)
Brake Shoe: Service and Repair
Removal
For additional information see Notes, Warnings, and Hints. See: Fundamentals and Basics
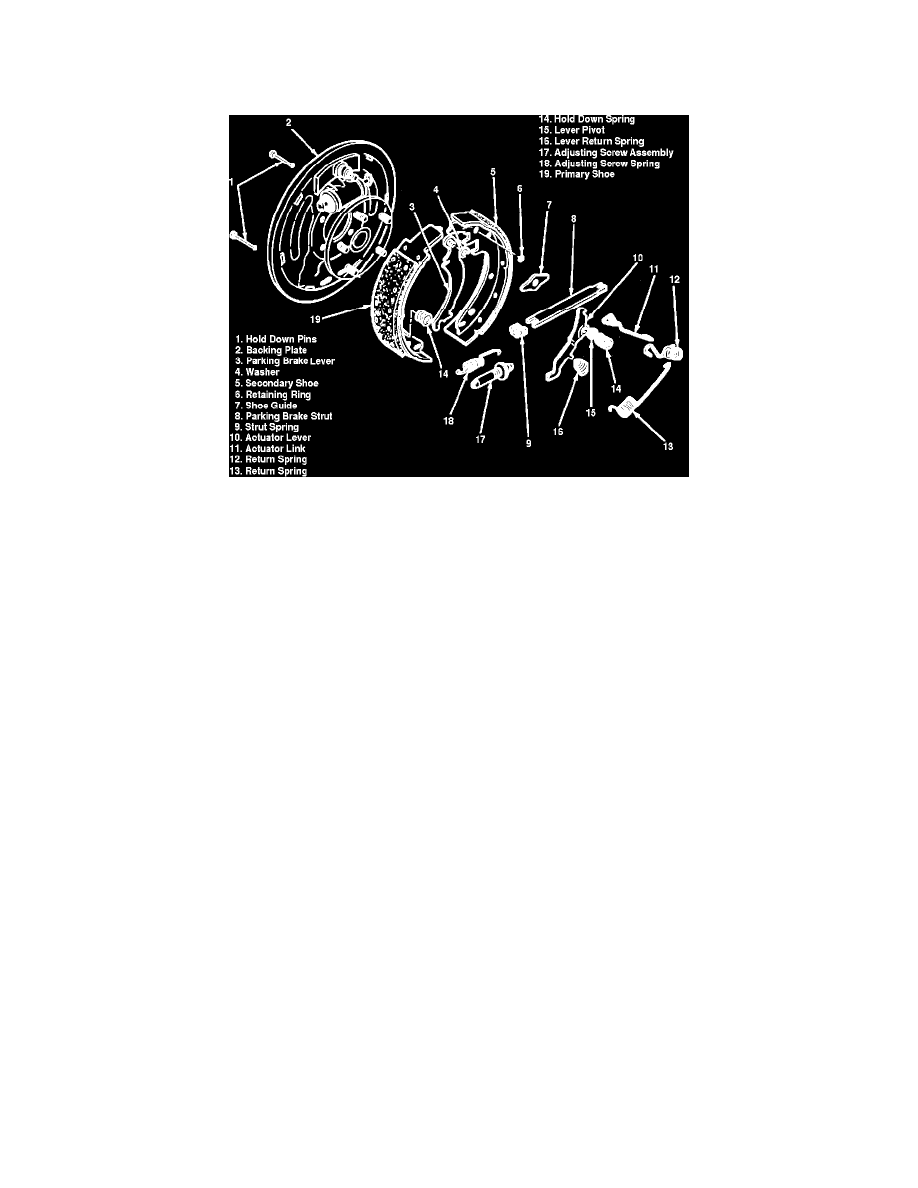
Fig. 1 Exploded View Of Drum Brake Assembly.
1.
Raise and support vehicle, then remove tire and wheel assembly.
2.
Remove brake drum. If brake lining is dragging on brake drum, back off brake adjustment by rotating adjustment screw. Refer to individual truck
chapter for procedure. If brake drum is rusted or corroded to axle flange and cannot be removed, lightly tap flange to drum mounting surface with
a suitable hammer.
3.
Using brake spring pliers or equivalent, unhook primary and secondary return springs. Observe location of brake parts being removed to aid
during installation.
NOTE: For additional information see Brake Spring Removal and Installation Notes. See: Fundamentals and Basics
4.
Remove brake hold-down springs with suitable tool.
5.
Lift actuating lever, then unhook actuator link from anchor pin and remove.
6.
Remove actuating lever(s) and return spring.
7.
Spread shoes apart and remove parking brake strut and spring.
8.
Disconnect parking brake cable from lever, then remove brake shoes from backing plate.
9.
Separate brake shoes by removing adjusting screw and spring, then unhook parking brake lever from shoe assembly.
10.
Clean dirt from brake drum, backing plate and all other components.
WARNING: Do not use compressed air or dry brush to clean brake parts. Many brake parts contain asbestos fibers which, if inhaled, can
cause serious injury. Clean brake parts with a water soaked rag or a suitable vacuum cleaner to minimize airborne dust.