
Suburban 3/4 Ton 4WD V8-305 5.0L (1986)
6.
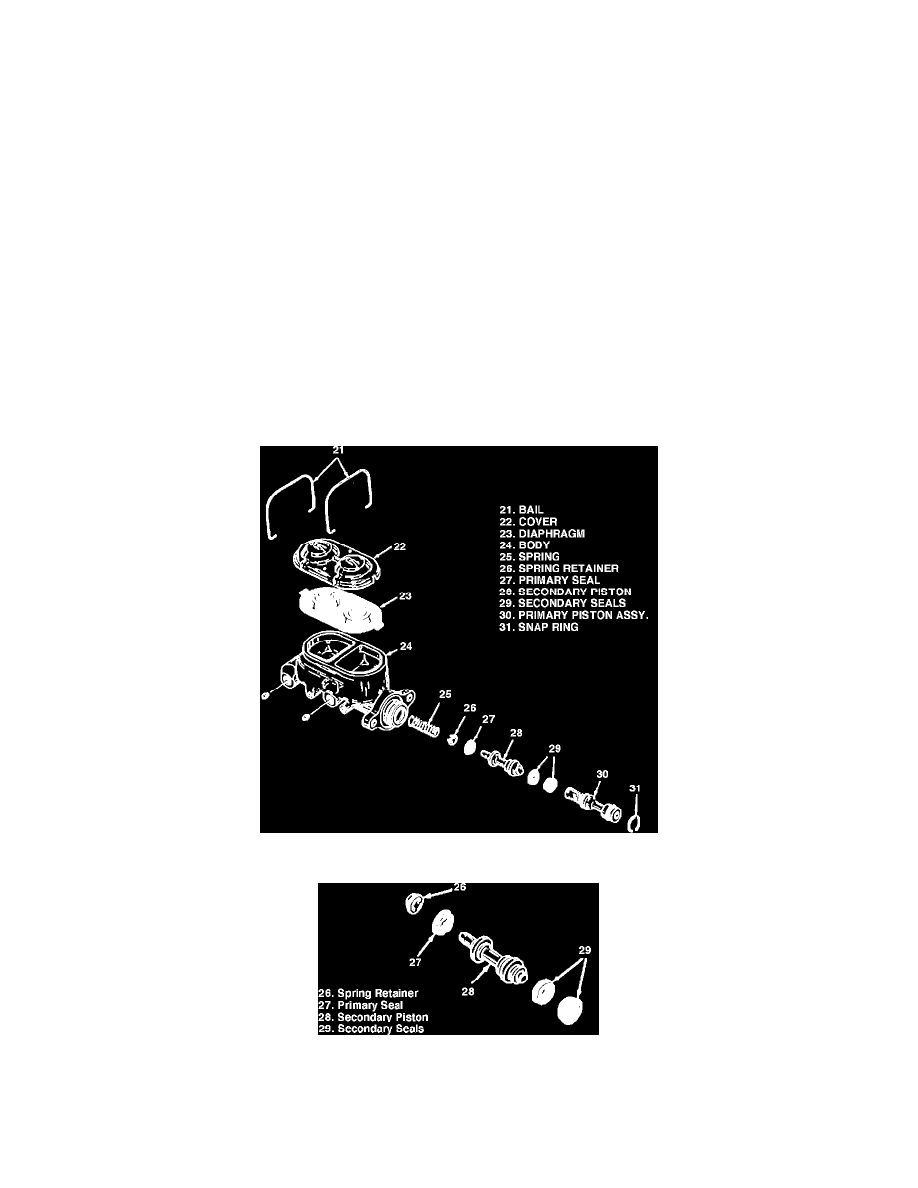
Plug primary fluid outlet (outlet nearest to cowl when master cylinder is installed), then apply compressed air into secondary fluid outlet to remove
primary and secondary pistons.
7.
Remove spring retainer and seals from secondary piston.
8.
Clamp master cylinder in a vise, then remove reservoir using a pry bar. Remove reservoir grommets.
9.
Inspect master cylinder bore for corrosion.
CAUTION: Do not use abrasive material on master cylinder bore. Replace if bore is corroded.
ASSEMBLY
Clean all parts not included in repair kit with brake fluid.
CAUTION: Do not dry with compressed air. Lubricate all rubber parts with clean brake fluid prior to installation.
1.
Lubricate new reservoir grommets with silicone brake lube, then press grommets into master cylinder body. Ensure grommets are properly seated.
2.
Lay reservoir upside down on flat, hard surface. Press master cylinder body onto reservoir using rocking motion.
3.
Install new seals on secondary piston, then the spring retainer.
4.
Install spring and secondary piston assembly into cylinder.
5.
Install primary piston. Depress primary piston into cylinder, then install lock ring.
6.
Install fluid level switch and proportioner valve assembly, if equipped.
7.
Fit diaphragm into reservoir cover, then install cover onto reservoir.
8.
Install master cylinder in vehicle.
Cast Iron Type
Fig. 4 Exploded View Of Master Cylinder.
Fig. 5 Secondary Piston & Seals.
DISASSEMBLY
1.
Remove master cylinder from vehicle.
2.
Clean outside of master cylinder, then remove reservoir cover and diaphragm.