
Suburban 3/4 Ton 4WD V8-305 5.0L (1986)
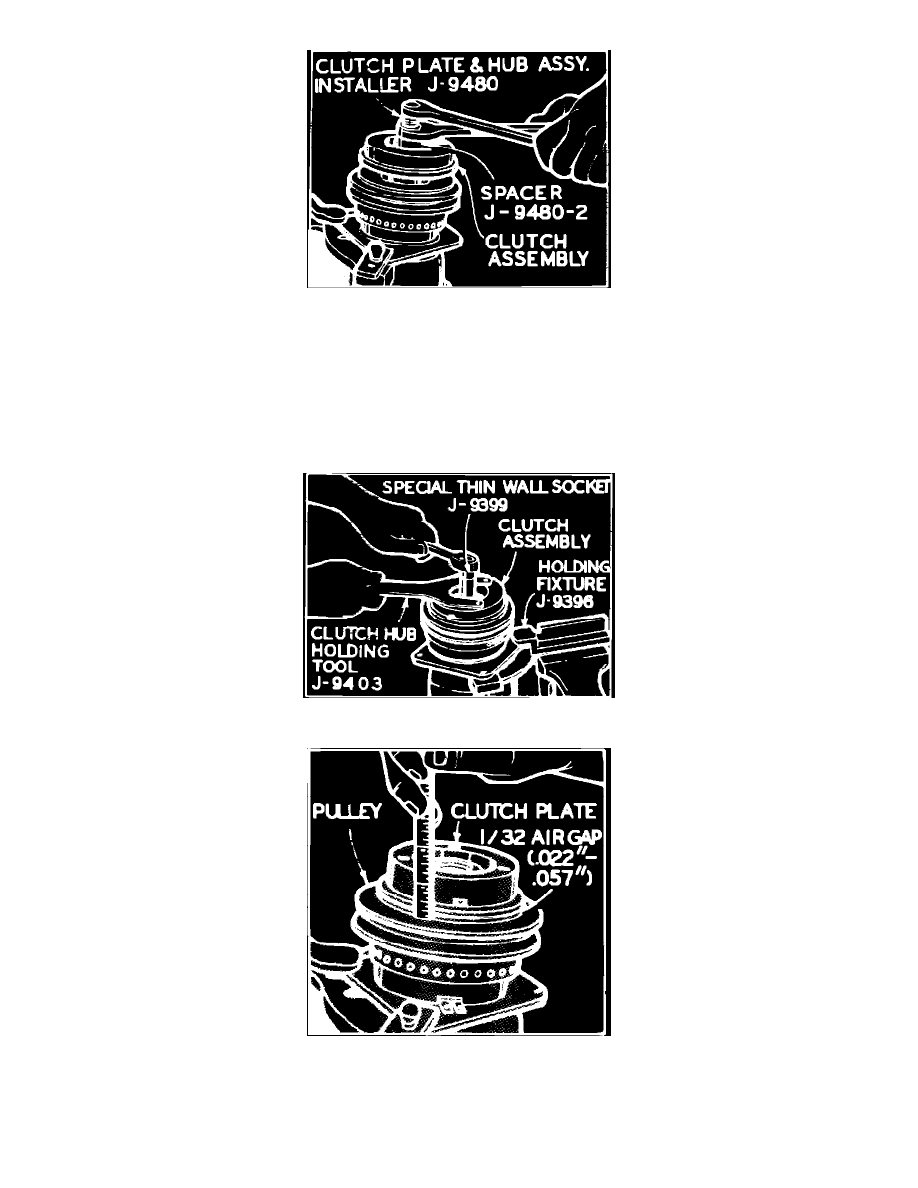
Fig. 17 Installing clutch plate & hub
4.
Place spacer on hub, Fig. 17. Insert end of clutch plate and hub installer through spacer and thread tool onto end of shaft.
5.
Hold hex portion of tool body with a wrench and tighten center screw several turns to press hub partially on shaft, Fig. 17.
6.
Remove tool and check alignment of drive key with keyway in shaft. If alignment is correct, replace installer tool and continue to press hub onto
shaft until there is approximately a 3/32 inch (.093) air gap between frictional surface of pulley and clutch plate. A zero thrust race is 3/32 inch
thick and can be used as a gauge between these frictional surfaces.
7.
Remove tools and install hub spacer.
8.
Install hub retainer ring with flat side of ring facing spacer.
Fig. 14 Removing lock nut
Fig. 18 Checking air gap
9.
Install a new shaft lock nut with small diameter boss of nut against hub spacer, using thin wall socket shown in Fig. 14. Hold clutch hub with
holding tool and tighten nut to 15 ft. lbs. Air gap between frictional surfaces of pulley and clutch plate, Fig. 18, should now be as specified in the
A/C Data Table.