
Suburban 3/4 Ton 4WD V8-305 5.0L (1986)
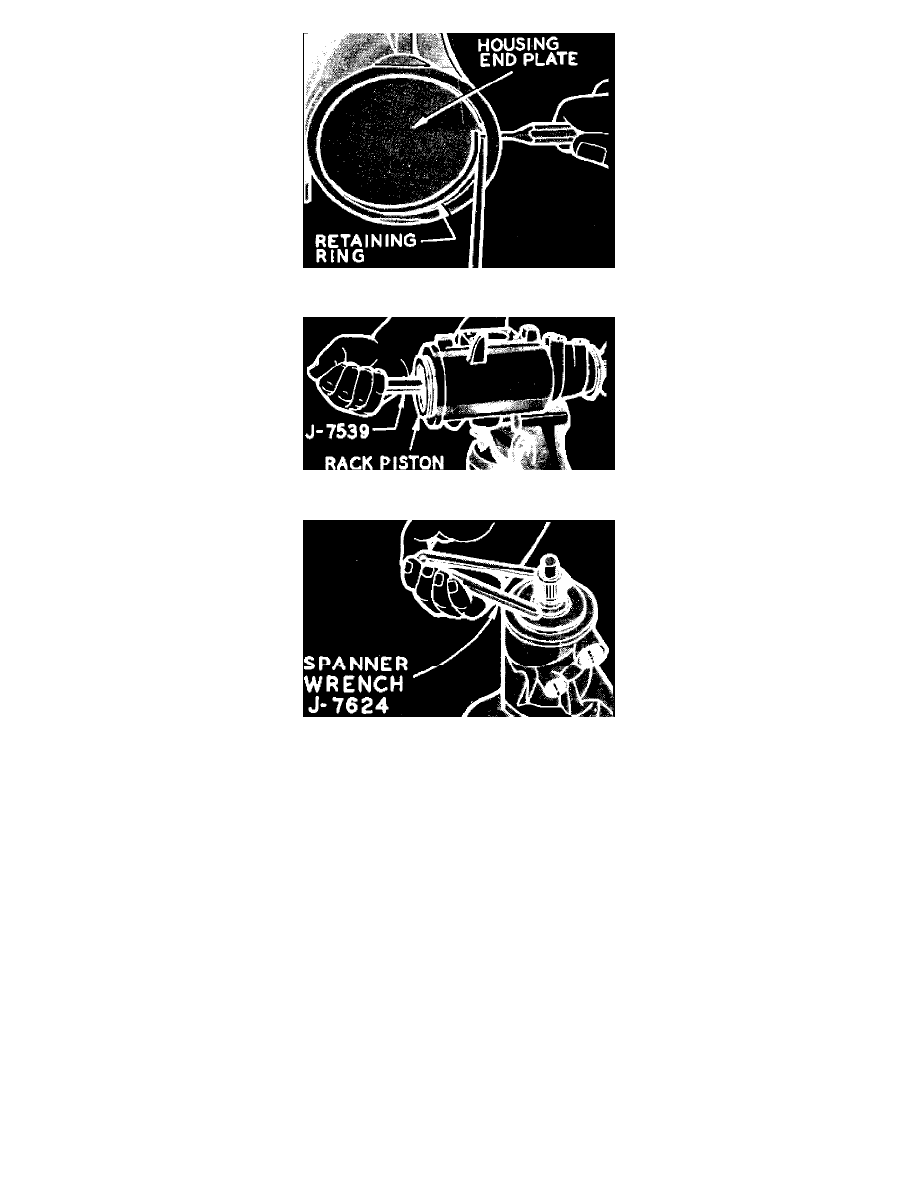
Fig. 5 Removing end plug retaining ring
Fig. 6 Installing rack-piston arbor tool in end of worm
Fig. 7 Removing adjuster plug
1.
Referring to
Fig. 3, position gear in vise with gear housing end plug facing up.
2.
Rotate gear housing end plug retaining ring so that one end of ring is over hole in housing. Spring one end of ring with a punch to allow
screwdriver to be inserted to lift ring out,
Fig. 5.
3.
Rotate coupling flange counterclockwise until rack-piston just forces end plug out of housing. Remove plug from housing.
Do not rotate any
further than necessary or balls fall out of their circuit and pitman shaft teeth and rack-piston will become disengaged.
4.
Remove rack-piston end plug, using a 1/2 inch square drive. To make removal easier, tap rack-piston end plug with a plastic mallet to unseat
threads. This is important as end plug is tightened to 75---80 ft-lbs during assembly and could break during removal if not handled carefully.
5.
Remove lock nut from pitman shaft adjuster screw and discard.
6.
Remove four side cover retaining screws and washers from cover.
7.
Rotate pitman shaft adjuster screw with an Allen wrench until side cover is lifted free of housing.
8.
Separate side cover from pitman shaft; discard side cover O-ring seal.
9.
Turn coupling flange until pitman shaft teeth are centered in housing.
10.
Tap end of pitman shaft with a soft mallet and slide pitman shaft out of housing.
11.
Remove housing end plug O-ring seal and discard.
12.
Insert Rack-Piston Arbor into rack-piston against end of worm,
Fig. 6. Turn coupling flange counterclockwise, while holding tool tightly against
worm, to force rack-piston onto arbor, and remove rack-piston from gear housing.
13.
Remove stub shaft-to-coupling flange retaining screw and remove flange.
14.
Remove adjuster plug lock nut by breaking it loose with hammer and punch, and remove lock nut from housing.
15.
Loosen adjuster plug and remove from housing,
Fig. 7.
16.
Remove valve assembly by grasping stub shaft and pulling out.
17.
Remove worm, lower thrust bearing and races from upper end of housing.