
Yukon Denali AWD V8-6.2L (2007)
Important
Clean the EVAP line connections and surrounding areas prior to disconnecting in order to avoid possible EVAP system contamination.
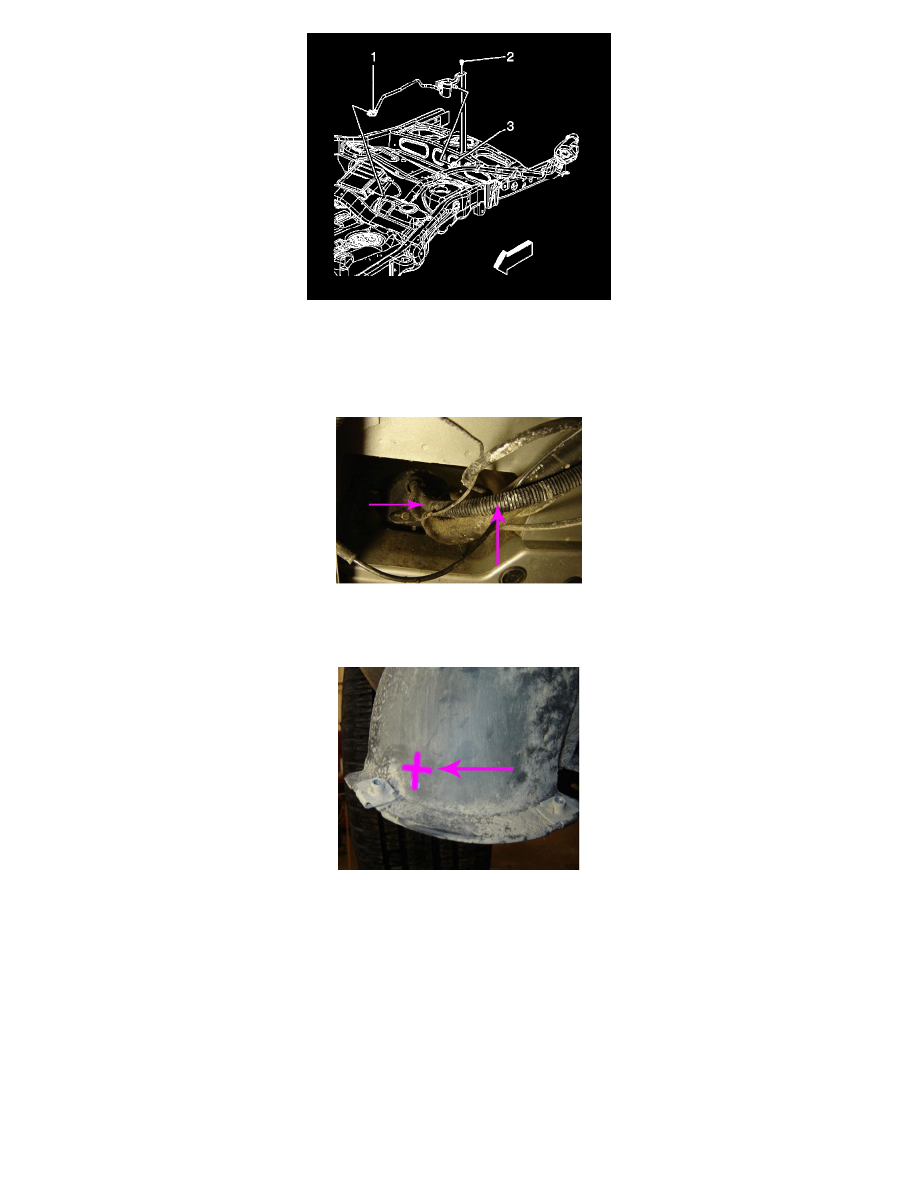
6. Disconnect the CVS valve assembly quick connect fitting (1) from the EVAP canister. Refer to Plastic Collar Quick Connect Fitting Service in SI.
7. Remove the CVS valve assembly bracket to spare tire cross-car support retaining bolt (2). DO NOT discard the bolt.
8. Remove the tie-straps and the CVS valve assembly black conduit from the fuel tank filler pipe assembly.
9. Remove the complete CVS valve assembly from the vehicle and discard.
10. Lower the fuel tank filler pipe housing and the fuel tank fill pipe enough to drill a hole into the housing.
11. Drill a 7 mm (0.27 in) hole in the fuel tank filler pipe housing approximately 15 mm (0.59 in) back from the base of the flange and 15 mm (0.59
in) rearward of the forward housing attachment clip as shown.
Remove any plastic burrs that remain after drilling.
12. Place the revised EVAP CVS valve assembly, P/N 20995472, into position in the vehicle. Ensure the EVAP CVS valve canister pipe is positioned
ABOVE the cross-car brace, just forward of the CVS valve.