
Yukon Denali AWD V8-6.2L (2007)
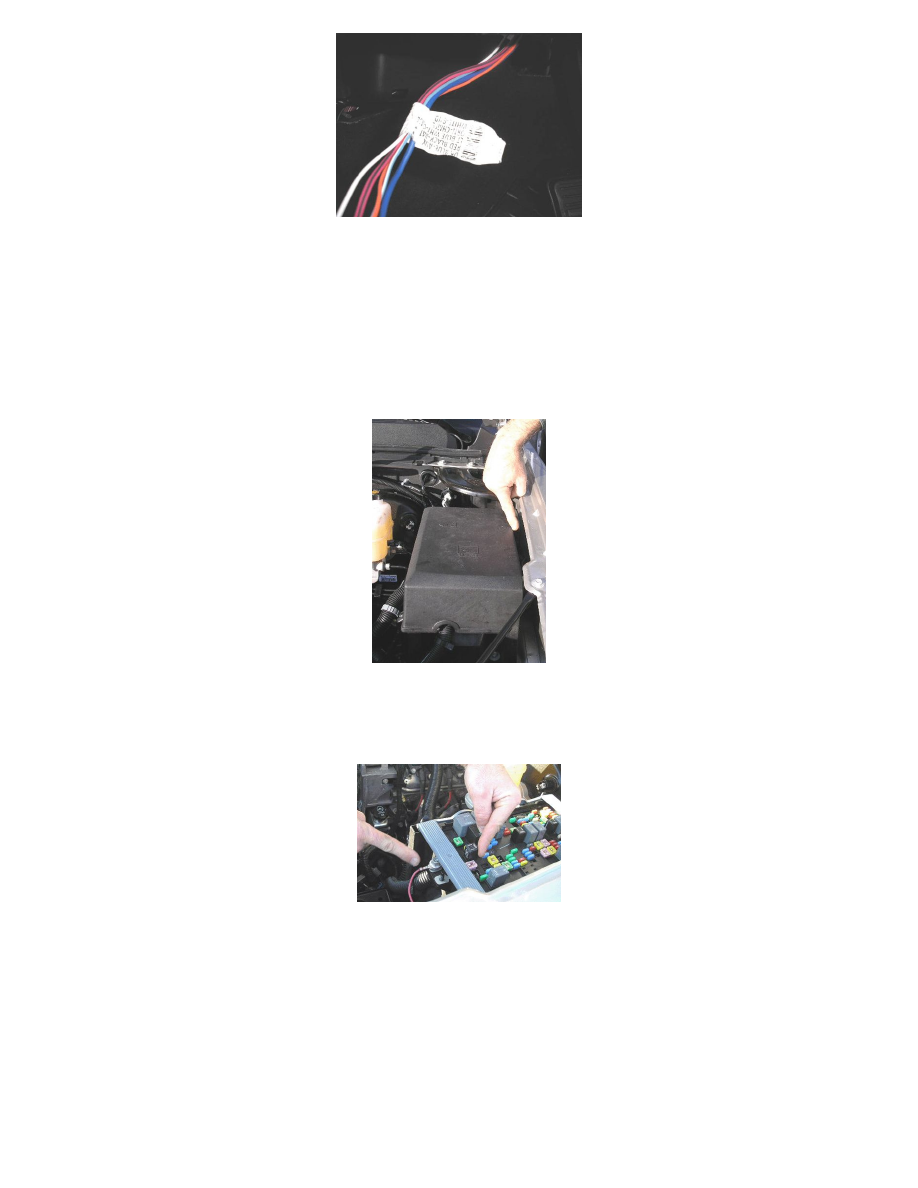
3. Match the vehicle harness label circuit functions to the trailer brake controller jumper harness functions.
Important
The color or wires to be joined together may not match.
-
Dark Blue Wire: switched power from controller to trailer brakes
-
Red with Black Stripe: fused vehicle power to electrical brake controller
-
Light Blue with White Stripe: Brake switch input to power electric brake controller
-
White: ground
-
Orange: CHMSL (Center High Mounted Stop Lamp) - not required with most systems
4. After completing the under dash connections to the electric brake controller, open the hood and locate the red wire that is taped to the harness
between the underhood electrical center and the driver side front fender.
5. Break the tape on the red/black wire and pull it toward the front of vehicle.
6. Remove the lid from the electrical center.
Important
Ensure that the ringlets are not interfering with the UBEC cover.
7. Place the terminal on the larger of the two studs at the front of the electrical center and secure with an M8 nut. This is circuit #242 to stud #2, to
power the aftermarket trailer brake controller.
Important
The fuse is already present in the vehicle to power the electrical trailer brake controller system.
Auxiliary Power (Applies to All LD & 07-09 HD's Only)