
Accord L4-1955cc 2.0L SOHC 2-bbl (1986)
Compressor Clutch: Service and Repair
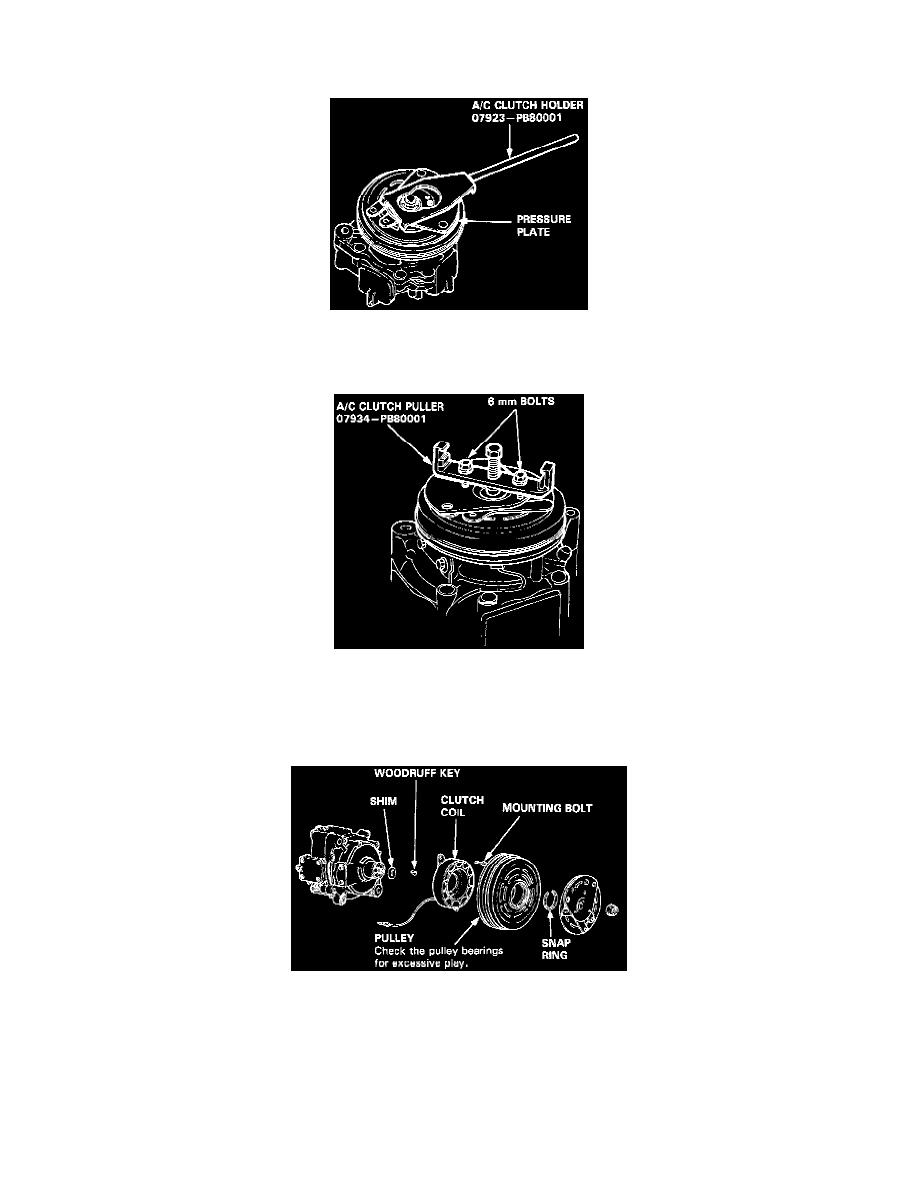
Honda / Keihin Compressor
1. Remove the nut while holding the pressure plate with the special tool shown.
CAUTION: Be careful not to compress the spring excessively.
2. Install the clutch remover tool onto the pressure plate using two 6 mm bolts. Remove the plate by screwing in the center bolt.
CAUTION: Use only the special tool to remove the pressure plate. If it is not used, clutch damage may result.
NOTE: Tighten the 6 mm bolts equally, so the special tool is installed parallel to the pressure plate.
3. Use snap ring pliers to take off the snap ring, then remove the pulley from the shaft with a 2 or 3 jaw puller.
CAUTION: When removing the snap ring, be careful not to damage the aluminum compressor snout.
4. Unscrew the clutch coil mounting bolt by using a TORX DRIVER BIT, then remove the clutch coil.
NOTE: It's not necessary to remove the clutch wire clamp; just pry it up enough to remove the wire.