
Accord L4-1955cc 2.0L SOHC 2-bbl (1986)
11.
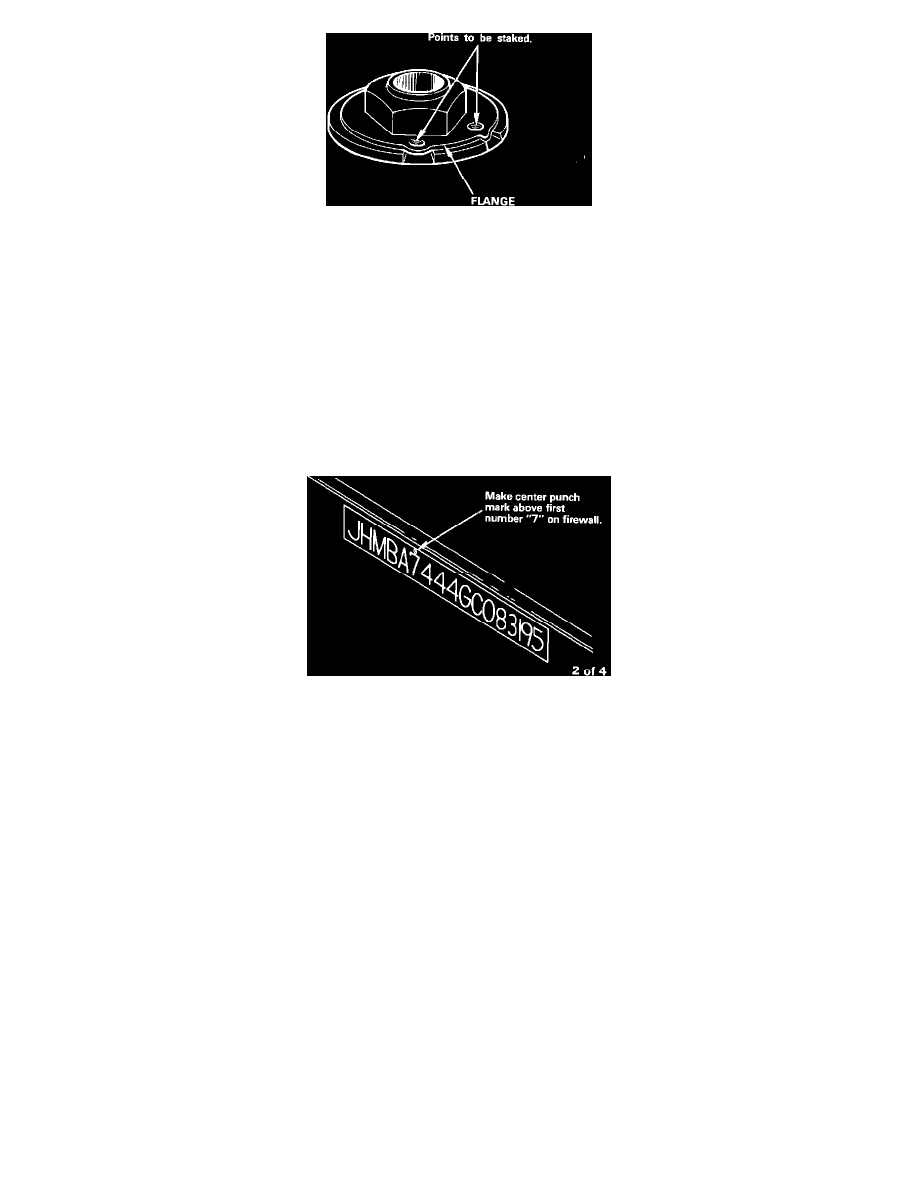
Stake the countershaft flange nut with a dull, rounded punch in 2 places to a depth of 1.0 mm.
12.
Clean the mating surfaces and the end cover housing.
13.
Install a new gasket and O-rings on the transmission center housing. Reinstall the end cover and torque the bolts to 12 N-m (1.2 kg-m, 9 ft.lbs.).
CAUTION: Fit the end cover by hand. (Do not use a hammer.) Use of excessive force may cause irreparable damage to the end cover and cause
engine "flare" on 3-4 upshift.
14.
Raise the front beam back into position and retighten the rear motor mount bolts.
15.
Reinstall the front beam bolts, center beam, radius rod, splash shield and wheel. Torque the lug nuts to 110 N-m (11 kg-m, 80 ft.lbs.). Refill the
transmission to the full mark, and recheck the level after the car has reached normal operating temperature.
16.
Test drive the car, and include a continuous drive in reverse of about 200 feet.
17.
Center punch a completion mark on the firewall above the first number "7" of the VIN.
PARTS INFORMATION
20 mm flange nut:
P/N 90201-689-900
(up to trans. #F4-6104022)
H/C 0736793
23 mm flange nut:
P/N 90202-PF4-000
(from trans. #F4-6104023)
H/C 2440055
End cover gasket:
P/N 21812-PF4-000 H/C 2114858
O-ring:
P/N 91301-PC9-003
(2 required)
H/C 1352400
WARRANTY CLAIM INFORMATION
Operation number:
218110
Flat rate time:
1.3 hours
Failed part H/C: 0
Defect code:
610
Contention code:
E02