
Accord L4-1955cc 2.0L SOHC FI (1987)
Evaporator Core: Service and Repair
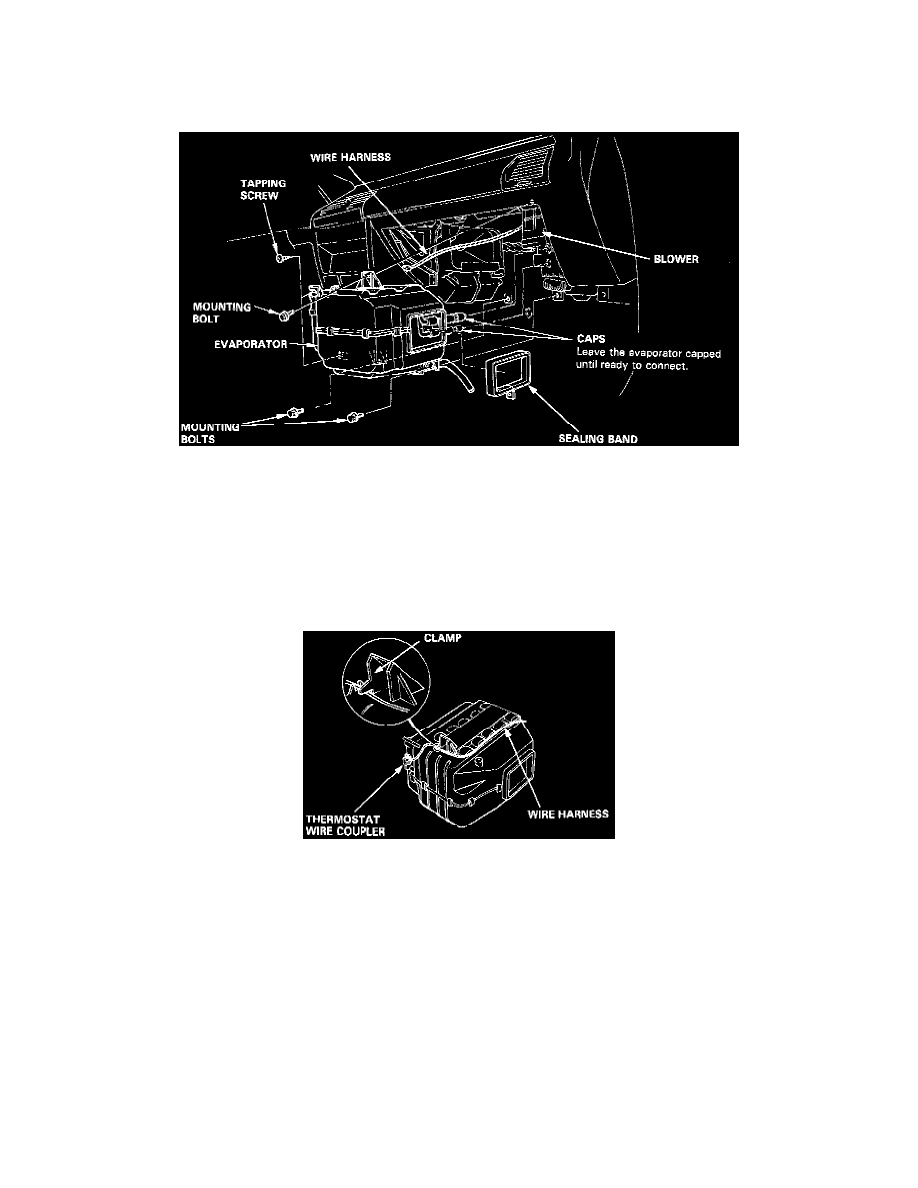
Removal and Installation
1. Disconnect the battery negative terminal.
2. Use a Refrigerant Recovery/Recycling System to recover the refrigerant from the system.
3. Disconnect the receiver line and suction hose from the evaporator.
CAUTION: Cap the open fittings immediately to keep moisture and dirt out of the system.
4. Remove the tapping screws (4) and glove box lower cover.
5. Remove the screws (2) and glove box.
6. Remove the screws (4), bolt (1) and glove box frame.
7. Disconnect the drain hose from the evaporator lower housing.
8. Loosen the sealing band and slide it toward the blower.
9. Disconnect the thermostat wire, and pull the wire out of the clamp at the top of the evaporator.
10. Remove the evaporator by removing the three bolts and two tapping screws.
11. Remove the sealing band from the blower if necessary.
12. Install the evaporator in the reverse order of removal.
13. Charge the system and test performance.