
Accord L4-1955cc 2.0L SOHC FI (1987)
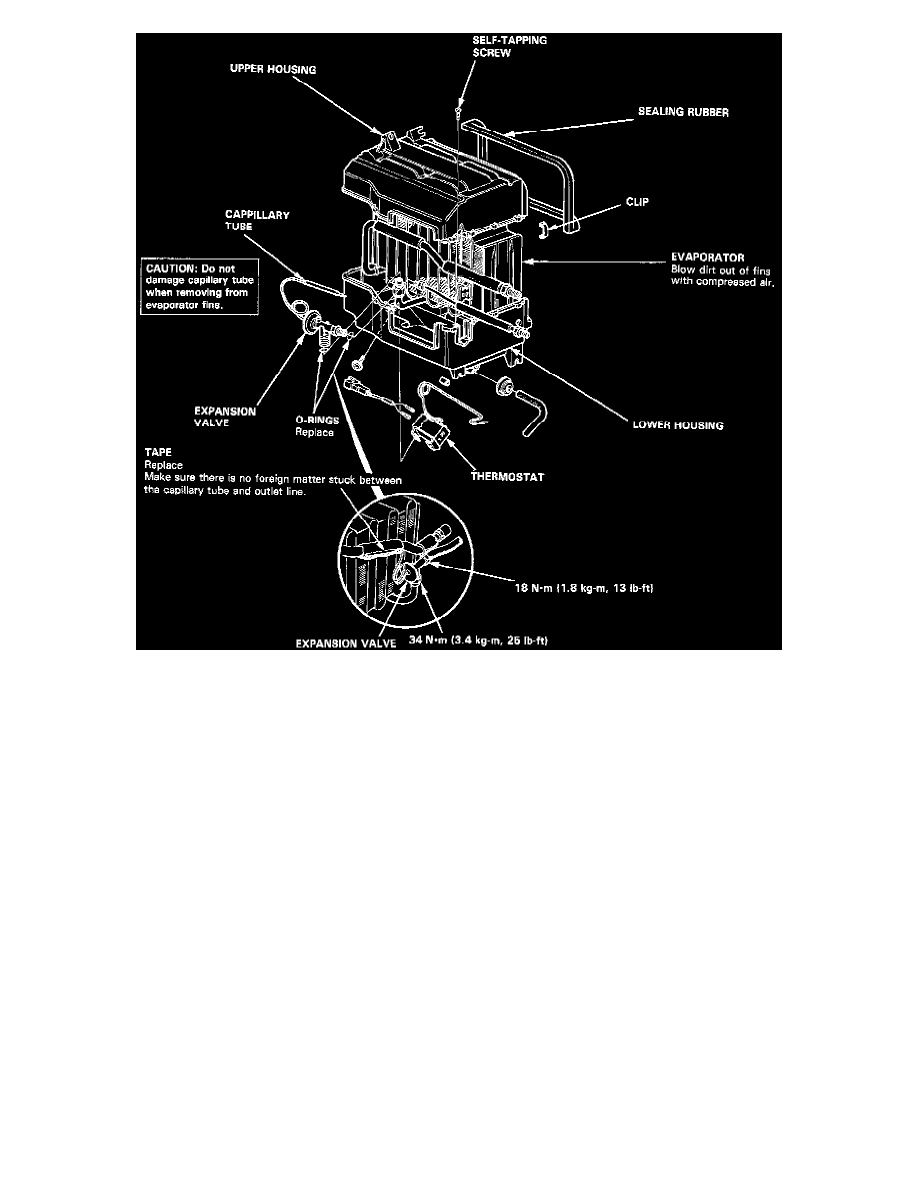
12. Remove the self-tapping screw and clip from the housing.
13. Carefully separate the housings as required to obtain access to the capillary tube in the housing.
14. Pull out the capillary tube of the thermostat from the evaporator fins.
15. Separate the housings and remove the evaporator cover.
16. Remove the expansion valve.
17. Assemble the evaporator in the reverse order of disassembly, noting the following:
-
Torque expansion valve fittings to specifications:
Expansion valve to evaporator core: 34 Nm (25 lb ft)
Expansion valve to receiver line: 18 Nm (13 lb ft)
-
Install the expansion cover capillary tube against the suction line, and wrap it with tape.
-
Reinstall the thermostat capillary tube in its original location.
-
Reassemble the upper and lower housings with clips, make sure there are no gaps between them.
18. Install the evaporator in the reverse order of removal.
19. Charge the system and test performance.