
Accord L4-1955cc 2.0L SOHC FI (1987)
-
If there is no vacuum, go to Solenoid Valve Test I.
4. Raise engine speed above 1,500 rpm.
There should be no vacuum.
-
If there is vacuum, go to Solenoid Valve Test II.
-
If there is no vacuum, the test is complete.
Solenoid Valve Test I:
1. Start the engine and allow to idle.
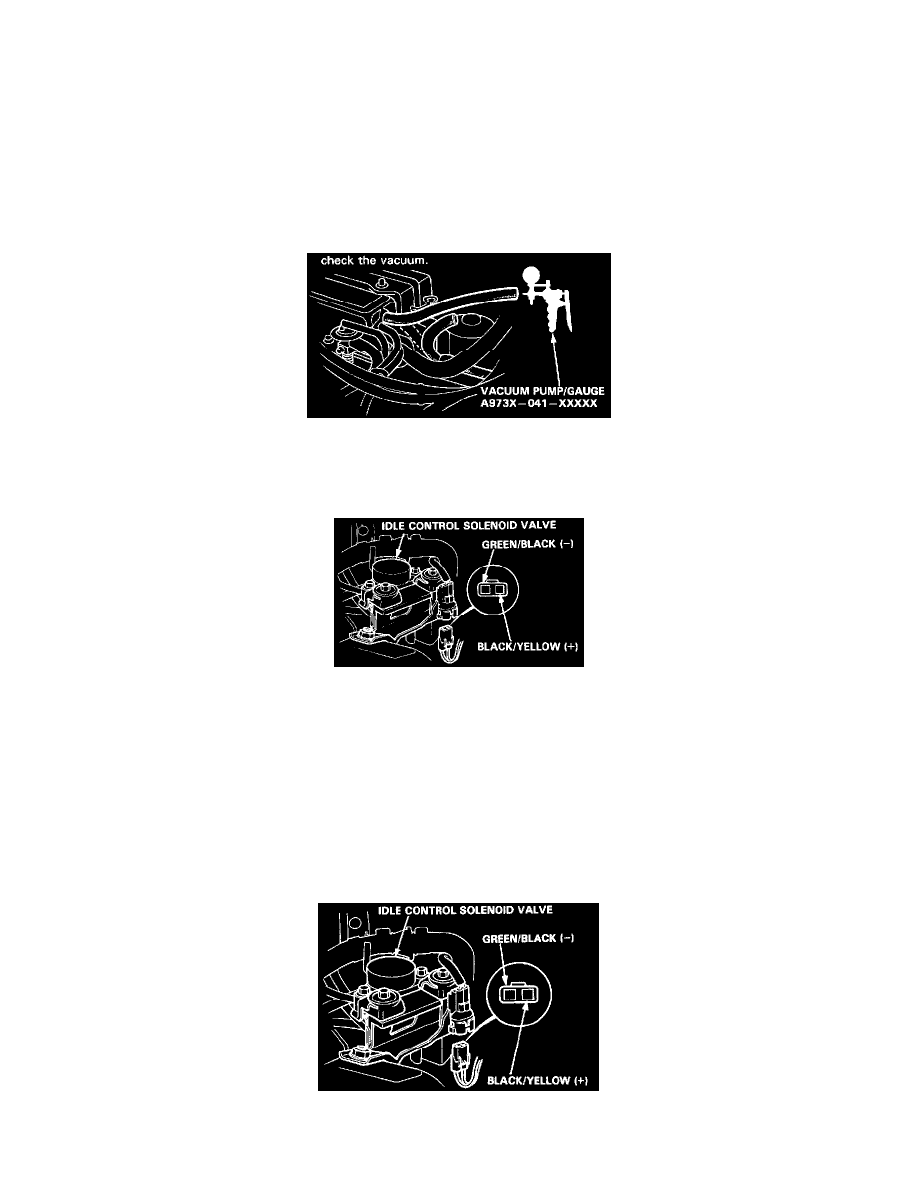
2. Disconnect the upper vacuum hose of the idle control solenoid valve from the intake manifold and check the vacuum.
-
If there is no vacuum, check the vacuum port.
3. Stop the engine.
4. Disconnect the 2P connector on the idle control solenoid valve.
5. Attach the positive probe of the voltmeter to the Black/Yellow terminal and the negative probe to the Green/Black terminal.
6. Within 10 seconds after restarting the engine, check the voltage at idle.
-
If there is voltage, replace the solenoid valve and re-test.
-
If there is no voltage, attach the positive probe of the voltmeter to the Black/Yellow terminal of the connector, and the negative probe to body
ground. Within 10 seconds after restarting the engine, check the voltage.
-
If there is no voltage, repair the open in the Black/Yellow wire between the solenoid valve and the No.1 fuse.
-
If there is voltage, inspect for an open in the Green/Black wire between the solenoid valve and the ECU. If the wire is OK, see ECU
troubleshooting.
Solenoid Valve Test II:
1. Start the engine.
2. Disconnect the 2P connector on the idle control solenoid valve.
3. Attach the positive probe of the voltmeter to the Black/Yellow terminal, and the negative probe to the Green/Black terminal.
4. Hold engine above 1,500 rpm and check the voltage.