
Accord L4-2.4L (2005)
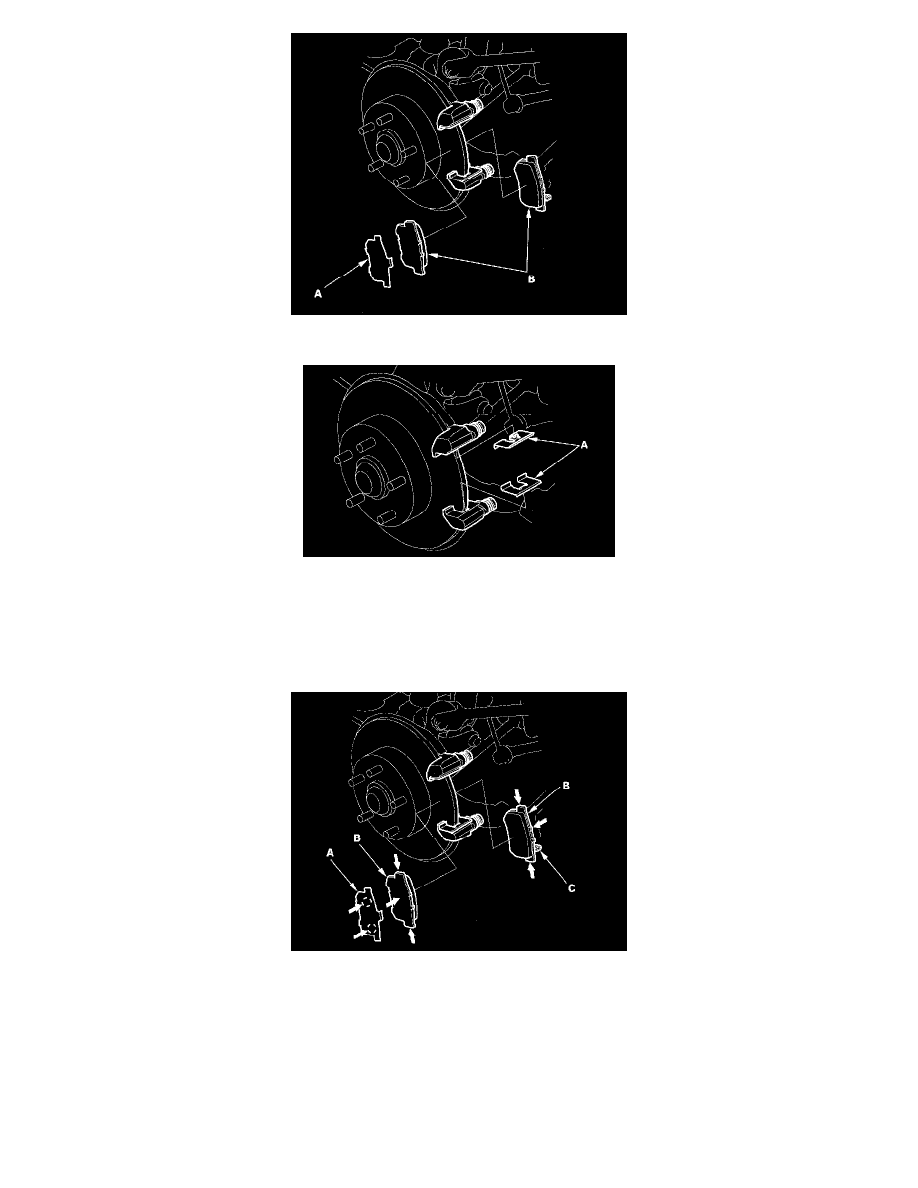
5. Remove the pad retainers (A).
6. Clean the caliper thoroughly; remove any rust and check for grooves and cracks.
7. Check the brake disc for damage and cracks.
8. Install the pad retainers.
9. Apply a thin coat of M-77 assembly paste (P/N 08798-9010) to both sides of the pad shim (A), the back of brake pads (B), and the other areas
indicated by the arrows. Wipe excess assembly paste off the pad shims and brake pads. Contaminated brake discs or pads reduce stopping ability.
Keep assembly paste off the brake discs and pad material.
10. Install the brake pads and pad shims correctly. Install the brake pad with the wear indicator (C) on the inside bottom.
If you are reusing the brake pads, always reinstall the brake pads in their original positions to prevent a momentary loss of braking efficiency.
11. Rotate the caliper piston (C) clockwise into the cylinder, then align the cutout (D) in the piston with the tab (E) on the inner pad by turning the
piston back. Lubricate the boot with rubber grease to avoid twisting the piston boot. If the piston boot is twisted, back it out so it is positioned
properly.