Accord V6-3.5L (2010)

7. Install the trim in the reverse order of removal, and note these items:
-
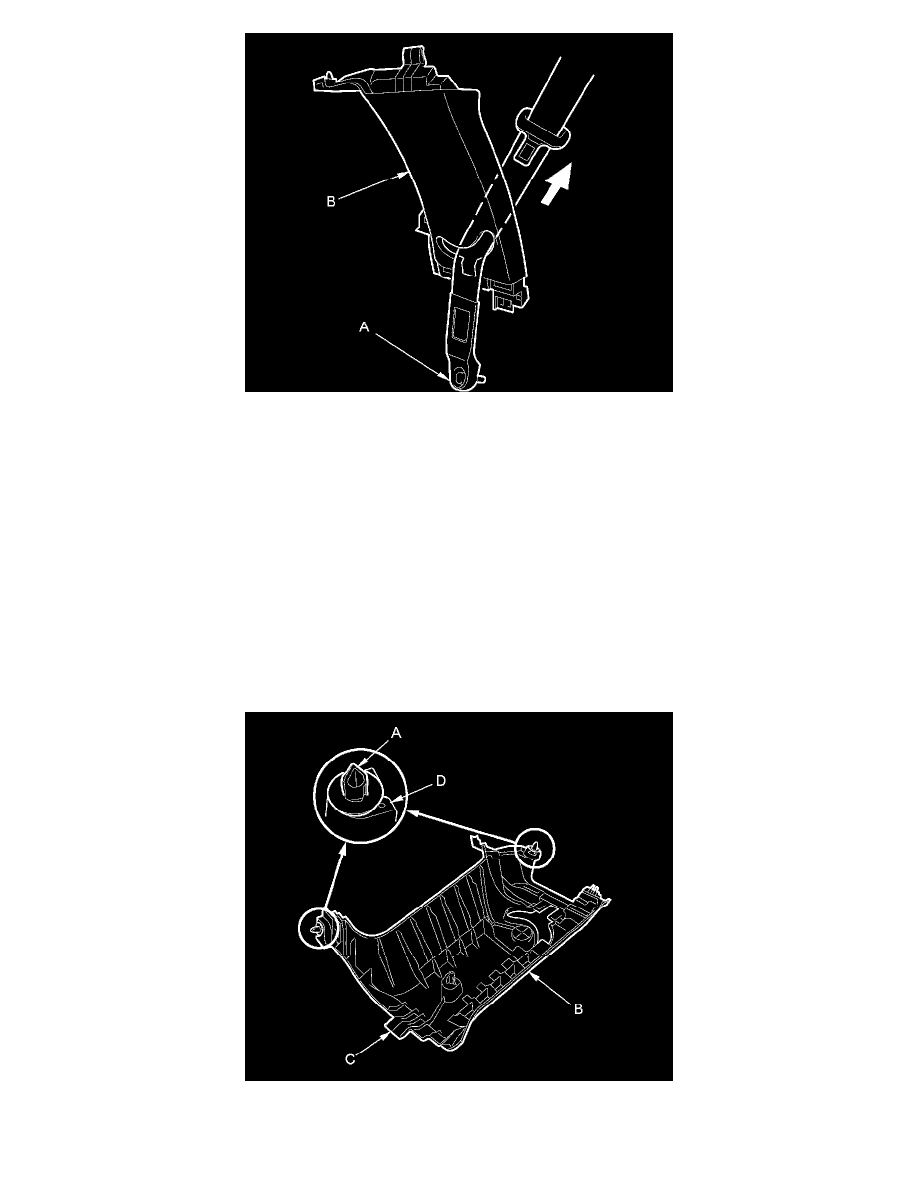
If the clips (A) are damaged or stress-whitened, replace them with new ones.
-
If the side curtain airbag has deployed, replace the B-pillar upper trim and all clips on the trim with new parts See: Restraint Systems/Air Bag
Systems/Service and Repair.
-
To prevent the side curtain airbags from deploying improperly and possibly causing injury, inspect the trim and replace it with a new one if it
has any of the following damage:
-
Any cracks or deformations in the B-pillar upper trim (B) or the upper hook (C), or any stress-whitened areas in the upper part of the trim
-
Any cracks or stress-whitened areas in the clips seating surfaces (D)
-
Replace any damaged parts with new ones.
-
Make sure the top of the B-pillar upper trim overlaps with the headliner correctly See: Restraint Systems/Air Bag Systems/Service and Repair.
-
Make sure the pin on the B-pillar upper trim is engaged to the hole in the body when installing the trim.
-
Make sure the upper hook is installed into the hole in the body securely.
-
Push the clips and the lower hooks into place securely.
-
Before installing the lower anchor, make sure there are no twists or kinks in the seat belt.
Trim inspection
B-Pillar Upper/Lower Trim - 4-door
SRS components are located in this area. Review the SRS component locations See: Restraint Systems/Air Bag Systems/Locations/SRS Component
