
Accord V6-3.5L (2010)
14. After disconnecting the quick-connect fitting, check it for dirt or damage See: Powertrain Management/Fuel Delivery and Air Induction/Fuel Line
Coupler/Service and Repair/Fuel Line/Quick-Connect Fitting Removal.
15. Do the battery terminal reconnection procedure See: Starting and Charging/Battery/Service and Repair/Procedures.
Without the HDS
1. Remove the driver's dashboard lower cover See: Body and Frame/Interior Moulding / Trim/Dashboard / Instrument Panel/Service and
Repair/Removal and Replacement/Driver's Dashboard Undercover Removal/Installation.
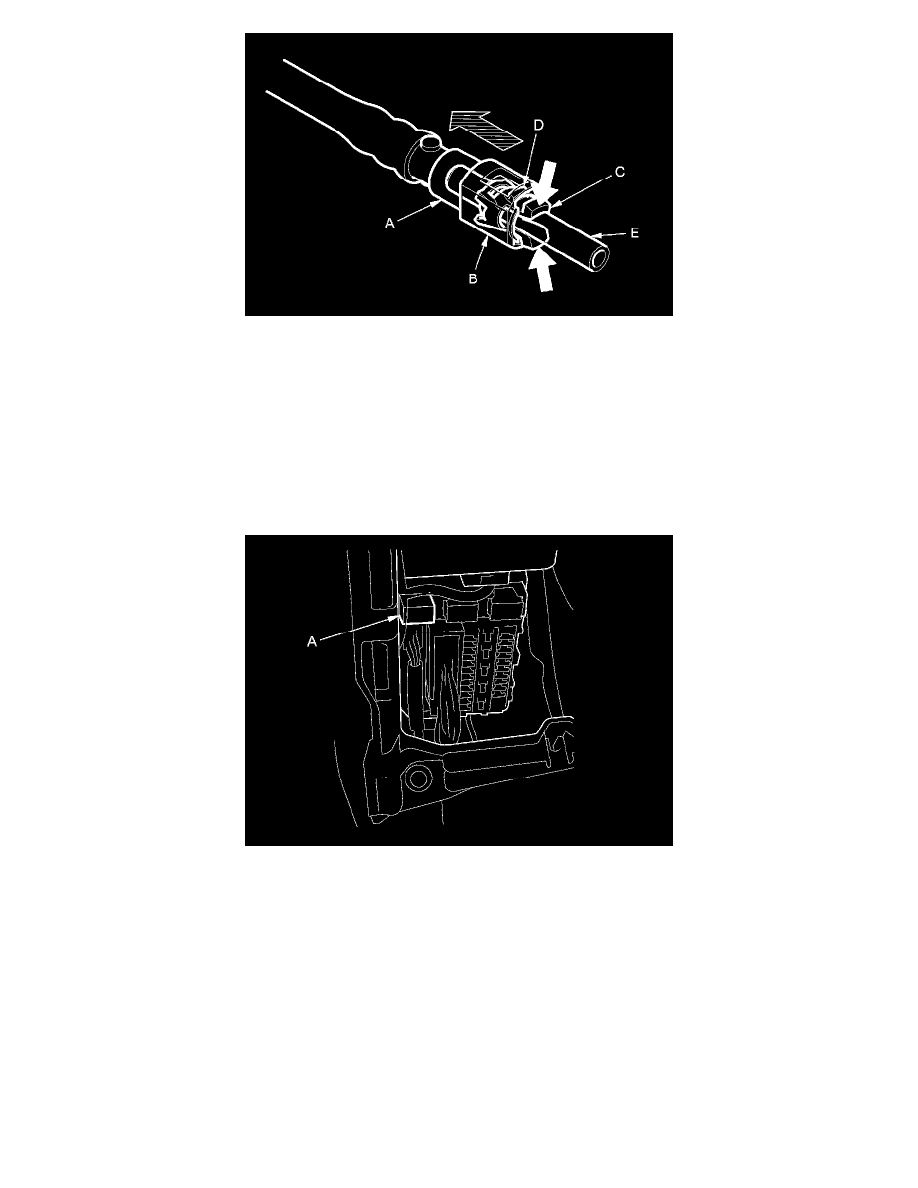
2. Remove PGM-FI main relay 2 (FUEL PUMP) (A) from the driver's under-dash fuse/relay box.
3. Start the engine, and let it idle until it stalls.
NOTE: If any DTCs are stored, clear and ignore them.
4. Turn the ignition switch to LOCK (0).
5. Remove the fuel fill cap to relieve the pressure in the fuel tank.
6. Do the battery terminal disconnection procedure See: Starting and Charging/Battery/Service and Repair/Procedures.
7. Remove the cover (A) and quick-connect fitting cover (B) See: Powertrain Management/Fuel Delivery and Air Induction/Fuel Line
Coupler/Service and Repair/Fuel Line/Quick-Connect Fitting Removal.