
Accord V6-3.5L (2010)
is in ON (II), or for at least 3 minutes after the ignition switch is turned to LOCK (0).
-
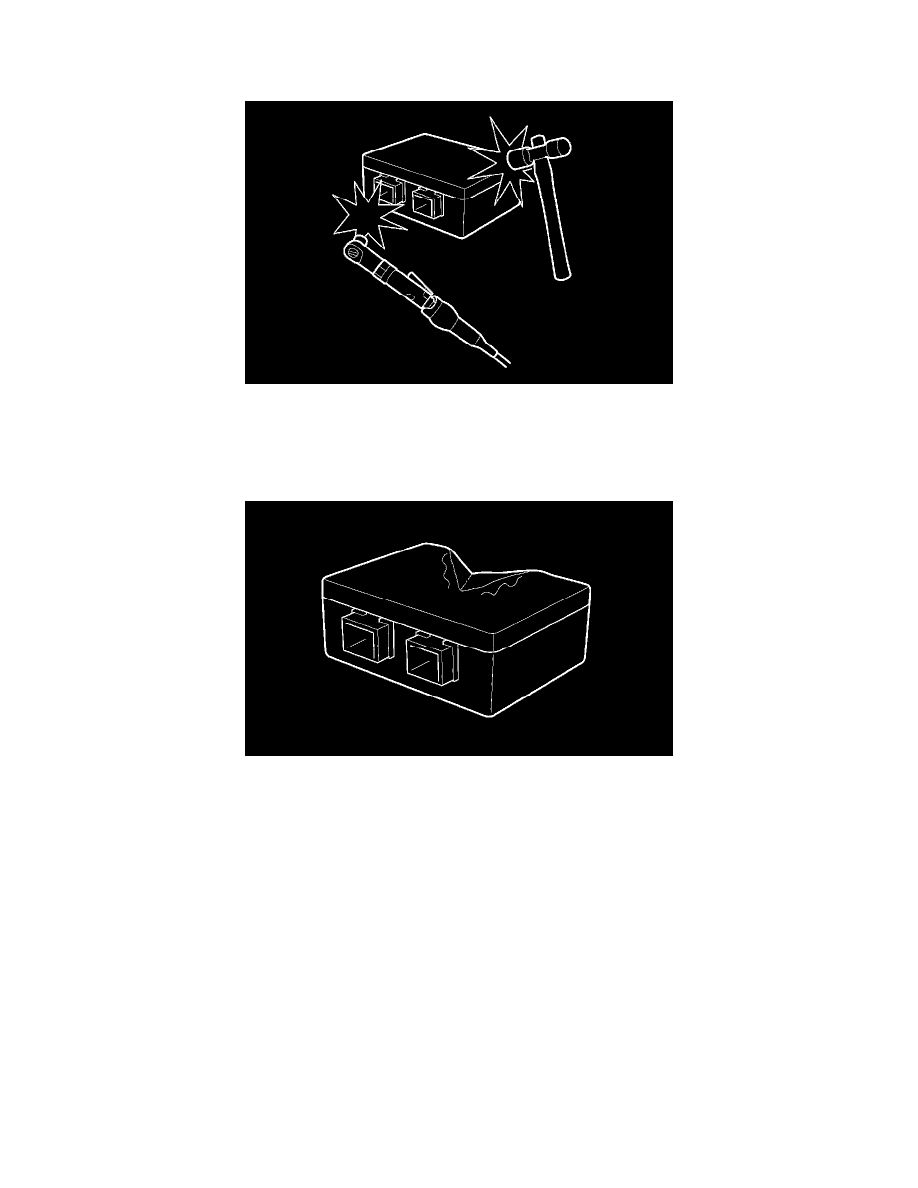
During installation or replacement, be careful not to bump (by impact wrench, hammer, etc.) the area around the SRS unit, the front impact
sensors, the side impact sensors, or the rear safing sensor. The airbags could accidentally deploy and cause damage or injury.
-
After a collision where the front airbags, the side airbags, the side curtain airbags, or the seat belt tensioners deploy, go to Component
Replacement/Inspection after Deployment See: Restraint Systems/Air Bag Systems/Service and Repair. After a collision where the airbags or the
side airbags do not deploy, inspect for any damage or any deformation on the SRS unit, the front impact sensors, the rear safing sensor, and the
side impact sensors. Also, do the front seat active head restraint inspection See: Body and Frame/Seats/Head Rest/Testing and Inspection. Replace
all damaged parts.
-
Do not disassemble the SRS unit, the front impact sensors, the side impact sensors, the rear safing sensor, the driver's seat position sensor, or the
front passenger's weight sensors.
-
Always install the SRS unit, the driver's seat position sensor, all impact sensors, and the rear safing sensor securely with new TORX bolts torqued
to 9.8 Nm (1.0 kg-m, 7.2 lb-ft).
-
Do not spill water or oil on the SRS unit or any of the sensors.
Wiring Precautions
Some of the SRS wiring can be identified by a special yellow outer covering and the SRS connectors can be identified by their yellow color. Observe the
following instructions.
-
Never attempt to modify, splice, or repair SRS wiring.
If there is an open or damage to the SRS wiring, replace the harness.