Civic L4-1.8L (2006)

Receiver Dryer: Service and Repair
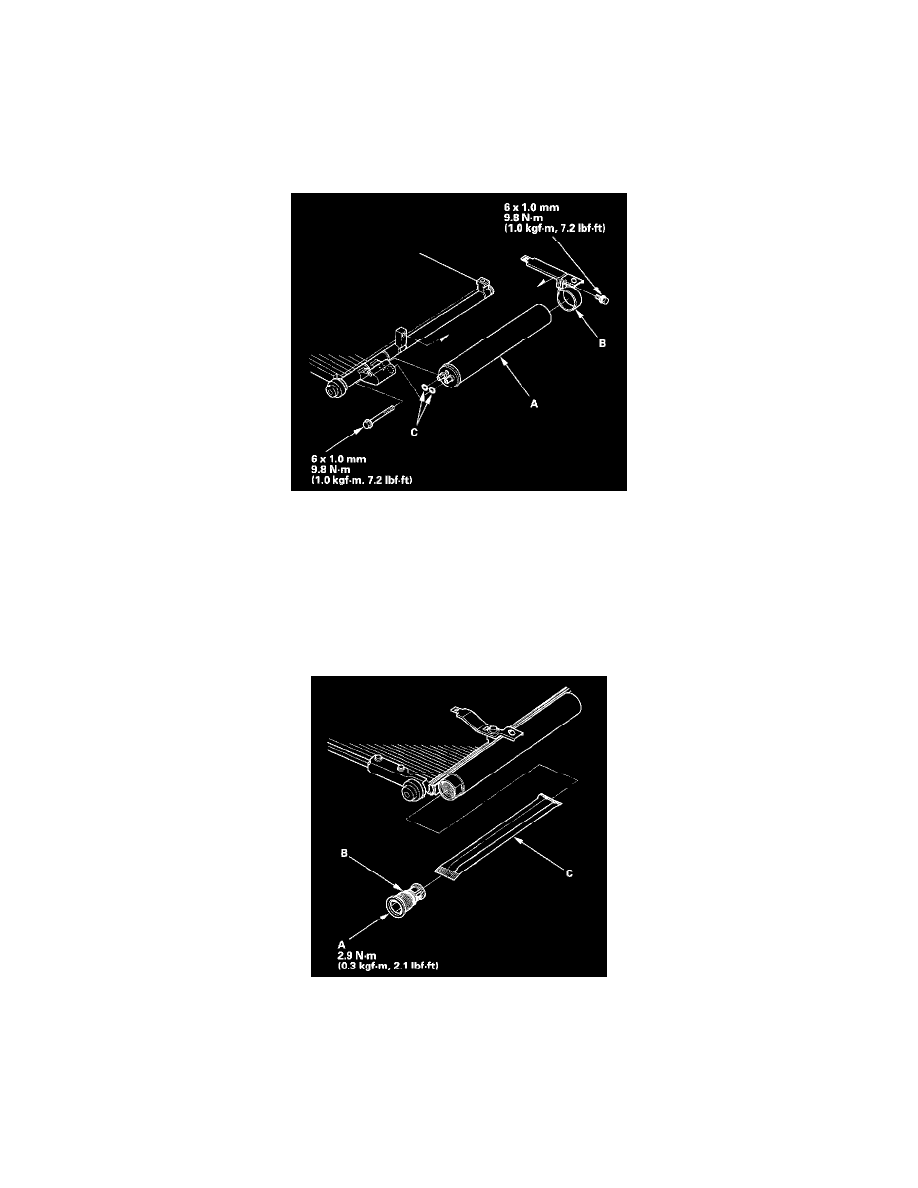
Receiver/Dryer Desiccant Replacement
4-door
NOTE: Install the receiver/dryer as quickly as possible to prevent the system from absorbing moisture from the air.
1. Remove the A/C condenser.
2. Remove the bolts from the A/C condenser, then remove the receiver/dryer (A), the bracket (B), and the O-rings (C).
3. Install the receiver/dryer in the reverse order of removal. Replace the O-rings with new ones, and apply a thin coat of refrigerant oil (SANDEN
SP-10) before installing them. Be sure to use the correct O-rings for HFC-134a (R-134a) to avoid leakage.
2-door
NOTE: Install the receiver/dryer as quickly as possible to prevent the system from absorbing moisture from the air.
1. Remove the A/C condenser.
2. Remove the cap (A) from the bottom of the A/C condenser. Remove the O-rings (B) and the desiccant (C).
3. Install the receiver/dryer in the reverse order of removal, and note these items:
-
Replace the O-rings with new ones, and apply a thin coat of refrigerant oil (SANDEN SP-10) before installing them. Be sure to use the correct
O-rings for HFC-134a (R-134a) to avoid leakage.
-
Install the cap to the specified torque. It is made of resin a can be easily stripped.
