
Civic L4-1.8L (2006)
Control Arm: Service and Repair
Front Suspension
Lower Arm Removal/installation
Special Tools Required
^
Oil seal driver, 64 mm 07GAD-PH70201
^
Bearing separator 07KAF-PS30200
^
Attachment, 32 x 35 mm 07746-0010100
^
Driver 07749-0010000
^
Oil seal driver, 55 x 66.2 mm 07965-KE80100
Removal/Installation
1. Raise the front of the vehicle, and support it with safety stands in the proper locations.
2. Remove the front wheel.
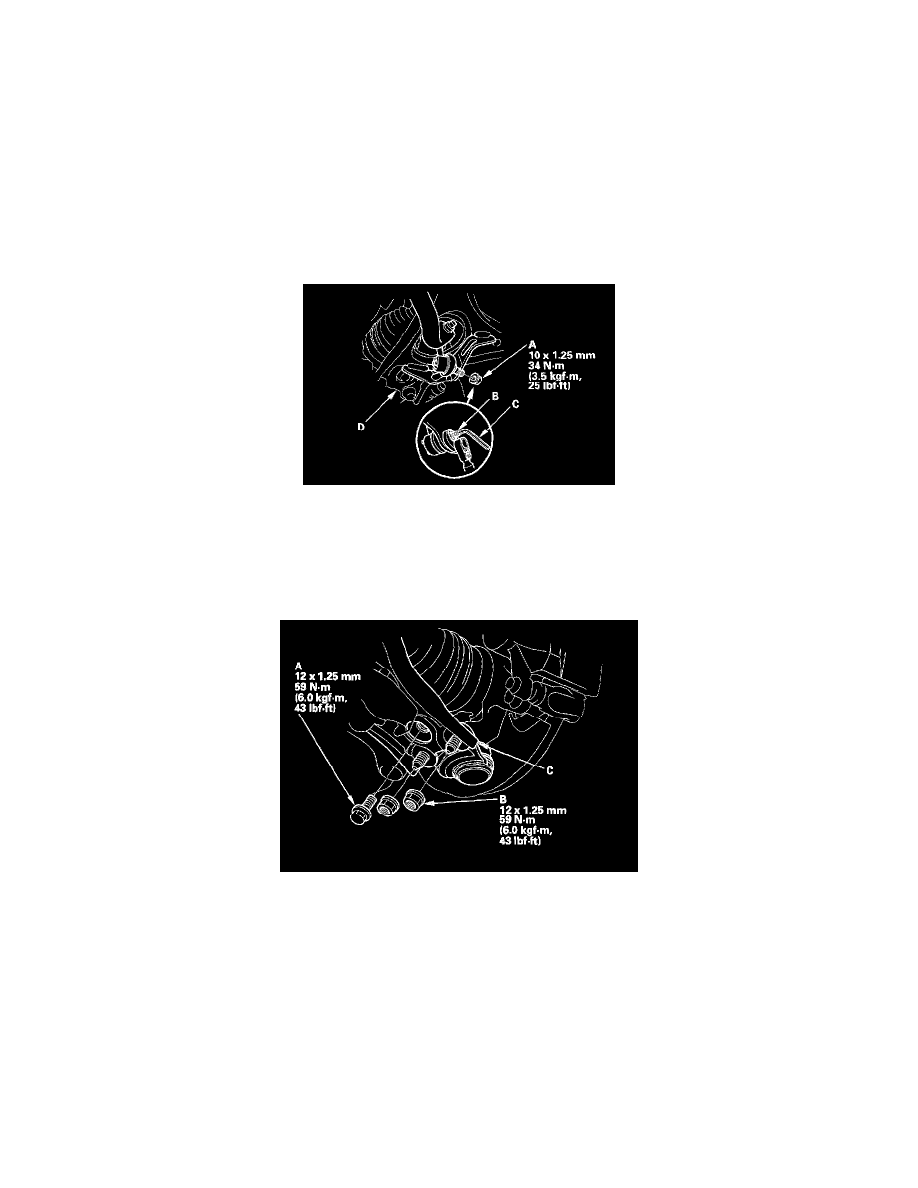
3. Remove the flange nut (A) while holding the respective joint pin (B) with a hex wrench (C), then disconnect the stabilizer links from the lower arm
(D).
NOTE: Use a new flange nut during reassembly.
4. Turn the stabilizer bar backward to gain easier access to the front side of the lower arm mounting bolt.
5. Remove and discard the flange bolt (A) and flange nuts (B) from the lower arm (C).
NOTE: During installation, install a new flange bolt and new flange nuts. After lightly tightening all three fasteners, tighten them to the specified
torque beginning with the flange nuts.
6. Disconnect the lower ball joint from the lower arm.