
Civic L4-1668cc 1.7L SOHC MFI (2003)
5.
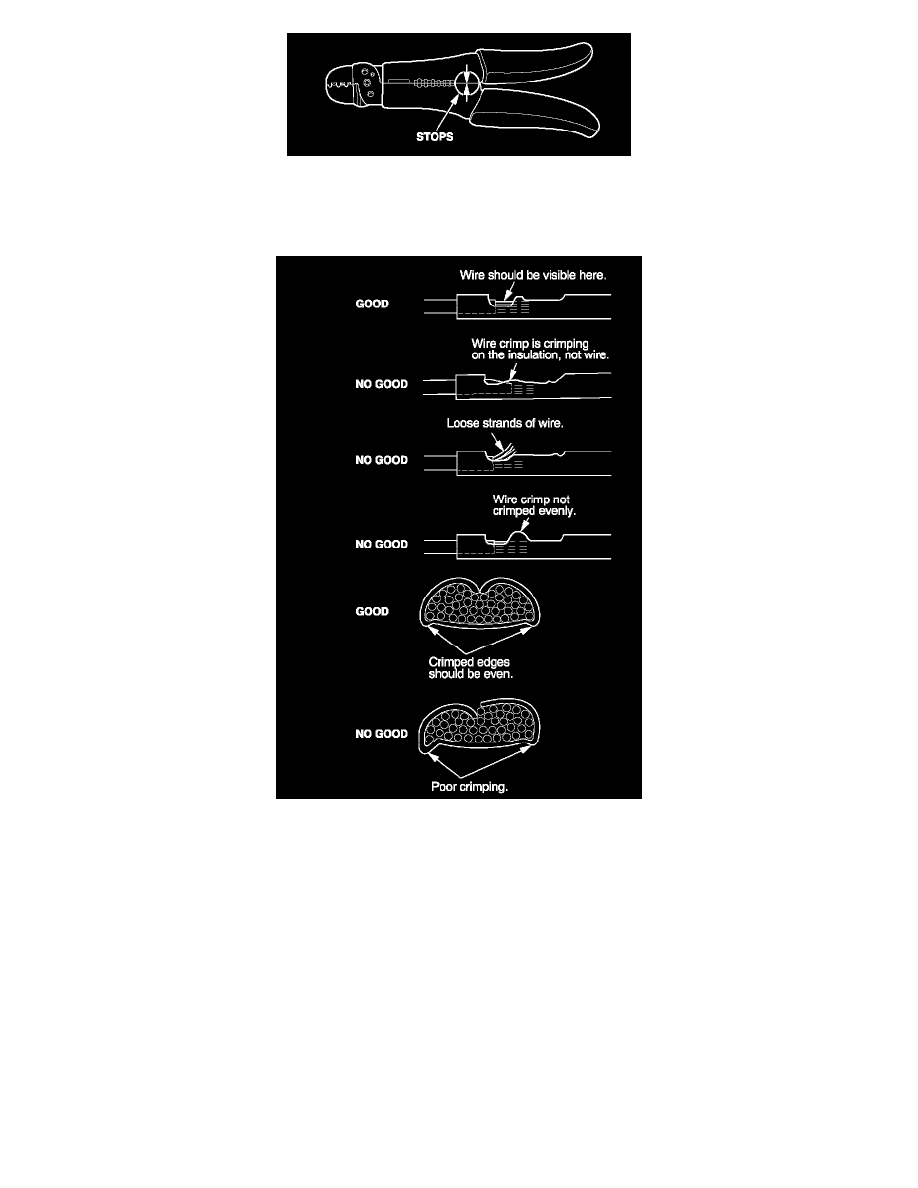
With the wire inserted in the new terminal as shown in step 3, crimp the wire by squeezing the tool with both hands until the stops make contact.
6.
Crimp the insulation by positioning the 5.5 slot on the tool over the insulation crimp section of the terminal and squeezing the tool with both hands
until the stops make contact.
7.
Inspect the quality of the wire crimp. If it has any of the following NO GOOD crimps, cut it off and start over.
8.
Clean the starter side of the S terminal as needed using electric contact cleaner and an electrical connector cleaning brush (Snap-on P/N YA385A
or equivalent). Blow out any debris remaining on or around the terminal with compressed air.
9.
Apply silicone dielectric grease (3M silicone paste P/N 08946, Permatex Dielectric Tune-up grease P/N 67VR, or equivalent) to the female side of
the S terminal, then carefully insert the terminal into the S terminal on the starter side.
10.
Slide the boot completely over the S terminal.
11.
Reconnect the positive battery cable, then reconnect the negative battery cable.
12.
Enter the anti-theft code for the audio unit (if applicable), then enter the customer's audio presets. Set the clock.
13.
Confirm that the starter engages properly by starting the engine several times.
14.
Do the idle learn procedure:
^
Make sure all electrical items (A/C, audio unit, defogger, lights, etc.) are off.