
Civic L4-1668cc 1.7L SOHC MFI (2003)
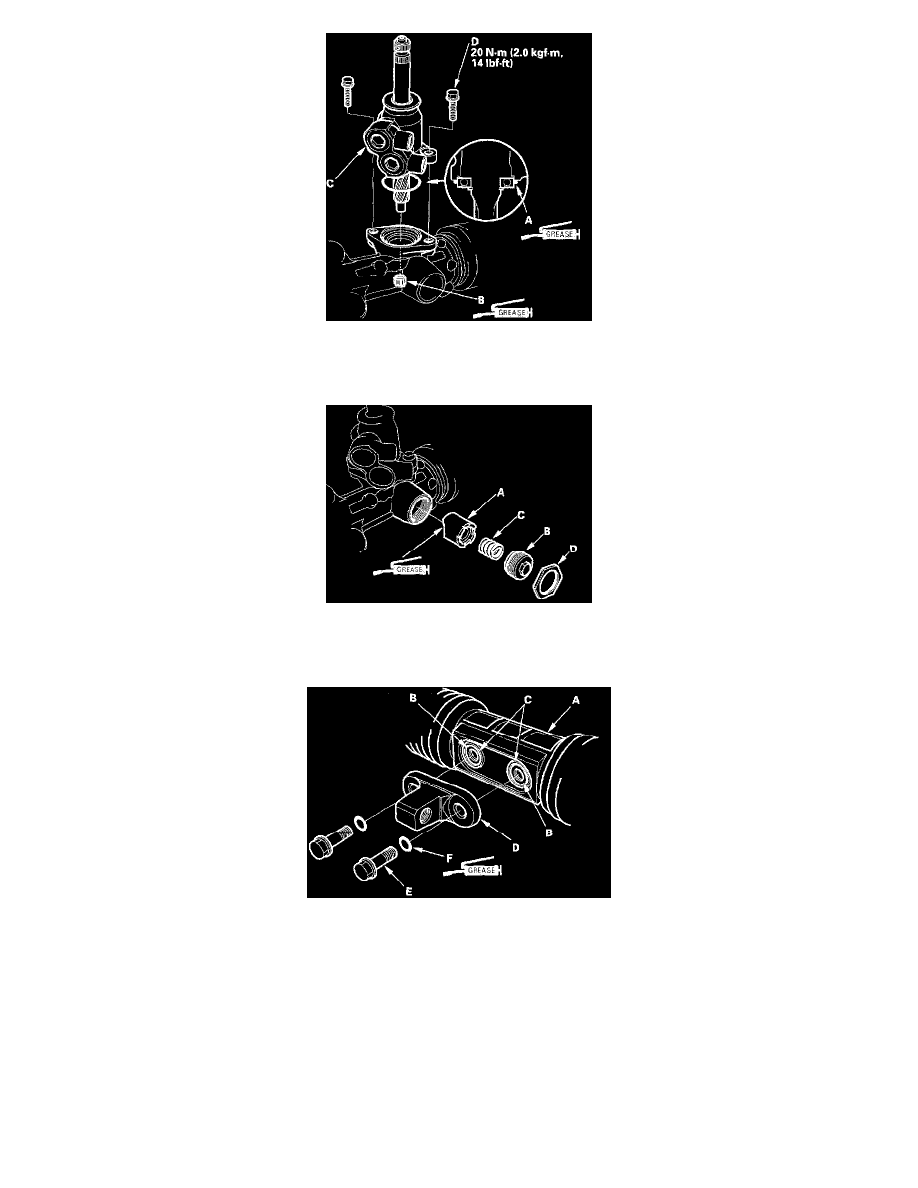
78. Coat the new O-ring (A) with multipurpose grease, and carefully fit it on the valve housing.
79. Apply multipurpose grease to the needle bearing (B) in the gearbox housing, then install the valve body unit (C) by engaging the gears. Note the
valve body unit installation position (direction of the line connections). Tighten the flange bolts (D) to the specified torque.
80. Apply multipurpose grease to the sliding surface of the rack guide (A), and install it onto the gearbox housing. Wipe the grease off the threaded
section of the housing.
81. Apply sealant all around the threads on the rack guide screw (B), then install the spring (C), rack guide screw, and locknut (D).
82. Center the steering rack within its stroke, and align the slider guide (B) with the holes (C) in boot A. Fit the slider guide to boot A by pressing
around the edges of the holes securely.
83. Before installing the bracket (D), clean the mating surface of the 12 mm flange bolts (E) and bracket. Coat the new O-rings (F) with multipurpose
grease, and install them on the 12 mm flange bolts.
84. Loosely install the bracket on the steering rack by tightening the 12 mm flange bolts to 25 Nm (2.5 kgf-cm, 18 ft. lbs.).