
Civic L4-1668cc 1.7L SOHC MFI (2003)
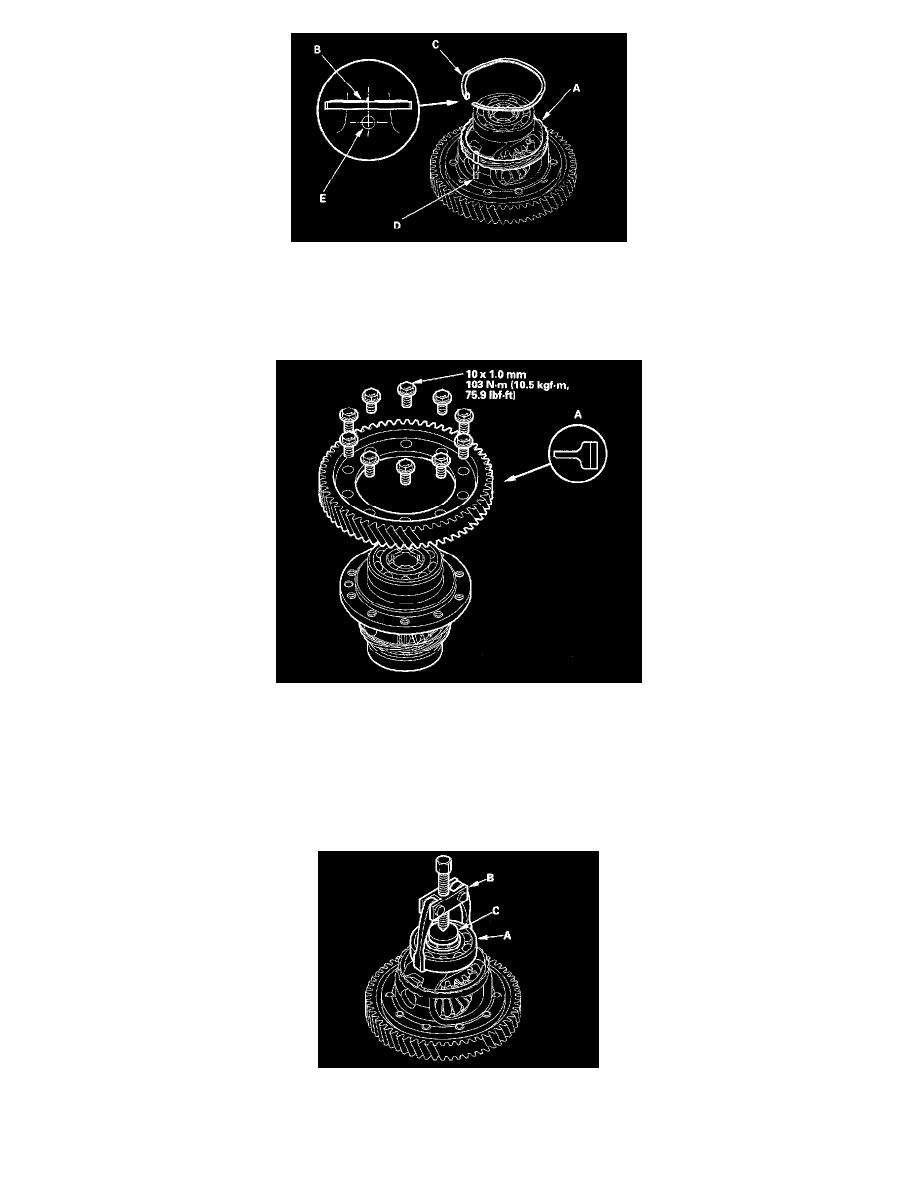
6. Install the speedometer drive gear (A) with its chamfered side facing the carrier.
7. Align the hooked end (B) of the snap ring (C) with the spring pin (D) in the pinion shaft (E), then install the snap ring in the differential carrier
groove.
Final Driven Gear Replacement
1. Remove the final driven gear from the differential carrier. The final driven gear bolts have left-hand threads.
2. Install the final driven gear with the chamfered side on the inner bore (A) facing the differential carrier.
3. Tighten the bolts to 103 Nm (10.5 kgf-cm, 75.9 ft. lbs.) in a crisscross pattern.
Carrier Bearing Replacement
Special Tools Required
Driver 40 mm I.D. 07746-0030100
1. Remove the bearings (A) with a commercially available bearing puller (B) and stepper adapter (C).