
Civic CVCC L4-1488cc 1.5L EW1, EW3 (1985)
5.
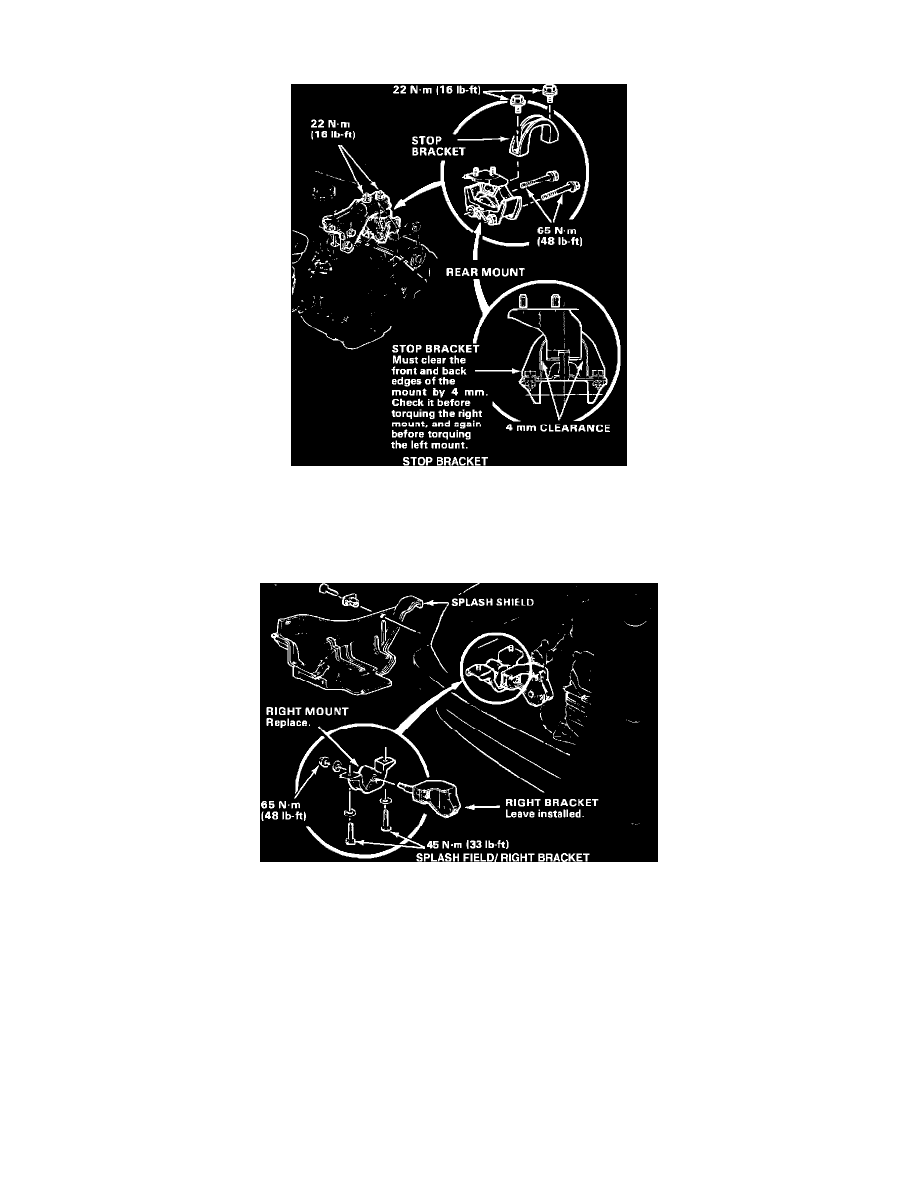
Remove the two nuts and two bolts from the rear mount, then raise the engine slightly and remove the mount.
STOP BRACKET
6.
Transfer the stop bracket from the old rear mount to the new one, and torque its bolts to 22 N-m (16 ft.lbs).
7.
Install the new rear mount and torque its two bolts to 65 N-m (47 ft.lbs); torque the two nuts to 22 N-m (16 ft.lbs).
SPLASH SHIELD/RIGHT BRACKET
8.
Remove the right splash shield (metal screws, and plastic screws in expansion clips).
9.
Remove the nut from the stud on the right mount bracket. Then remove the two bolts holding the mount itself to the frame. Lower the engine as
necessary, and slide the mount off the stud.
10.Install the new right mount and tighten its bolts and nut so they're just snug. Then, from under the car, make sure the stop bracket on the rear mount
has 4 mm clearance around it as shown in step 5. If it doesn't, pry the engine forward or back as necessary to get as close to 4 mm as possible. Then
torque the two bolts in the right mount to 45 N-m (33 ft.lbs).
11.
Remove the jack or hoist from the engine.
NOTE:
If you aren't replacing the left mount, skip steps 13 and 14.
12.
Torque the nut on the end of the right mount to 65 N-m (48 ft.lbs). Then reinstall the splash shield.
13.
Again make sure the stop bracket in the rear mount has 4 mm clearance around it. If it doesn't, pry against the left mount as shown to move it