Civic LX Sedan L4-1668cc 1.7L SOHC MFI (2001)

Mainshaft: Testing and Inspection
Mainshaft Inspection
Mainshaft Inspection
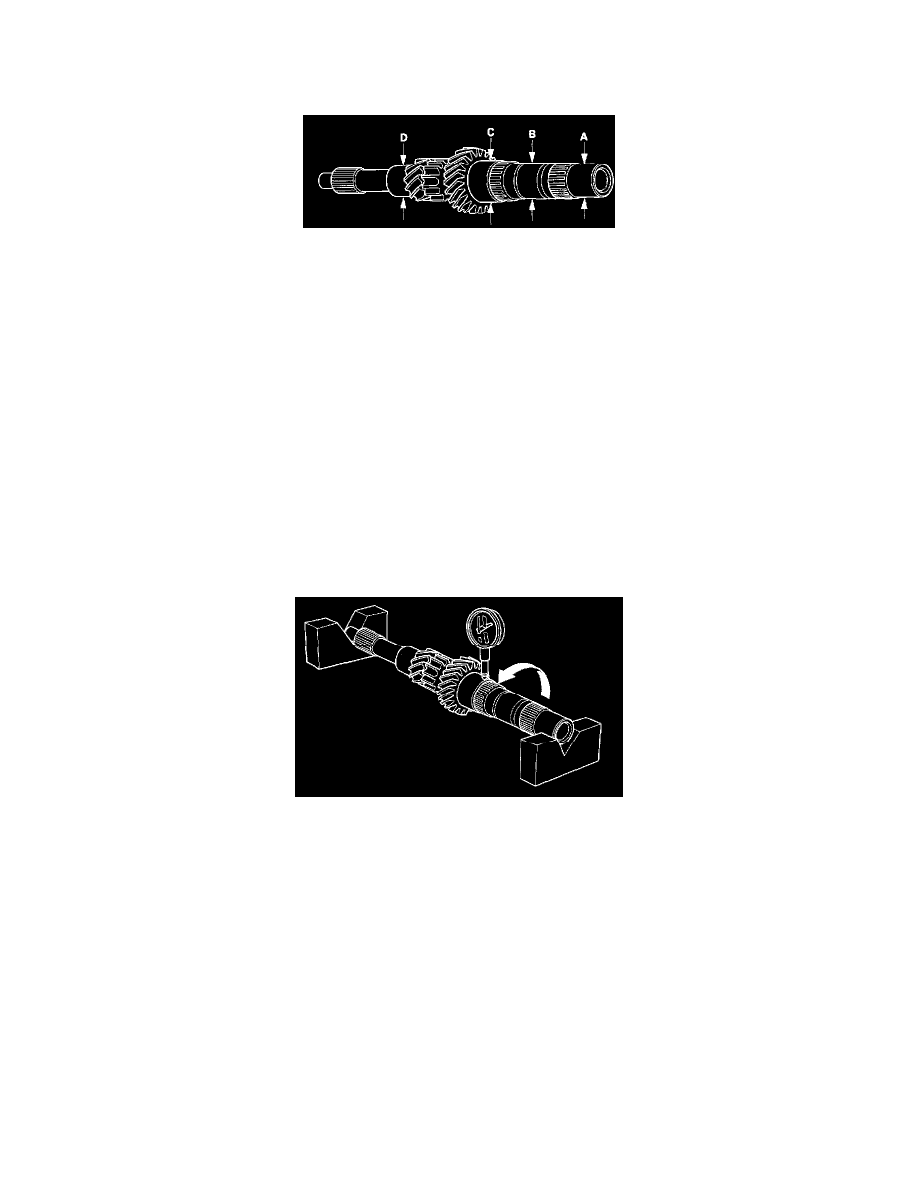
1. Inspect the gear surface and bearing surface for wear and damage, then measure the mainshaft at points A, B, and C. If any part of the mainshaft is
less than the service limit, replace it with a new one.
Standard:
A (Ball bearing surface):
25.987-26.000 mm (1.0231-1.0236 in.)
B (Spacer collar surface):
'01 model: 28.980-28.993 mm (1.1409-1.1415 in.)
'02 model: 28.992-29.005 mm (1.1414-1.1419 in.)
C (Needle bearing surface):
34.984-35.000 mm (1.3773 - 1.3780 in.)
D (Ball bearing surface):
25.977-25.990 mm (1.0227-1.0232 in.)
Service Limit:
A: 25.93 mm (1.021 in.)
B:'01 model: 28.93 mm (1.139 in.)
'02 model: 28.94 mm (1.139 in.)
C: 34.93 mm (1.375 in.)
D: 25.92 mm (1.020 in.)
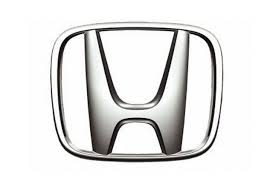
2. Inspect the runout by supporting both ends of the mainshaft. Rotate the mainshaft two complete revolutions when measuring the runout. If the
runout is more than the service limit, replace the mainshaft with a new one.
Standard: 0.02 mm (0.001 in.) max.
Service Limit: 0.05 mm (0.002 in.)
