
CR-V EX 4WD L4-1972cc 2.0L DOHC MFI (2000)
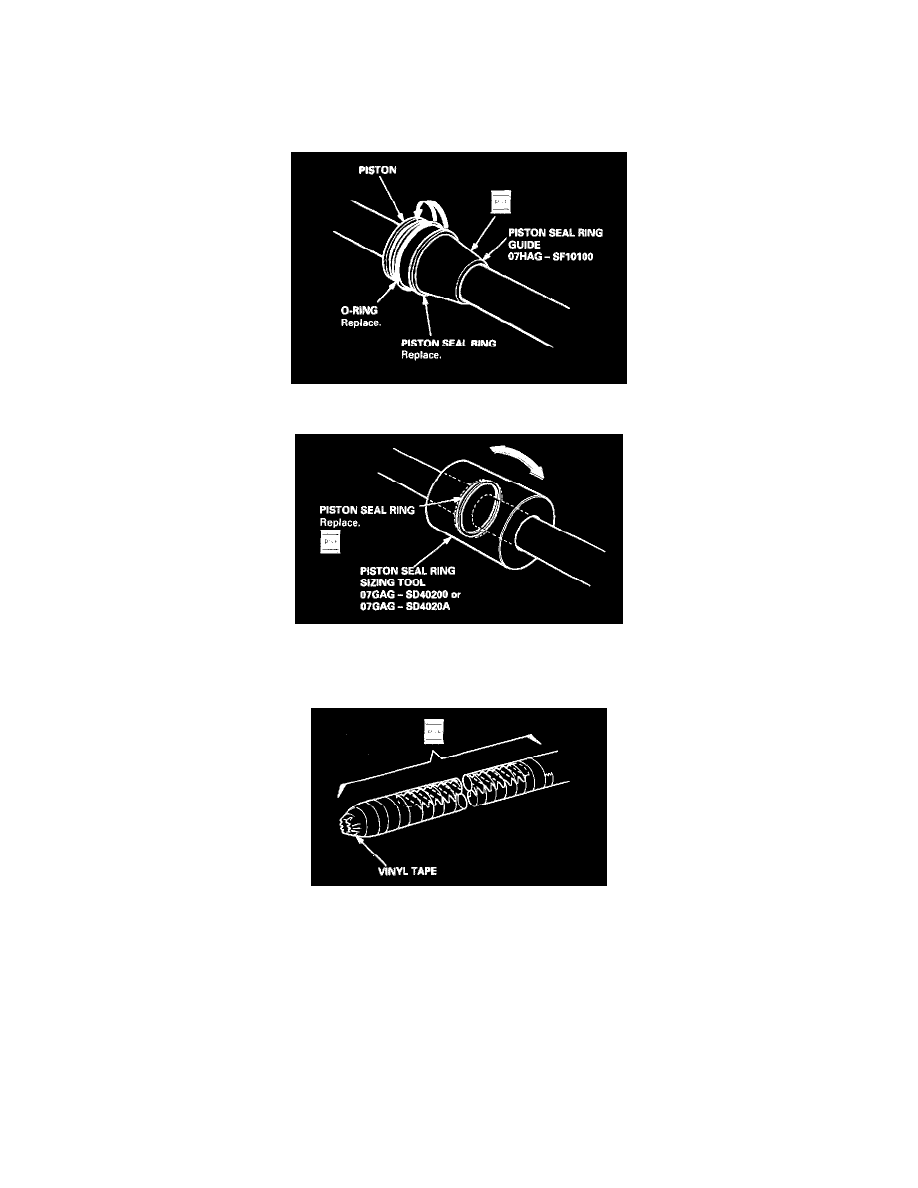
25. Coat the piston seal ring guide with power steering fluid, then slide it onto the rack, big end first.
26. Position the new O-ring and new piston seal ring on the special tool, then slide them down toward the big end of the tool.
Note these items during reassembly:
-
Do not over expand the resin seal rings. Install the resin seal rings with care so as not to damage them. After installation, be sure to contract the
seal ring using the special tool (sizing tool).
-
Replace the piston's O-ring and seal ring as a set.
27. Pull the O-ring off into the piston groove, then pull the piston seal ring off into the piston groove on top of the O-ring.
28. Coat the piston seal ring and the inside of the special tool with power steering fluid.
29. Carefully slide the tool onto the rack and over the piston seal ring.
30. Move the special tool back and forth several times to make the piston seal ring fit snugly in the piston.
31. Wrap vinyl tape around the rack teeth and rack end edges, then coat the surface of the tape with the power steering fluid. Make sure that the vinyl
tape is wrapped carefully so that there is no stepped portion.
32. Coat the inside surface of the new cylinder end seal with power steering fluid.