
CR-V EX 4WD L4-2.4L (2002)
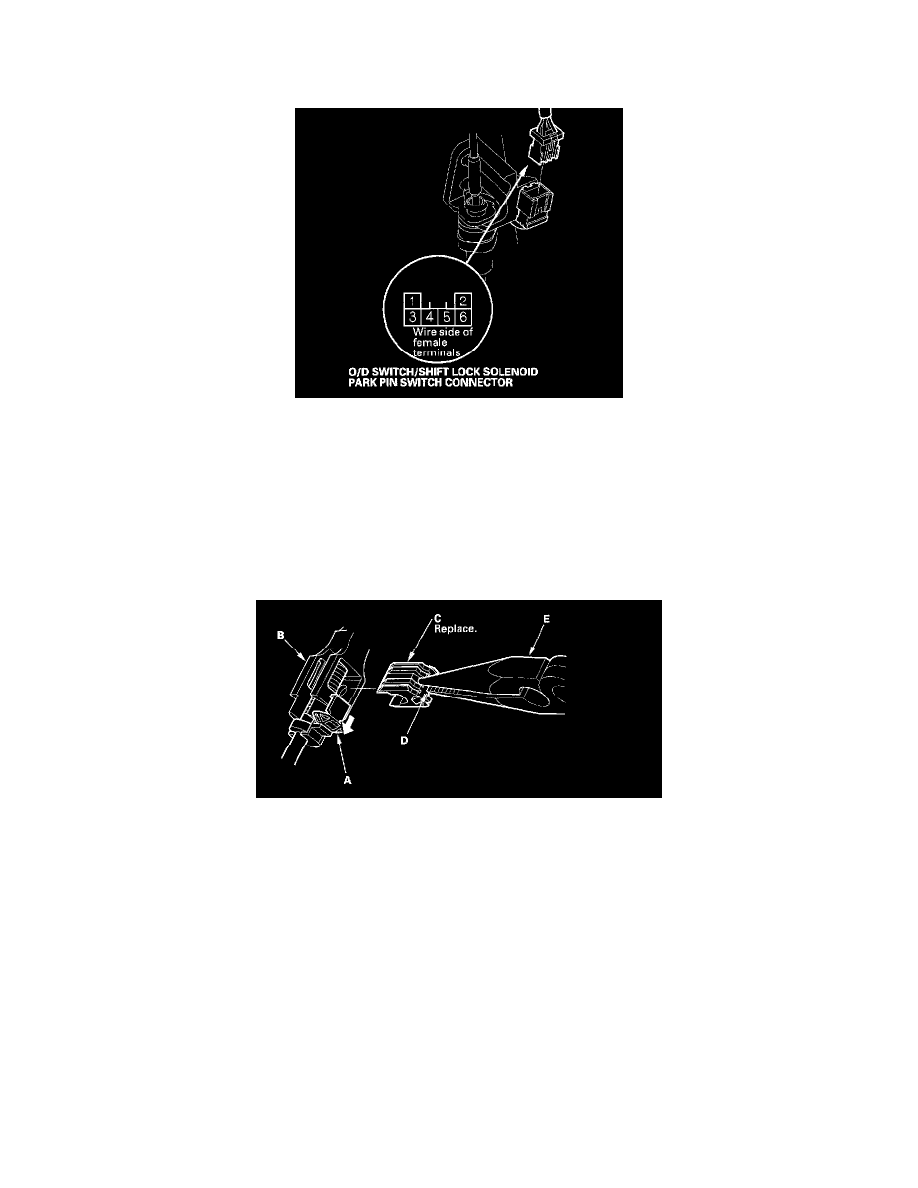
Shift Interlock Solenoid: Service and Repair
Shift Lock Solenoid Test/Replacement
1. Remove the driver's dashboard lower cover, and the instrument panel.
2. Disconnect the O/D switch/shift lock solenoid/park pin switch connector.
3. Connect the battery positive terminal to the No. 4 terminal of the O/D switch/shift lock solenoid/park pin switch connector, and connect the battery
negative terminal to the No. 3 terminal.
NOTE: Do not connect the battery positive terminal to the No. 3 terminal or you will damage the diode inside the solenoid.
4. Check that the shift lever can be moved from the P position. Release the battery terminals, move the shift lever back to P, and make sure it locks. If
the shift lock solenoid works properly, connect the connector and install the removed parts. If the shift lock solenoid is faulty, go to step 5 for
replacement.
5. Shift the shift lever to the R position.
6. Slide the lock tab (A) down on the shift cable end holder (B).
7. Grasp the shift cable lock (C) in the middle (D) with needle-nose pliers (E), and remove it from the shift cable end and shift cable end holder.
NOTE: Do not pry the shift cable lock with a screwdriver, it may damage the shift cable end holder.
8. Separate the shift cable end from the shift cable end holder.