
CR-V LX 2WD L4-1972cc 2.0L DOHC MFI (1998)
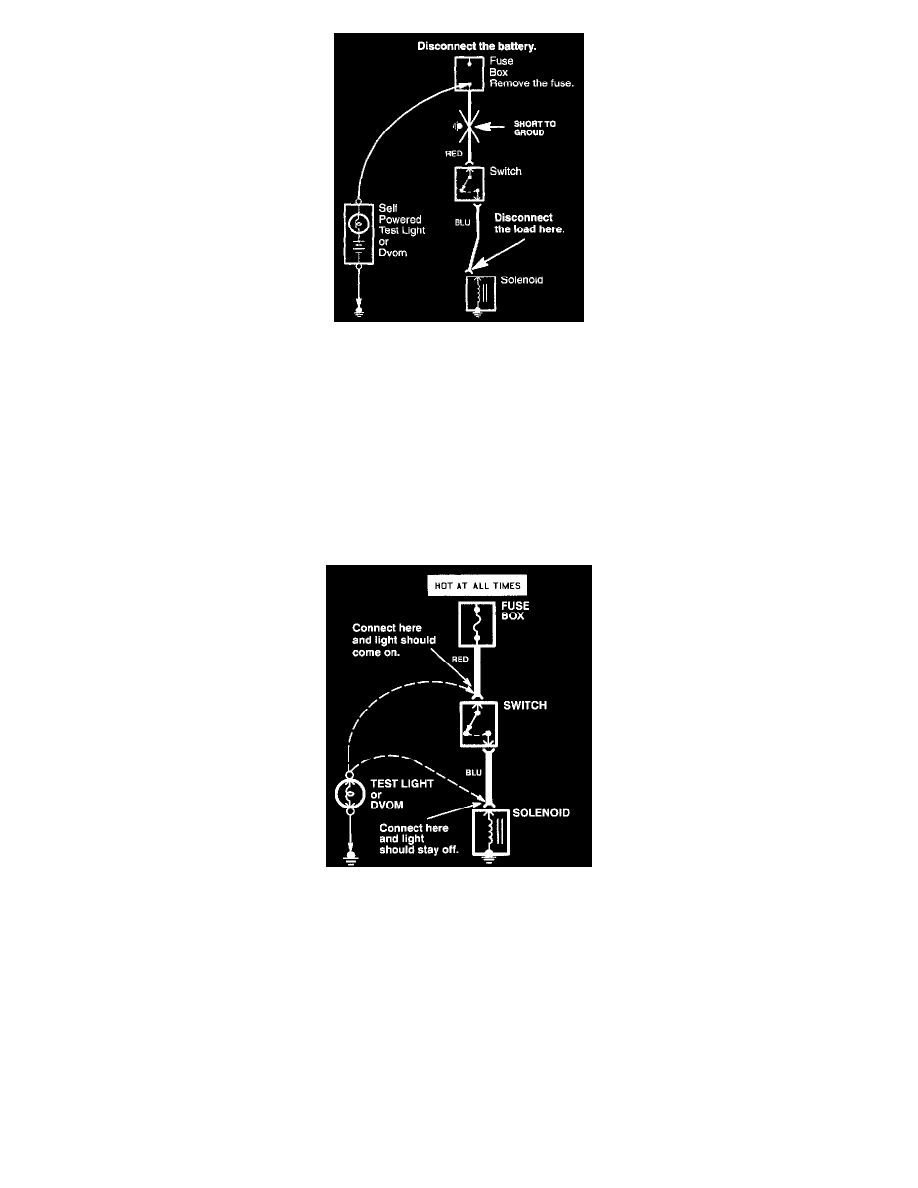
1. Remove the blown fuse and disconnect the battery and load.
2. Connect one lead of a self-powered test light or digital volt/ohmmeter (DVOM) (switched to the lowest "OHMS" range) to the fuse terminal on the
load side.
3. Connect the other lead to a known good ground.
4. Beginning near the fuse box, wiggle the harness. Continue this at convenient points about six inches apart while watching the test light or DVOM.
5. If the self-powered test light goes on or the DVOM displays a low reading or no reading (zero), there is a short to ground in the wiring near that point.
Testing For a Short With a Short Circuit Locator (Short Finder)
1. Remove the blown fuse. Leave the battery connected.
2. Connect the short finder across the battery terminals and the load (component) side of the fuse terminal.
3. Close all switches in the circuit you're testing.
4. Turn on the short finder. This creates a pulsing magnetic field around the wiring between the fuse box and the short.
5. Beginning at the fuse box, slowly move the short finder along the circuit wiring. The meter will show current pulses through sheet metal and body
trim. As long as the meter is between the fuse and the short, the needle will move with each current pulse. Once you move the meter past the point of the
short, the needle will stop moving. Check the wiring and connectors in this area to locate the cause of the short.
Testing For A Short With A Test Light or DVOM