
CR-V LX 2WD L4-1972cc 2.0L DOHC MFI (1998)
Seat Belt Retractor: Testing and Inspection
SRS components are located in this area. Review the SRS component locations, precautions, and procedures before preforming repairs or service
WARNING: To avoid accidental deployment and possible injury, always disconnect the seat belt tensioner connector before removing the
retractor.
1. Before installing the retractor, check that the seat belt can be pulled out freely.
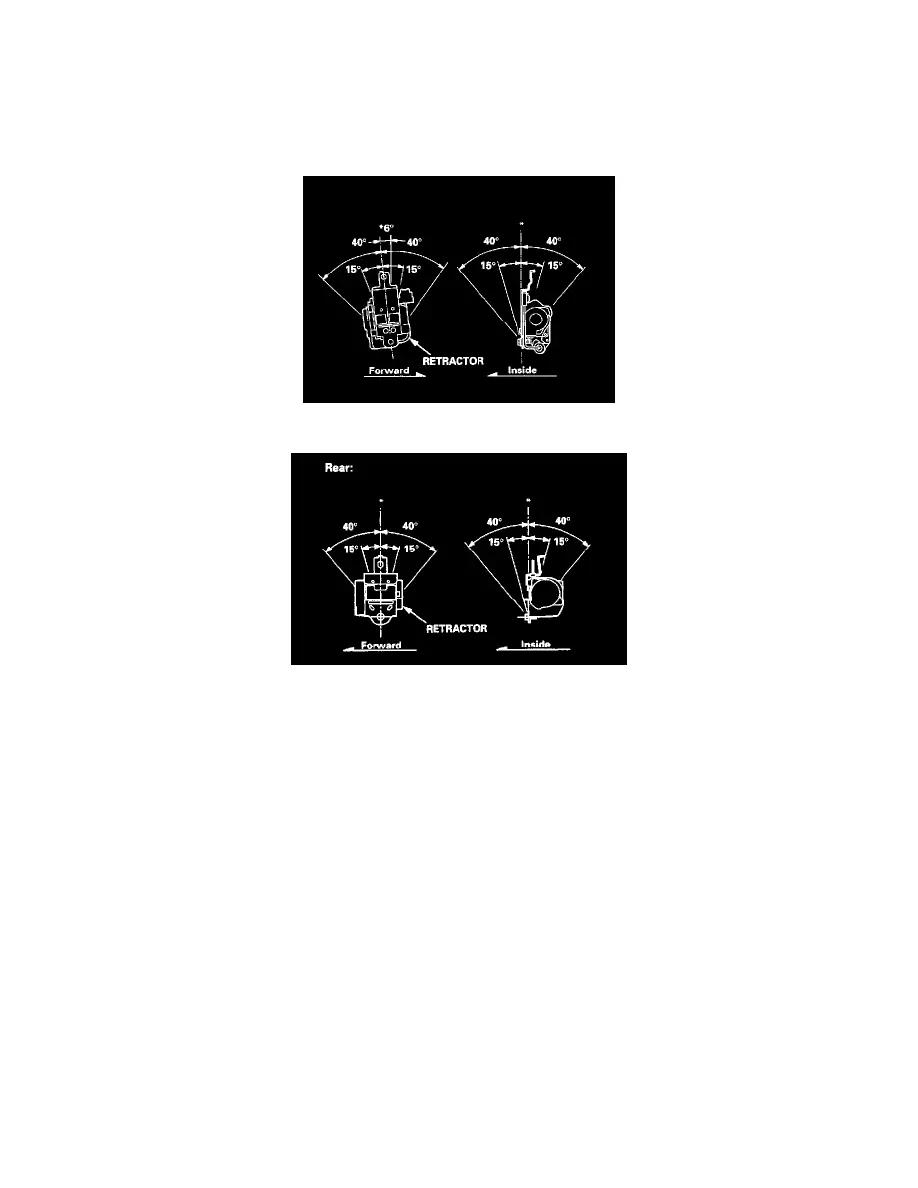
Retractor Positions
Retractor Positions
2. Make sure that the seat belt does not lock when the retractor is leaned slowly up to 150 from the mounted position. The seat belt should lock when
the retractor is leaned over 400.
CAUTION: Do not attempt to disassemble the retractor.
3. Replace the seat belt with a new assembly if there is any abnormality. Do not disassemble any part of the seat belt for any reason.
3. Replace the seat belt with a new assembly if there is any abnormality. Do not disassemble any part of the seat belt for any reason.