CR-V LX 2WD L4-1972cc 2.0L DOHC MFI (1998)

Shifter A/T: Service and Repair
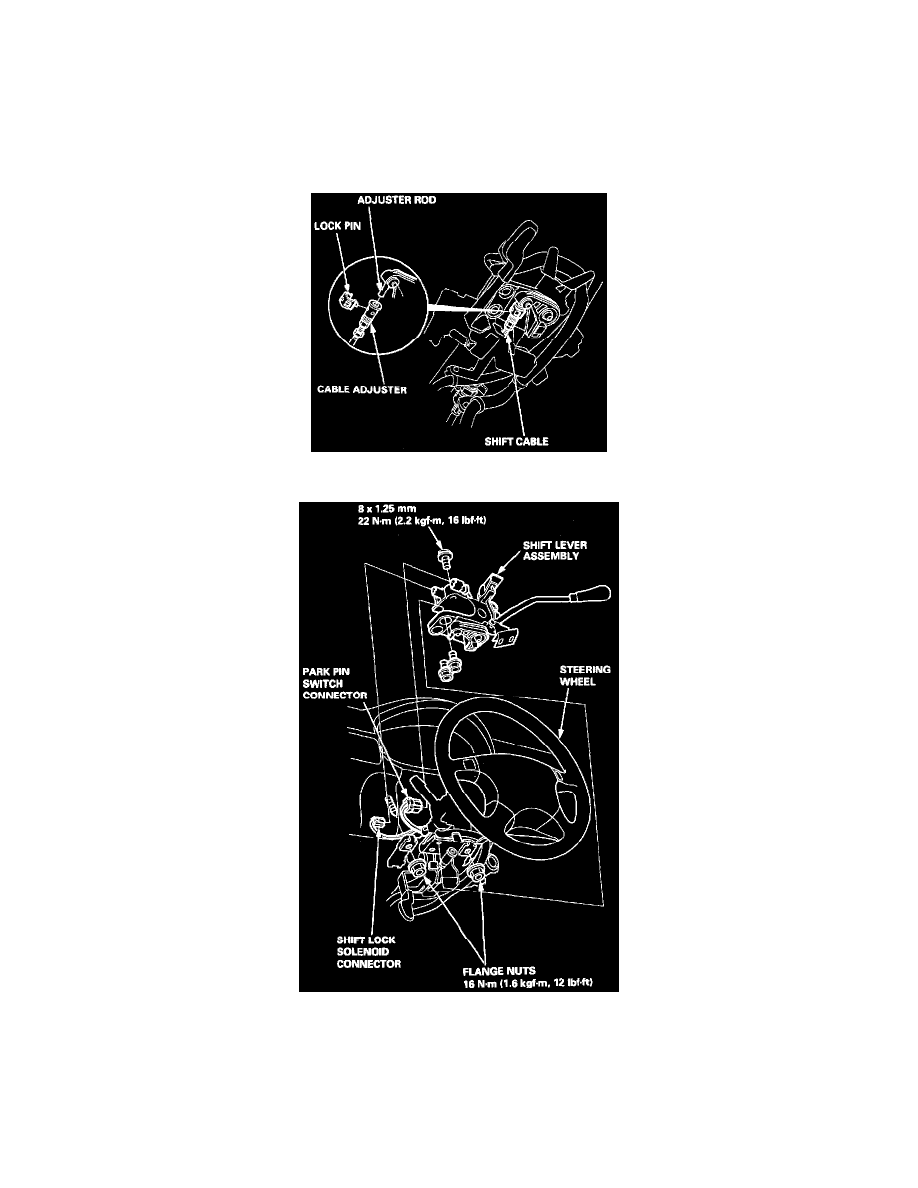
REMOVAL/INSTALLATION
SRS components are located in this area. Review the SRS component locations, precautions, and procedures in the SRS section before performing
repairs or service.
1. Remove the instrument panel lower cover and the column covers.
2. Shift-to [N] position, then remove the lock pin from the cable adjuster.
3. Separate the shift cable from the cable adjuster. Do not bend the shift cable excessively.
4. Remove the flange nuts and bolts securing the steering column, then lower the steering column.
5. Disconnect the shift lock solenoid and the park pin switch connector.
6. Remove the bolts securing the shift lever assembly, then remove the shift lever assembly.
7. Install the shift lever assembly in the reverse order of removal.
NOTE:
^
Make sure the lock pin is seated securely in the cable adjuster.
^
Replace the lock pin if it does not snap over the cable adjuster securely.
