CR-V LX 2WD L4-1972cc 2.0L DOHC MFI (1998)

8. Remove the cotter pin from the lower arm ball joint castle nut, and remove the nut.
9. Install a 12 mm hex nut on the ball joint. Be sure that the hex nut is flush with the ball joint pin end, or the threaded section of the ball joint pin
might be damaged by the special tool.
10. Use the special tool to separate the ball joint and lower arm. Be careful not to damage the ball joint boot. If necessary, apply penetrating type
lubricant to loosen the ball joint.
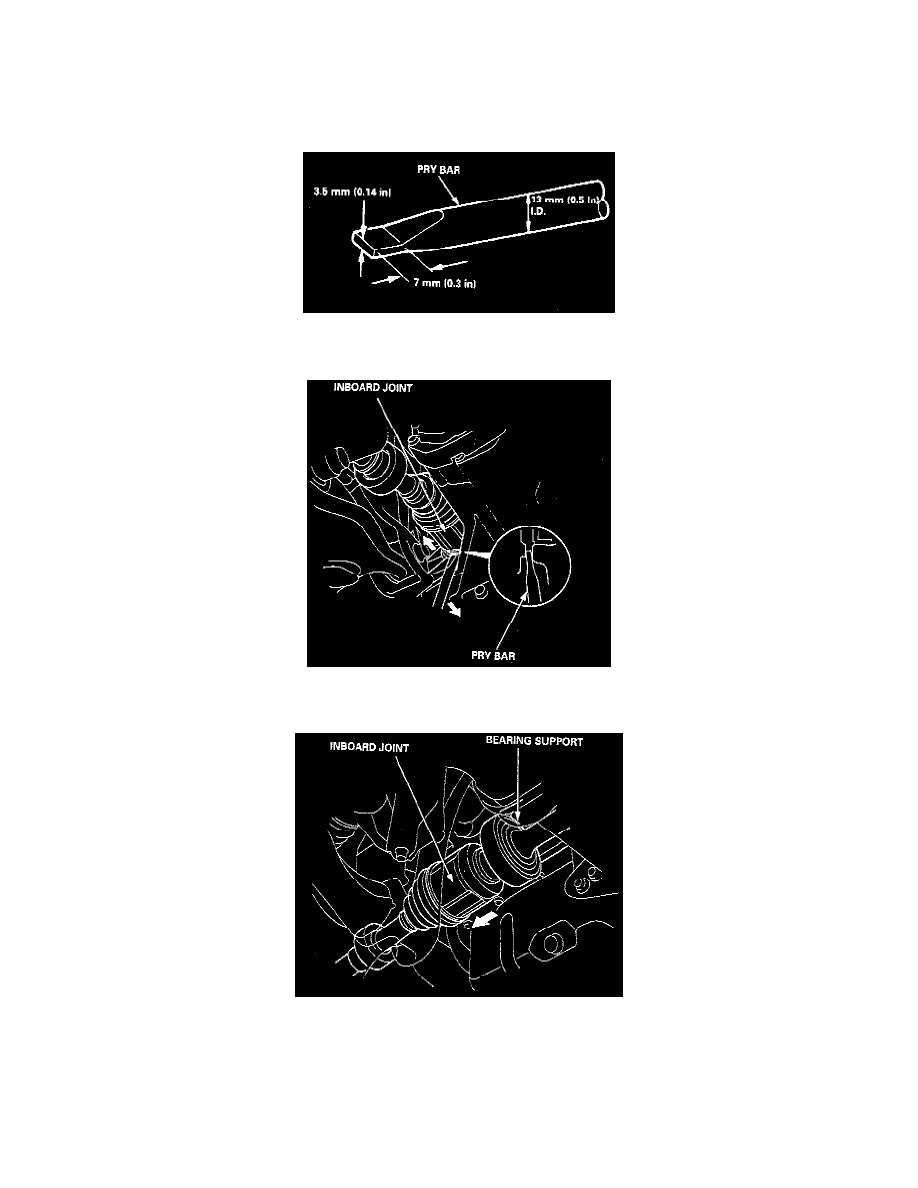
11. Pry the driveshaft assembly with a pry bar, as shown, to force the set ring at the driveshaft end past the groove. Be careful not to damage the oil
seals when prying.
12. Pull the inboard joint, and remove the driveshaft from the differential case or bearing support as an assembly. Do not pull on the driveshaft, the
inboard joint may come apart. Pull the driveshaft straight out to avoid damaging the differential oil seal or the intermediate shaft outer seal.
NOTE: Left driveshaft - Remove the left driveshaft from the bearing support by tapping on the inboard joint of the driveshaft with a plastic
hammer.
