
CR-V LX 4WD L4-2.4L (2002)
Windshield Moulding / Trim: Service and Repair
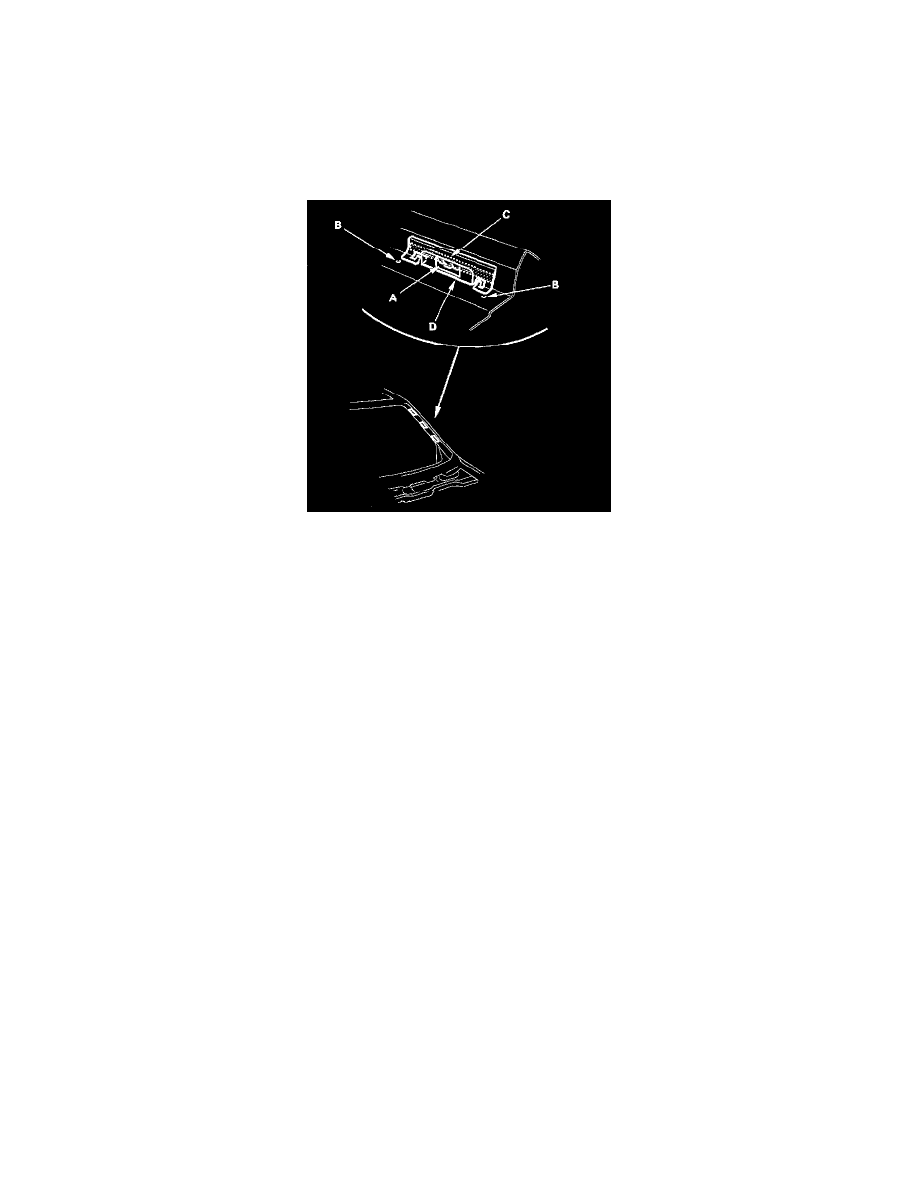
Side Windshield Trim Retainer Replacement
Side Windshield Trim Retainer Replacement
NOTE:
-
Take care not to scratch the body.
-
When heating the body with a dryer, be careful not to get it too hot. Heat it gradually to prevent damage to the paint.
-
Remove the plastic parts, and/or protect them from the heat with aluminum foil.
1. While heating the retainer (A) to 212-248 °F (100 -120 °C) with a dryer, gently pull it away from the body with pliers.
2. With a putty knife, scrape the remaining adhesive tape from the bonding surface while heating it with a dryer.
3. Clean the bonding surface with a sponge dampened in alcohol. Make sure the bonding surface is kept free or water, oil and grease.
4. Peel the adhesive backing away from the double-sided adhesive tape on new retainer.
5. Line up the retainers with the alignment marks (B) on the body, and attach the retainers with the adhesive tape (C).
6. Apply two-part epoxy adhesive (D) around the edge of the retainers as shown.