
Del Sol L4-1.5L SOHC (1993)
^
If the seals are flush, go to step 4.
^
If the seals are not flush, go to step 2.
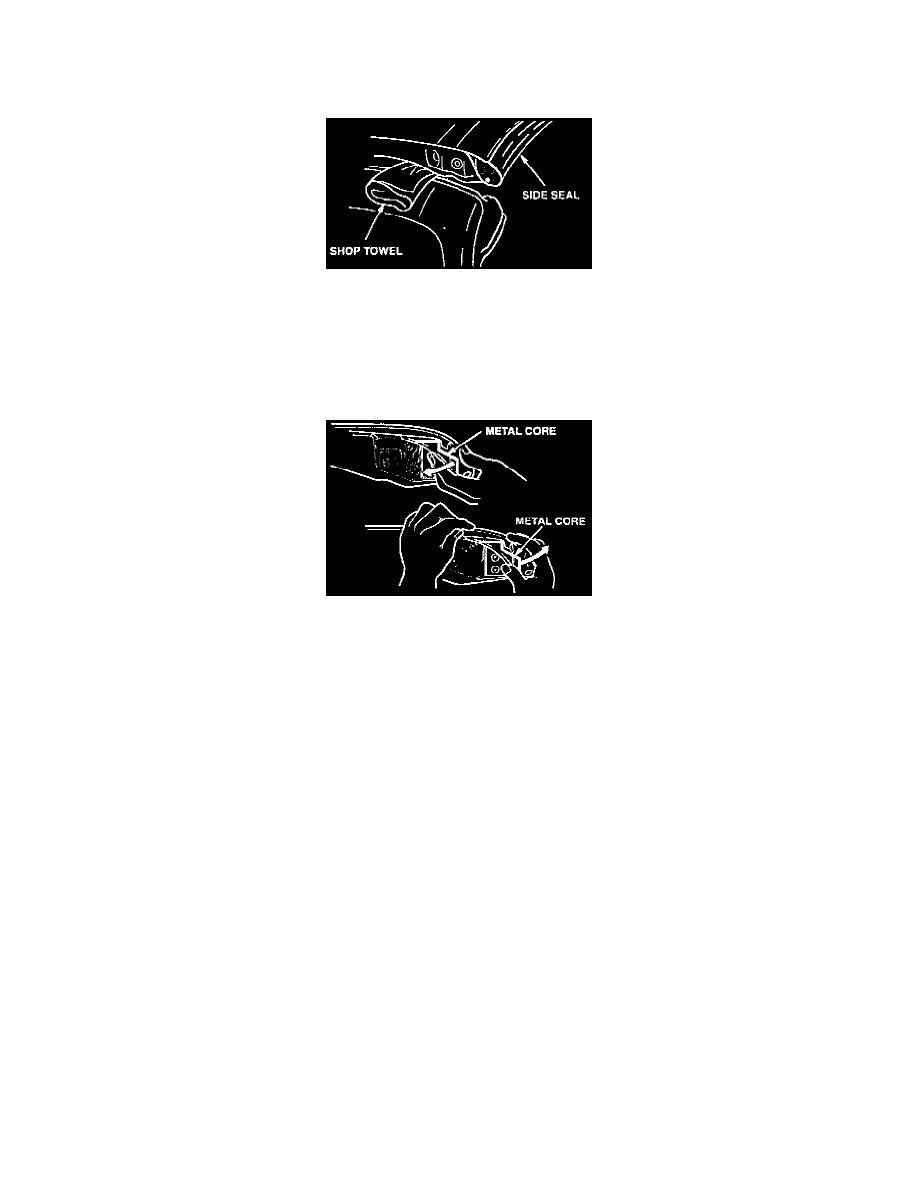
2.
Leave the doors open. Unlock both sides of the roof, then lift its front edge, and place a folded shop towel under it so you'll have access to the end
of the side seal.
3.
Adjust the end of the side seal to make it flush with the "A" pillar seal:
^
New type side seals: (Cars made in May 1994 and later, and some earlier repaired cars.) These seals have slotted screw holes in their end
brackets. To adjust the end of the seal, loosen the screws and reposition it flush with the "A" pillar seal, then tighten the screws.
^
Original side seals: (Cars made before May 1994.) Adjust the end of the side seal by carefully bending its metal core in or out as needed to
make it flush with the "A" pillar seal. After the adjustment, remove the towel, lock the roof, and check the fit. Repeat until the fit is flush.
COMPRESSION OF SIDE SEAL TO "A" PILLAR SEAL
4.
Check that the end of the side seal fits tightly against the "A" pillar seal. If the fit is too loose (or too light, deforming the seal). adjust the side seal
and, if necessary, the "A" pillar seal.
Side Seal: Pull the middle of the seal out of its retainer, then stretch the seal to the position you want, and hold it there while you push it back into
the retainer.
^
"A" Pillar Seal: If repositioning the side seal doesn't correct the fit, then carefully pull the upper outside corner of the "A" pillar seal away from
the pillar (the butyl adhesive will stick to the seal). Then move or "stretch" the seal into the position you want.