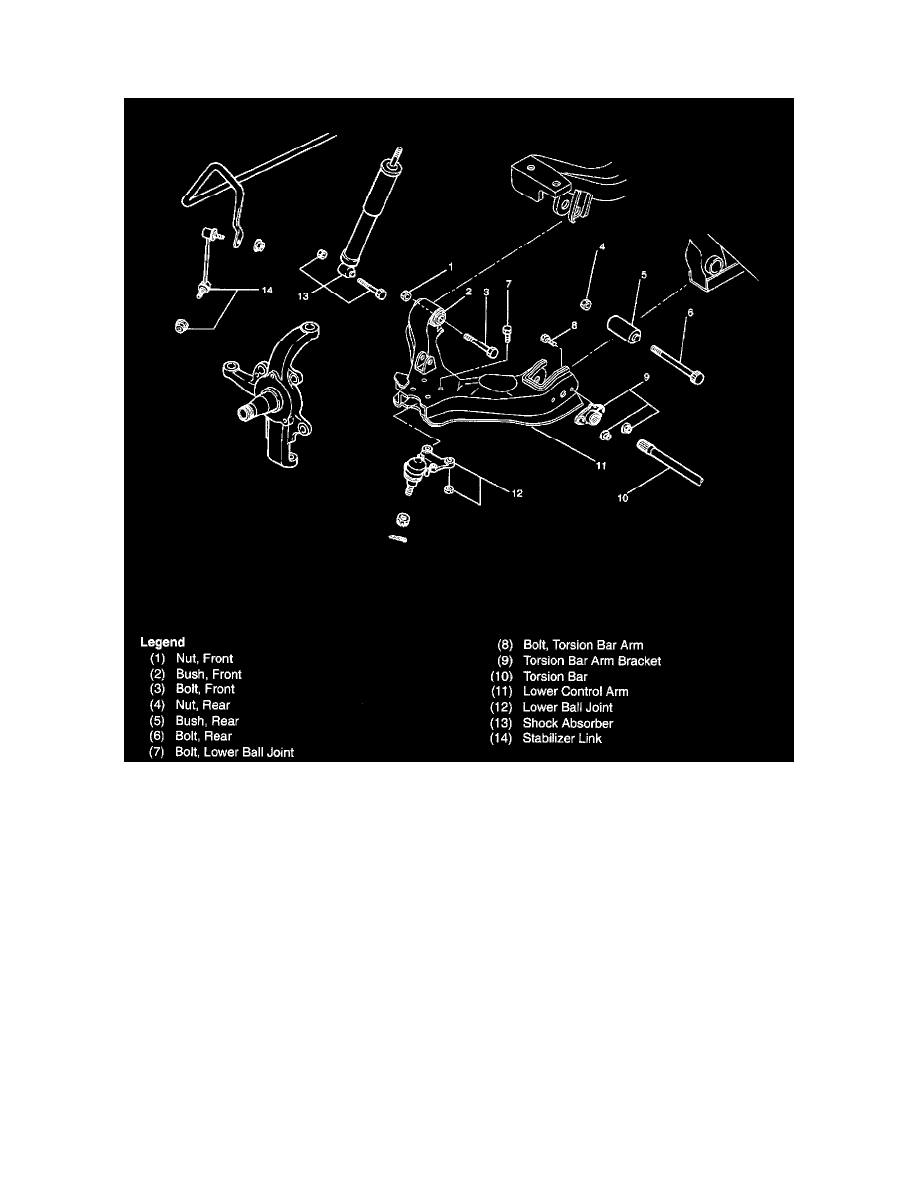
Passport LX 4WD V6-3165cc 3.2L DOHC MFI (2001)

Control Arm: Service and Repair
Lower Arm
REMOVAL
1. Raise the vehicle and support the frame with suitable safety stands.
2. Remove wheel and tire assembly.
3. Remove the tie-rod end from the knuckle.
4. Remove the retaining ring from the front axle driving shaft to release the shaft from hub (Except 2WD model).
5. Support lower control arm with a jack.
6. Remove front nut.
7. Remove rear nut.
8. Remove torsion bar.
9. Remove torsion bar arm bracket.
10. Disconnect the stabilizer link at the lower control arm.
11. Remove the shock absorber lower end from the lower control arm.
12. Remove the lower ball joint from the lower control arm.
13. Remove front bolt.
14. Remove rear bolt.
15. Remove lower control arm.
16. Remove torsion bar arm bolt.
17. Remove lower ball joint bolt.
