
Pilot V6-3.5L (2004)
Trim Panel: Service and Repair
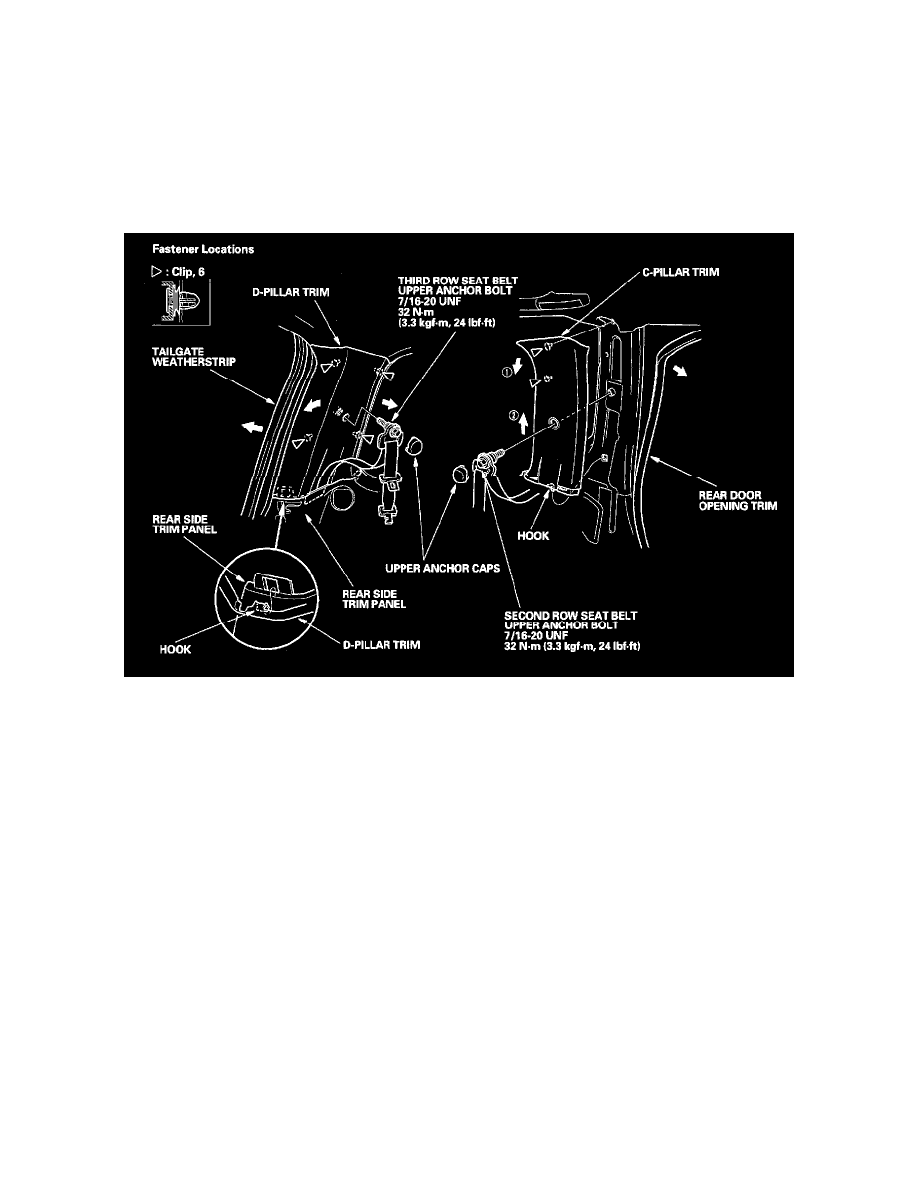
Trim Removal/Installation - Rear Side Pillar Area
Trim Removal/Installation - Rear Side Pillar Area
NOTE:
-
Put on gloves to protect your hands.
-
When prying with a flat-tip screwdriver, wrap it with protective tape to prevent damage.
-
Take care not to bend or scratch the trim and panels.
1. Remove the trim as shown. To remove the C-pillar trim, remove the upper portion of the rear side trim panel as necessary.
2. Install the trim in the reverse order of removal, and note these items:
-
Replace any damaged clips.
-
Push the clips into place securely.
-
Apply liquid thread lock to the upper anchor bolts before installation.
-
When installing the rear side trim panel, make sure there are no pinches in the seat belts.
-
Before installing the anchor bolts, make sure there are no twists or kinks in the seat belts.