Pilot V6-3.5L (2004)

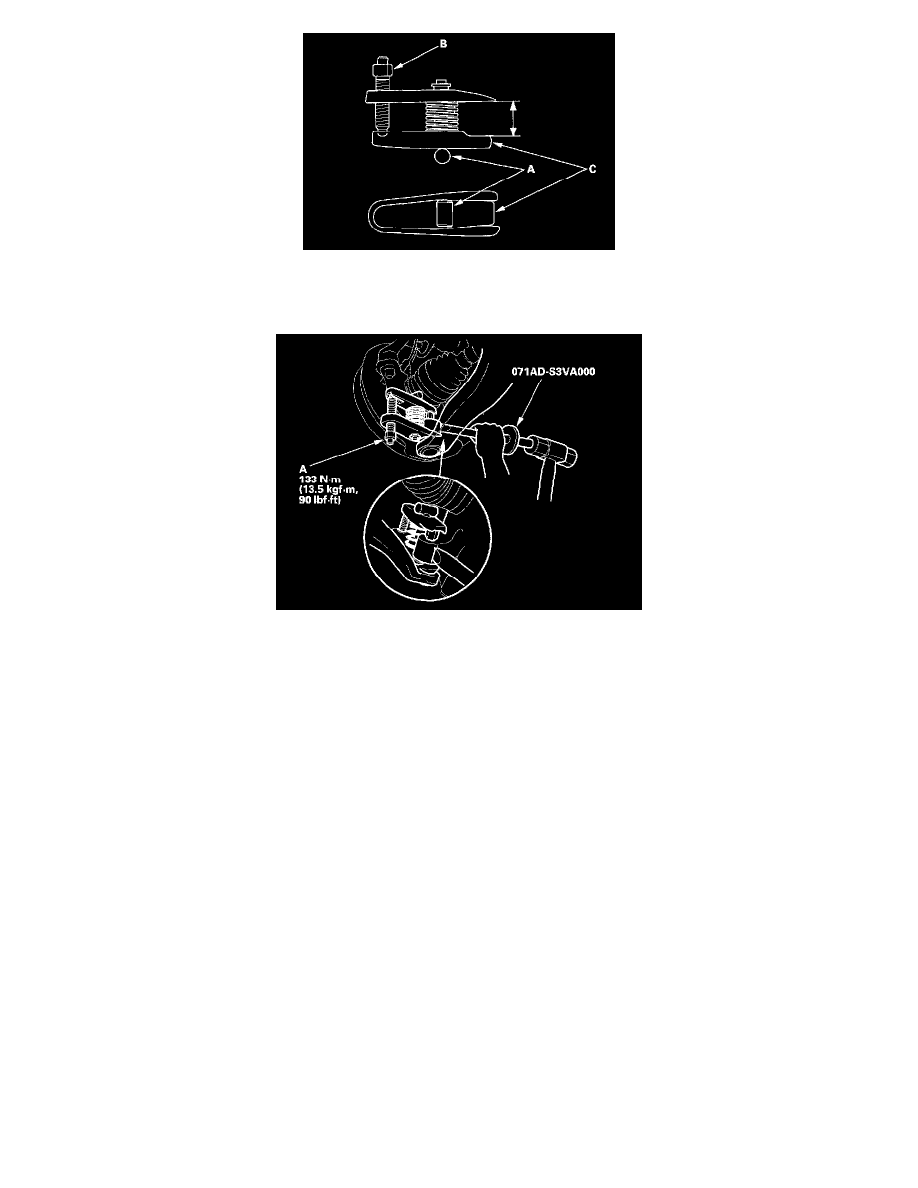
4. Once the special tool is in place, turn the adjusting bolt (A) as necessary to make the jaws parallel. Then hand-tighten the pressure bolt (B), and
recheck the jaws to make sure they are still parallel.
5. After making the adjustment to the adjusting bolt, make sure the head of the adjusting bolt (A) is in this position to the allow the jaw (C) to pivot.
6. Tighten the pressure bolt (A) to 133 Nm (13.5 kgf-m, 90 ft. lbs.). If the ball joint does not pop loose, strike the side of the knuckle with a hammer
and the special tool to dislodge the ball joint.
7. Remove the tool. Then remove the thread protector from the end of the ball joint, and pull the ball joint out of the steering/suspension arm. Inspect
the ball joint boot, and replace it if damaged.
