
Pilot 2WD V6-3.5L (2006)
Starter Motor: Service and Repair
Removal and Installation
Starter Removal and Installation
Removal
1. Make sure you have the anti-theft codes for the radio, and the navigation system, then write down the customer's audio presets.
2. Disconnect the negative cable from the battery first, then disconnect the positive cable.
3. Remove the battery.
4. Remove the automatic transmission fluid (ATF) dipstick.
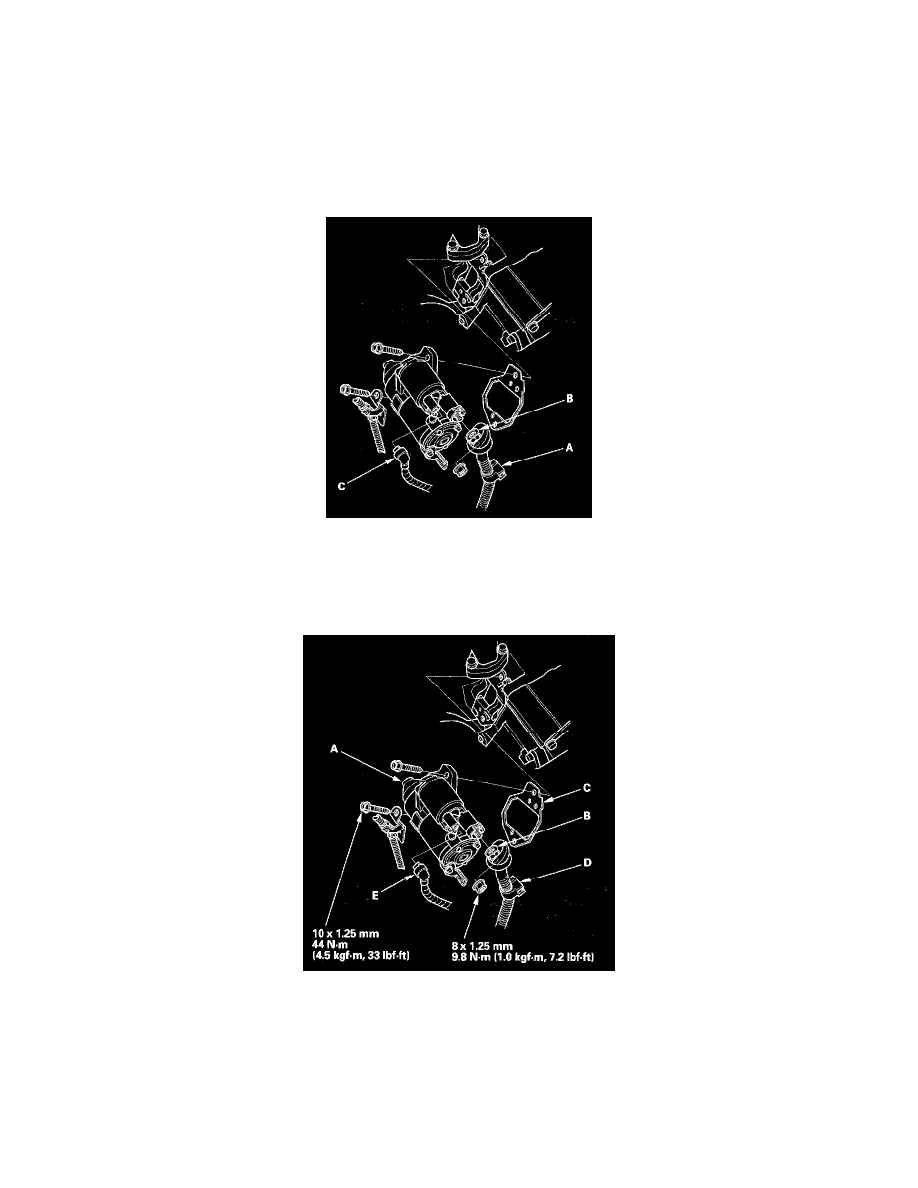
5. Remove the harness clamp (A).
6. Disconnect the starter cable (B) from the B terminal, then disconnect the BLK/WHT wire (C) from the S terminal.
7. Remove the two bolts holding the starter.
Installation
1. Install the starter (A) using a new gasket (C), then install the harness clamp (D), and connect the B terminal and BLK/WHT wire (E). Make sure
the crimped side of the B terminal is facing out.
2. Install the automatic transmission fluid (ATF) dipstick.
3. Connect the positive cable to the battery first, then connect the negative cable.
4. Start the engine to make sure the starter works properly.
5. Enter the anti-theft codes for the radio and the navigation system, then enter the customer's audio presets.
6. Do the power window control unit reset procedure.
7. Set the clock.