Pilot 4WD V6-3.5L (2008)

Shifter A/T: Removal and Replacement
Shift Lever Removal
Shift Lever Removal
SRS components are located in this area. Review the SRS component locations and the precautions and procedures in the SRS before doing repairs or
service.
1. Remove the steering column covers.
2. Remove the instrument panel.
3. Shift the transmission into the N position.
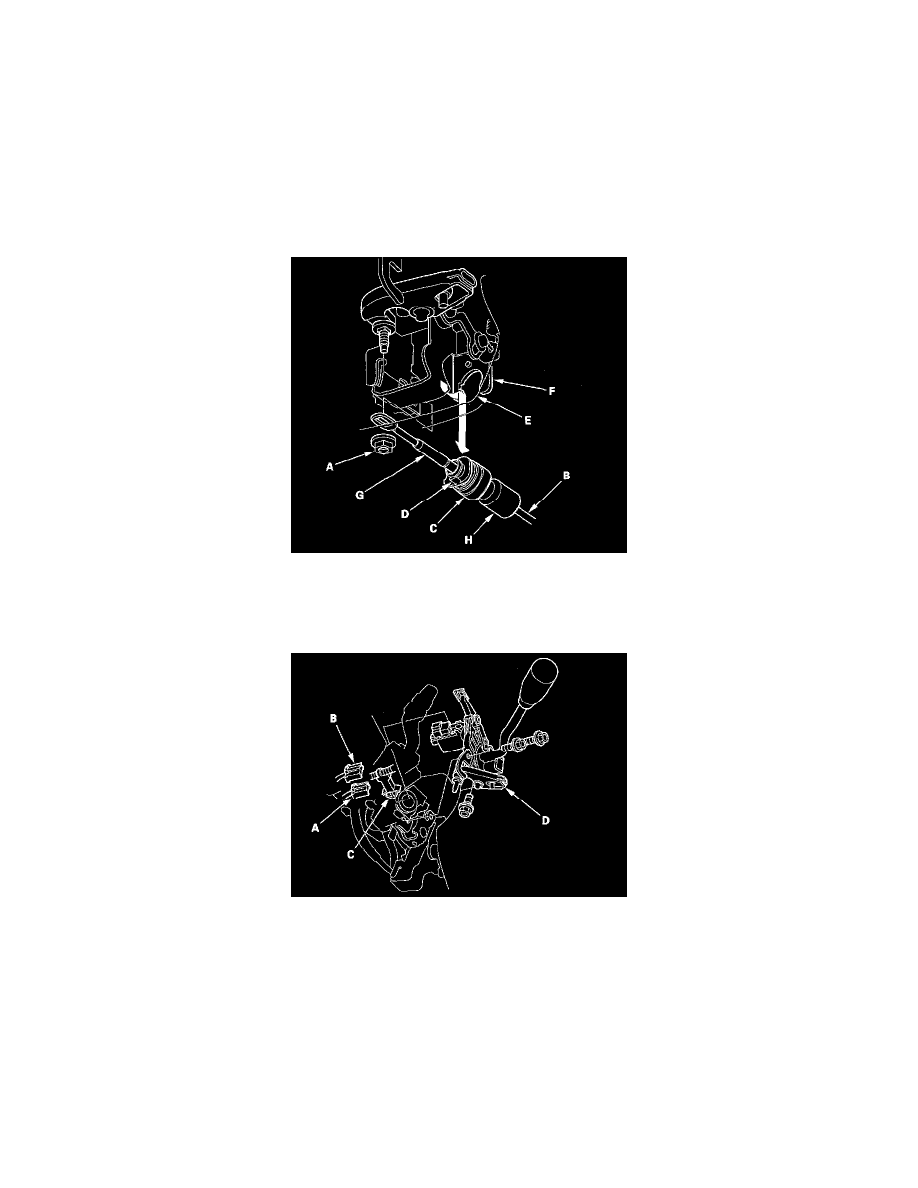
4. Remove the nut (A) securing the shift cable end, then separate the shift cable (B) from the shift lever.
5. Rotate the socket holder (C) on the shift cable a quarter turn; the tab (D) on the socket holder will be in the opening (E) of the socket holder
bracket (F). Then slide the holder to remove the shift cable from the socket holder bracket. Do not remove the shift cable by pulling the shift cable
guide (G) and damper (H).
6. Disconnect the shift lock solenoid connector (A) and park pin switch connector (B).
7. Remove the three bolts securing the shift lever assembly, remove the harness clamp (C), then remove the shift lever assembly (D).
Shift Lever Installation
Shift Lever Installation
SRS components are located in this area. Review the SRS component locations and the precautions and procedures in the SRS before doing repairs or
service.
1. Install the shift lever assembly (A) on the steering column, and install the harness clamp (B).
