
Prelude L4-1958cc SOHC (1988)
1.
Install the Wheel Alignment Gauge Attachments on the wheels.
NOTE:
Make sure the wheel hubs are clean and rust-free before installing the wheel alignment attachments.
2.
Install a camber/caster gauge on the Wheel Alignment Gauge Attachment and turn the wheel 20~ inward.
3.
Turn the adjust screw so that the bubble in the caster gauge is at 0~.
4.
Turn the wheel 20~ outward and read the caster on the gauge.
Caster angle:
2~ 20'+/- 30'
5.
If adjustment is required, record the caster reading and go to step 6. If adjustment is not required, go to step 12.
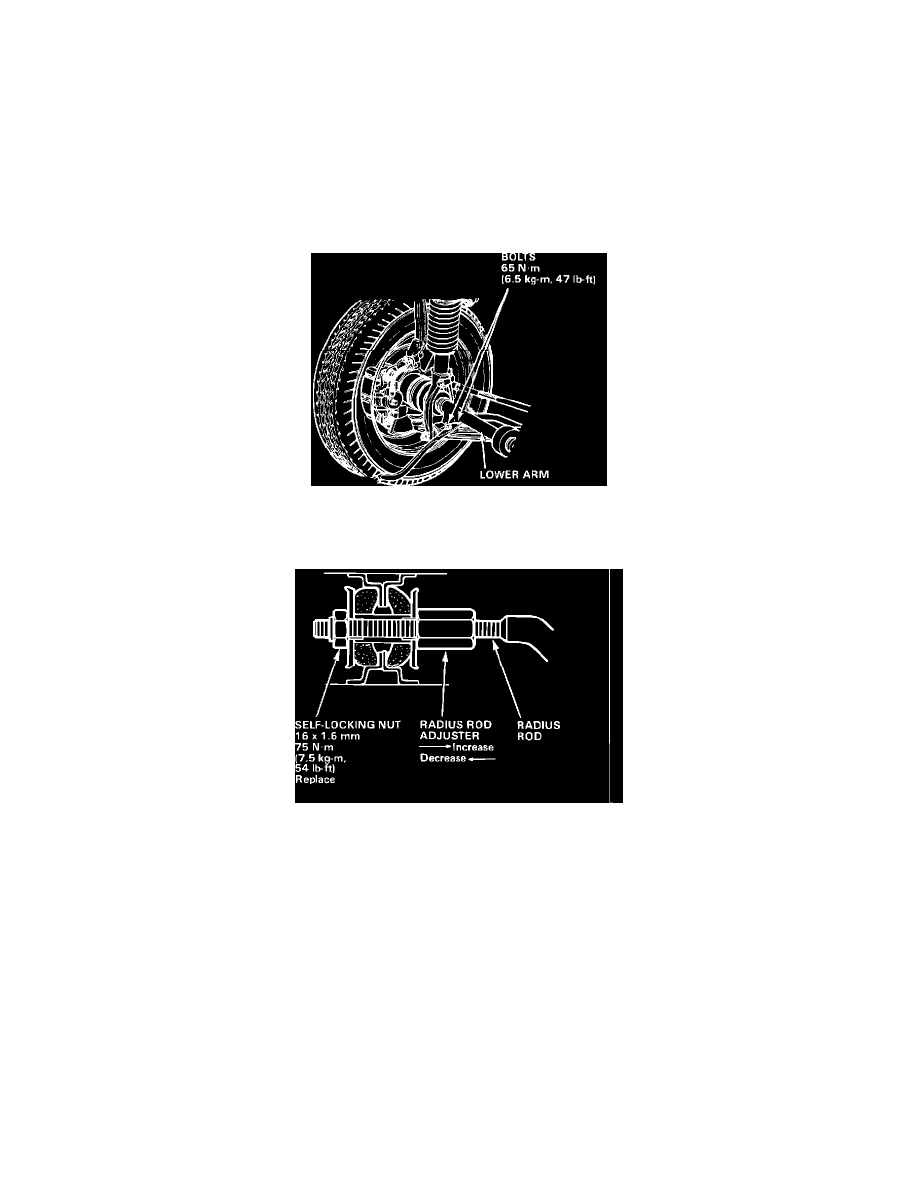
6.
Loosen the radius rod attaching bolts at the lower arm.
7.
Loosen the self-locking nut on the end of the radius rod.
8.
Adjust the caster by turning the radius rod adjuster as required.
To increase caster:
Turn the adjuster in.
To decrease caster:
Turn the adjuster out.
NOTE:
One full turn of the adjuster moves the radius rod 1.5 mm (0.06 in.) and changes the caster by 20'.
9.
Tighten the radius rod attaching bolts at the lower arm.
10.
Hold the radius rod adjuster nut in place and tighten the self-locking nut.
11.
Recheck the caster angle.