
Ridgeline V6-3.5L (2006)
Rear Bumper: Service and Repair
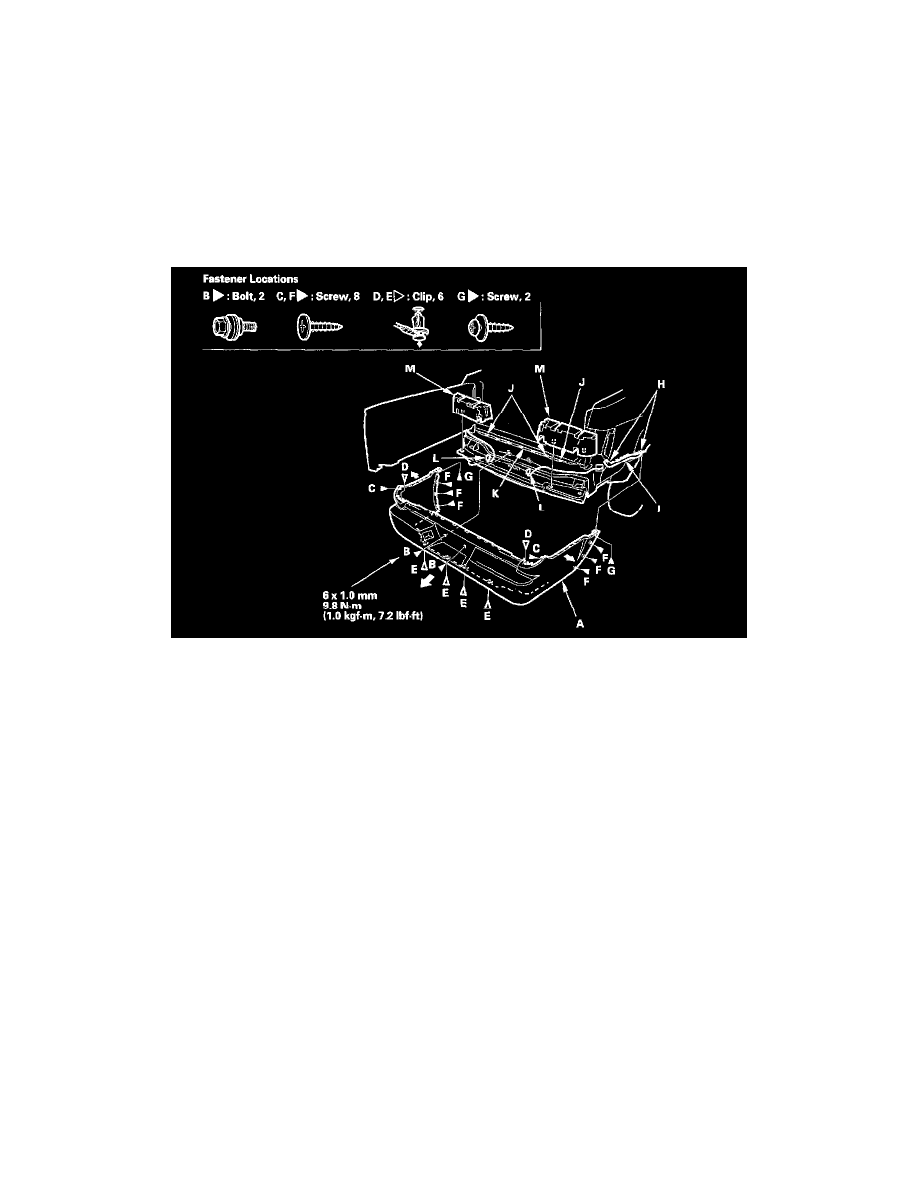
Rear Bumper
Rear Bumper Removal/Installation
NOTE:
-
Have an assistant help you when removing and installing the rear bumper.
-
Take care not to scratch the rear bumper and body.
-
Put on gloves to protect your hands.
1. Remove these items:
-
Taillight, both sides
-
Rear license plate
2. Remove the rear bumper (A).
1. Remove the bolts (B).
2. From the taillight areas, remove the screws (C) and clips (D).
3. From under the bumper, remove the clips (E).
4. Remove the screws (F, G), then pull the wheel arch portions of the bumper outward to release the bumper from the hooks (H) on the side
spacers (I).
5. With the help of an assistant, pull the bumper rearward to release the hooks (J) from the upper beams (K).
6. Disconnect the rear license light connectors (L).
7. Remove the rear bumper absorbers (M).
3. Install the bumper in the reverse order of removal, and note these items:
-
Make sure the rear license light connectors are plugged in properly.
-
Make sure the rear bumper engages the hooks (on the upper beams and both side spacers) on each side securely.
-
Replace any damaged clips.
-
Push the clips and hooks into place securely.