
Ridgeline V6-3.5L (2006)
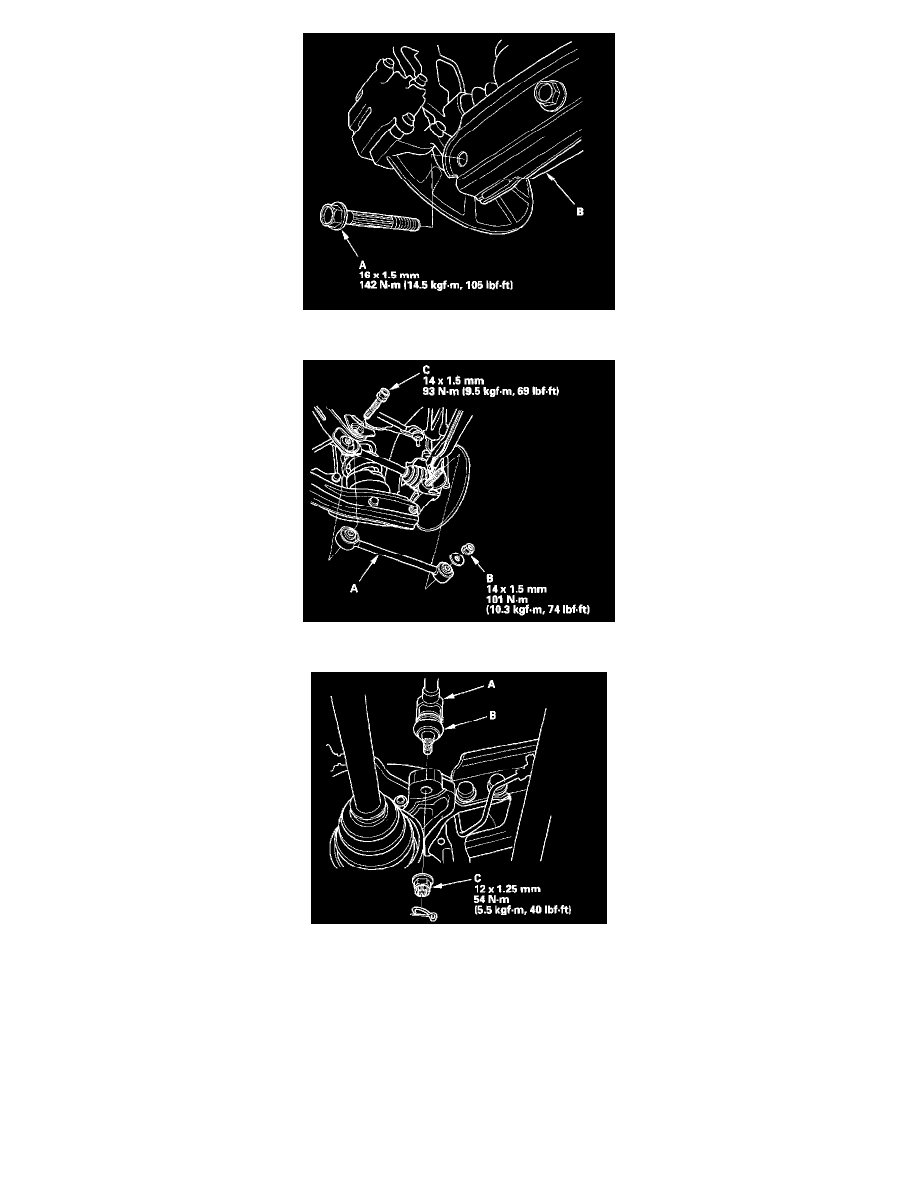
5. Install the flange bolt (A) onto lower arm (B).
6. install the lower arm A then install the flange bolt (A) and special self-locking nut (B).
7. Install the upper arm (A). Be careful not to damage the ball joint boot (B). Wipe off the grease before tighten the nut at the ball joint.
8. Torque the new castle nut (C) to the lower torque specification, then tighten it only far enough to align the slot with the ball joint pin hole. Do not
align the nut by loosening it.
NOTE: Make sure the ball joint boot is not damaged or cracked.