
S2000 L4-2.2L (2004)
Evaporator Case: Service and Repair
Removal and Installation
Blower/Evaporator Unit Removal and Installation
1. Recover the refrigerant with a recovery/recycling/charging station.
2. Make sure you have the anti-theft code for the radio, then write down the frequencies for the radio's preset buttons.
3. Remove the battery.
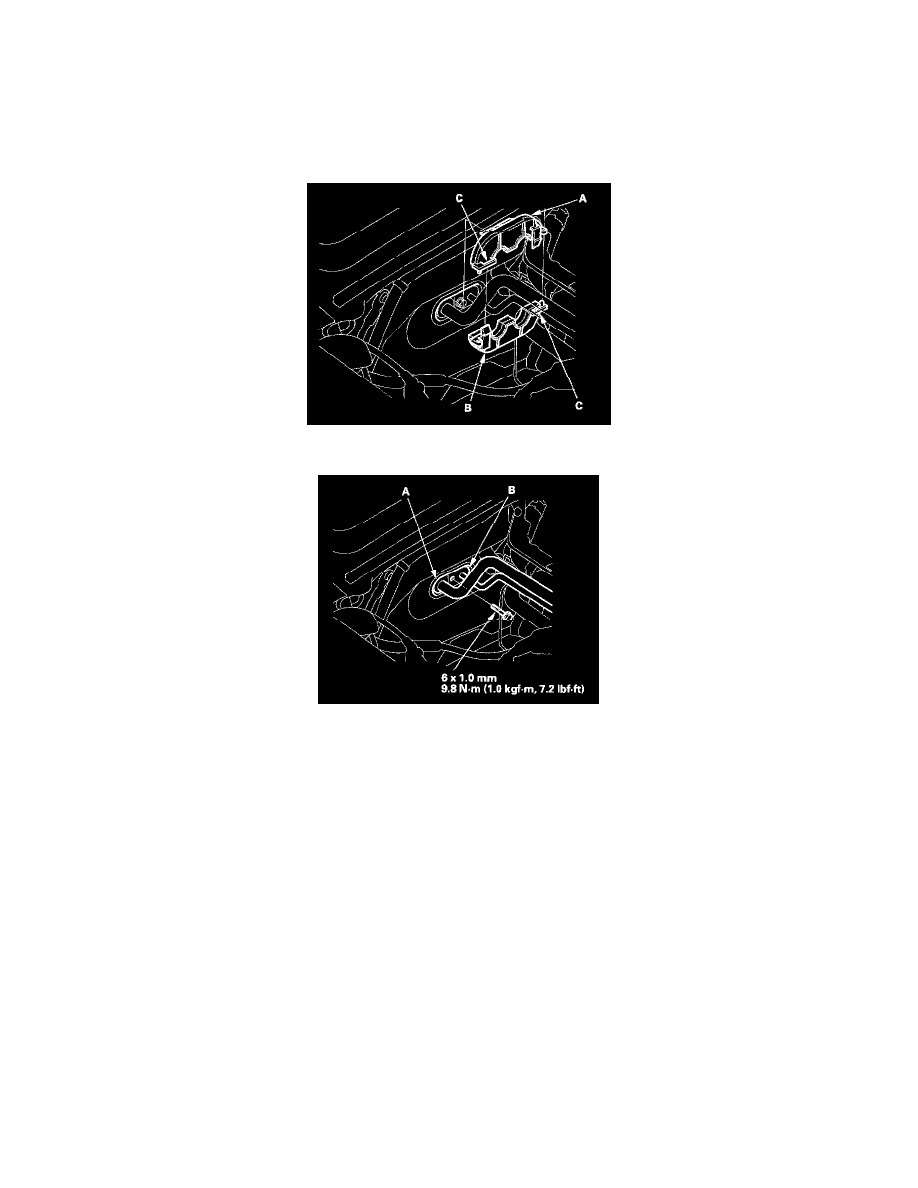
4. Pull out the grommets, then carefully separate the upper grommet (A) from the lower grommet (B) by releasing the locktabs (C).
5. Remove the bolt, then disconnect the suction line (A) and the receiver line (B) from the blower/evaporator unit. Plug or cap the lines immediately
after disconnecting them to avoid moisture and dust contamination.
6. Remove the passenger's dashboard lower cover and the right kick panel.
7. Disconnect the dashboard wire harness connector from the passenger's door wire harness connector, then remove it. Remove the wire harness
connectors and the soft top control unit from the steering hanger beam.