
Santa Fe L4-2.4L (2001)
CAUTION: Always replace the self-locking nut with a new one.
15. Apply semi-drying sealant to the threaded section of the end plug and tighten to the specified torque.
Tightening torque: End plug: 50 - 70 Nm
16. Stake the end plug at two points on its circumference with a punch.
17. install the tab washer and then the tie rod and hammer the tab washer end at two points lightly to the tie rod.
CAUTION:
1. Align the tab washer pawls with the rack grooves.
2. Use a new tab washer.
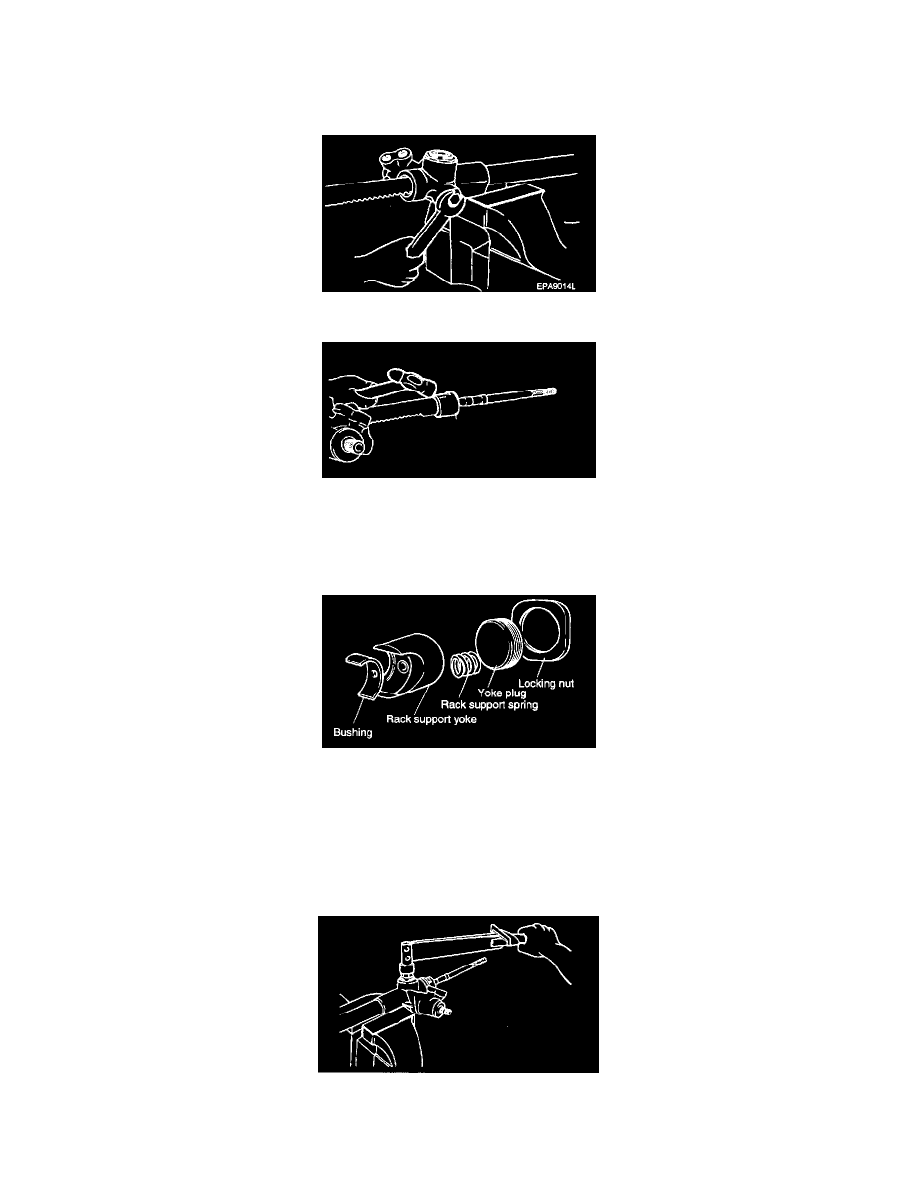
18. Install the bushing, rack support yoke, rack support spring and yoke plug in the order shown. Apply semi-drying sealant to the threaded section of
the yoke plug before installation.
19. With the rack placed at the center position, attach the yoke plug to the rack housing. Tighten the yoke plug within the range of 20 - 25 Nm (200 -
250 kg-cm, 14.5 - 18 ft. lbs.), using the special tool. Loosen the yoke plug for approximately 20° and tighten the locking nut to the standard value.
Tightening torque Locking nut: 50 - 70 Nm (500 - 700 kg-cm, 36 - 51 ft. lbs.)
20. After adjusting, install the yoke plug with a lock nut.
NOTE: When it cannot be adjusted within the specified return angle, check the rack support plug components or replace.
21. Tighten the feed tube to the specified torque and install the mounting rubber with adhesive.
22. Apply the specified grease to the bellows mounting position (fitting groove) of the tie rod.
Recommended grease: Multipurpose grease SAE J310a, NLGI #2 EP