
Sonata V6-3.0L (1991)
3.
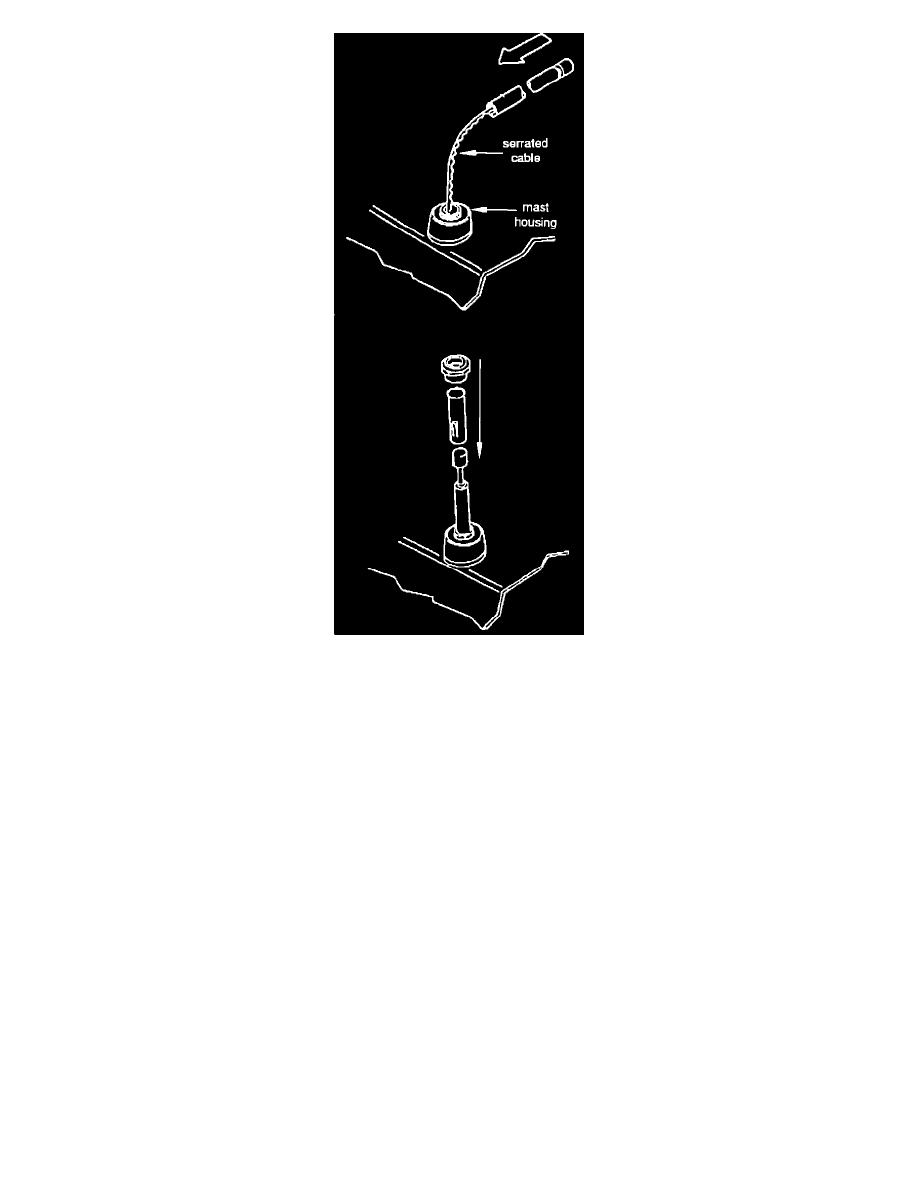
Insert the serrated cable from the new antenna into the mast housing until resistance is felt (approximately 12").
NOTE:
The serrated side of the cable must face the rear of the car.
4.
Manually collapse the replacement mast, and then turn off the radio. The serrated cable should start to retract (the cable retracts rather fast). As the
cable retracts, the base of the mast must be lined up with the mast housing (hole).
NOTE:
If the serrated cable does not retract into the housing, turn on the radio, rotate the cable slightly, clockwise or counterclockwise, and repeat step 4.
5.
Insert the antenna mast and contact spring into the housing.
6.
Reinstall the antenna mast mounting nut and tighten.
7.
Cycle the antenna several times to make sure the mast operates properly.
CLEANING PROCEDURES:
Periodic cleaning may be necessary to assure proper radio and power antenna operation. Do no lubricate the antenna mast. Lubrication will cause
damage to antenna operation from the collection of dust.
1.
Actuate antenna to full mast extention.
2.
Dampen clean cloth with mineral spirits.
3.
Wipe cloth over the antenna mast sections removing any dirt or grime residue.
4.
Actuate antenna through one complete cycle (retract and extend).