
Sonata V6-3.0L (1991)
Axle Shaft Assembly: Service and Repair
Removal
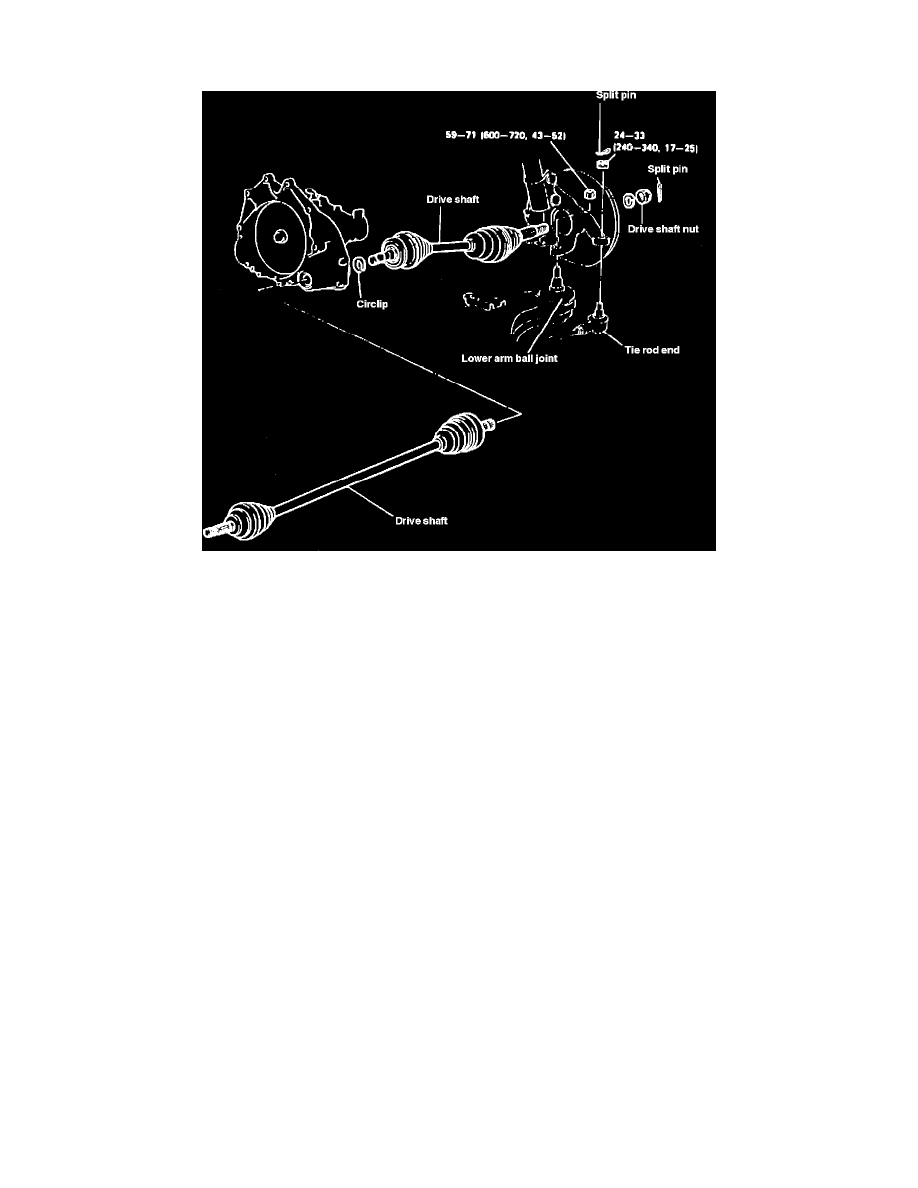
Fig. 2 Front Driveshaft Exploded View
1.
Using axle shaft puller 09526-11001 or equivalent, disconnect tie rod end from knuckle.
2.
Disconnect lower control arm ball joint from knuckle using tie rod end puller 09568-31000 or equivalent, Fig. 2.
3.
Insert suitable pry bar between transmission case and driveshaft, then pry driveshaft for transmission. Do not pull on driveshaft or insert pry bar
deep enough to damage oil seal.
4.
Using axle shaft puller 09526-11001 or equivalent, remove driveshaft from hub.
Disassembly
1.
Remove snap ring, then the double offset joint (DOJ) inner race, cage and balls as an assembly and clean this assembly. If balls drop out of cage
press them back in inner race.
2.
Wipe grease off spline portion.
3.
Remove DOJ boot and BJ boot. If boots can be reused, wrap vinyl tape around driveshaft spline so boots are not damaged as they are removed. Do
not disassemble BJ.
4.
Inspect all components and replace as necessary.
Assembly
1.
Wrap vinyl tape around driveshaft spline, then install BJ and DOJ boots.
2.
Fill inside of BJ and BJ boot with suitable grease.
3.
Using suitable grease lubricate DOJ outer race and fit driveshaft into DOJ outer race, then apply more grease to DOJ outer race.
4.
When installing DOJ boot bands ensure distance between center of band is 2.99 to 3.23 inches for lefthand shaft and 2.89 to 3.13 inches for
righthand shaft.
Installation
Reverse procedure to install. Tighten all nuts and bolts to specifications, Fig. 2.